UV Replacement/Calibration
Every so often I get a call about a machine with “Wet” or “Sticky” looking or feeling parts. This can be caused by a bad or improperly calibrated UV lamp. The UV lamp cures the resin that gets jetted by the heads. If the intensity of the UV light is low, it causes the material to under cure. This will cause the part quality issues that you see.
The first thing is to determine whether you need to replace or recalibrate your UV lamp. There are two reasons why you would need to replace your UV Lamp.
- You ran the UV calibration and the software recommends a new UV lamp.
- Your UV lamp bulb is physically broken.
If the UV bulb is not physically broken (you will be able to see damage to the bulb inside the UV assembly), run the UV calibration wizard. If the UV bulb is physically broken, follow the instructions to replace it, and then go on the calibration steps.
To replace a UV assembly on desktop printers:
- Shutdown the printer using the Start > Shutdown windows option.
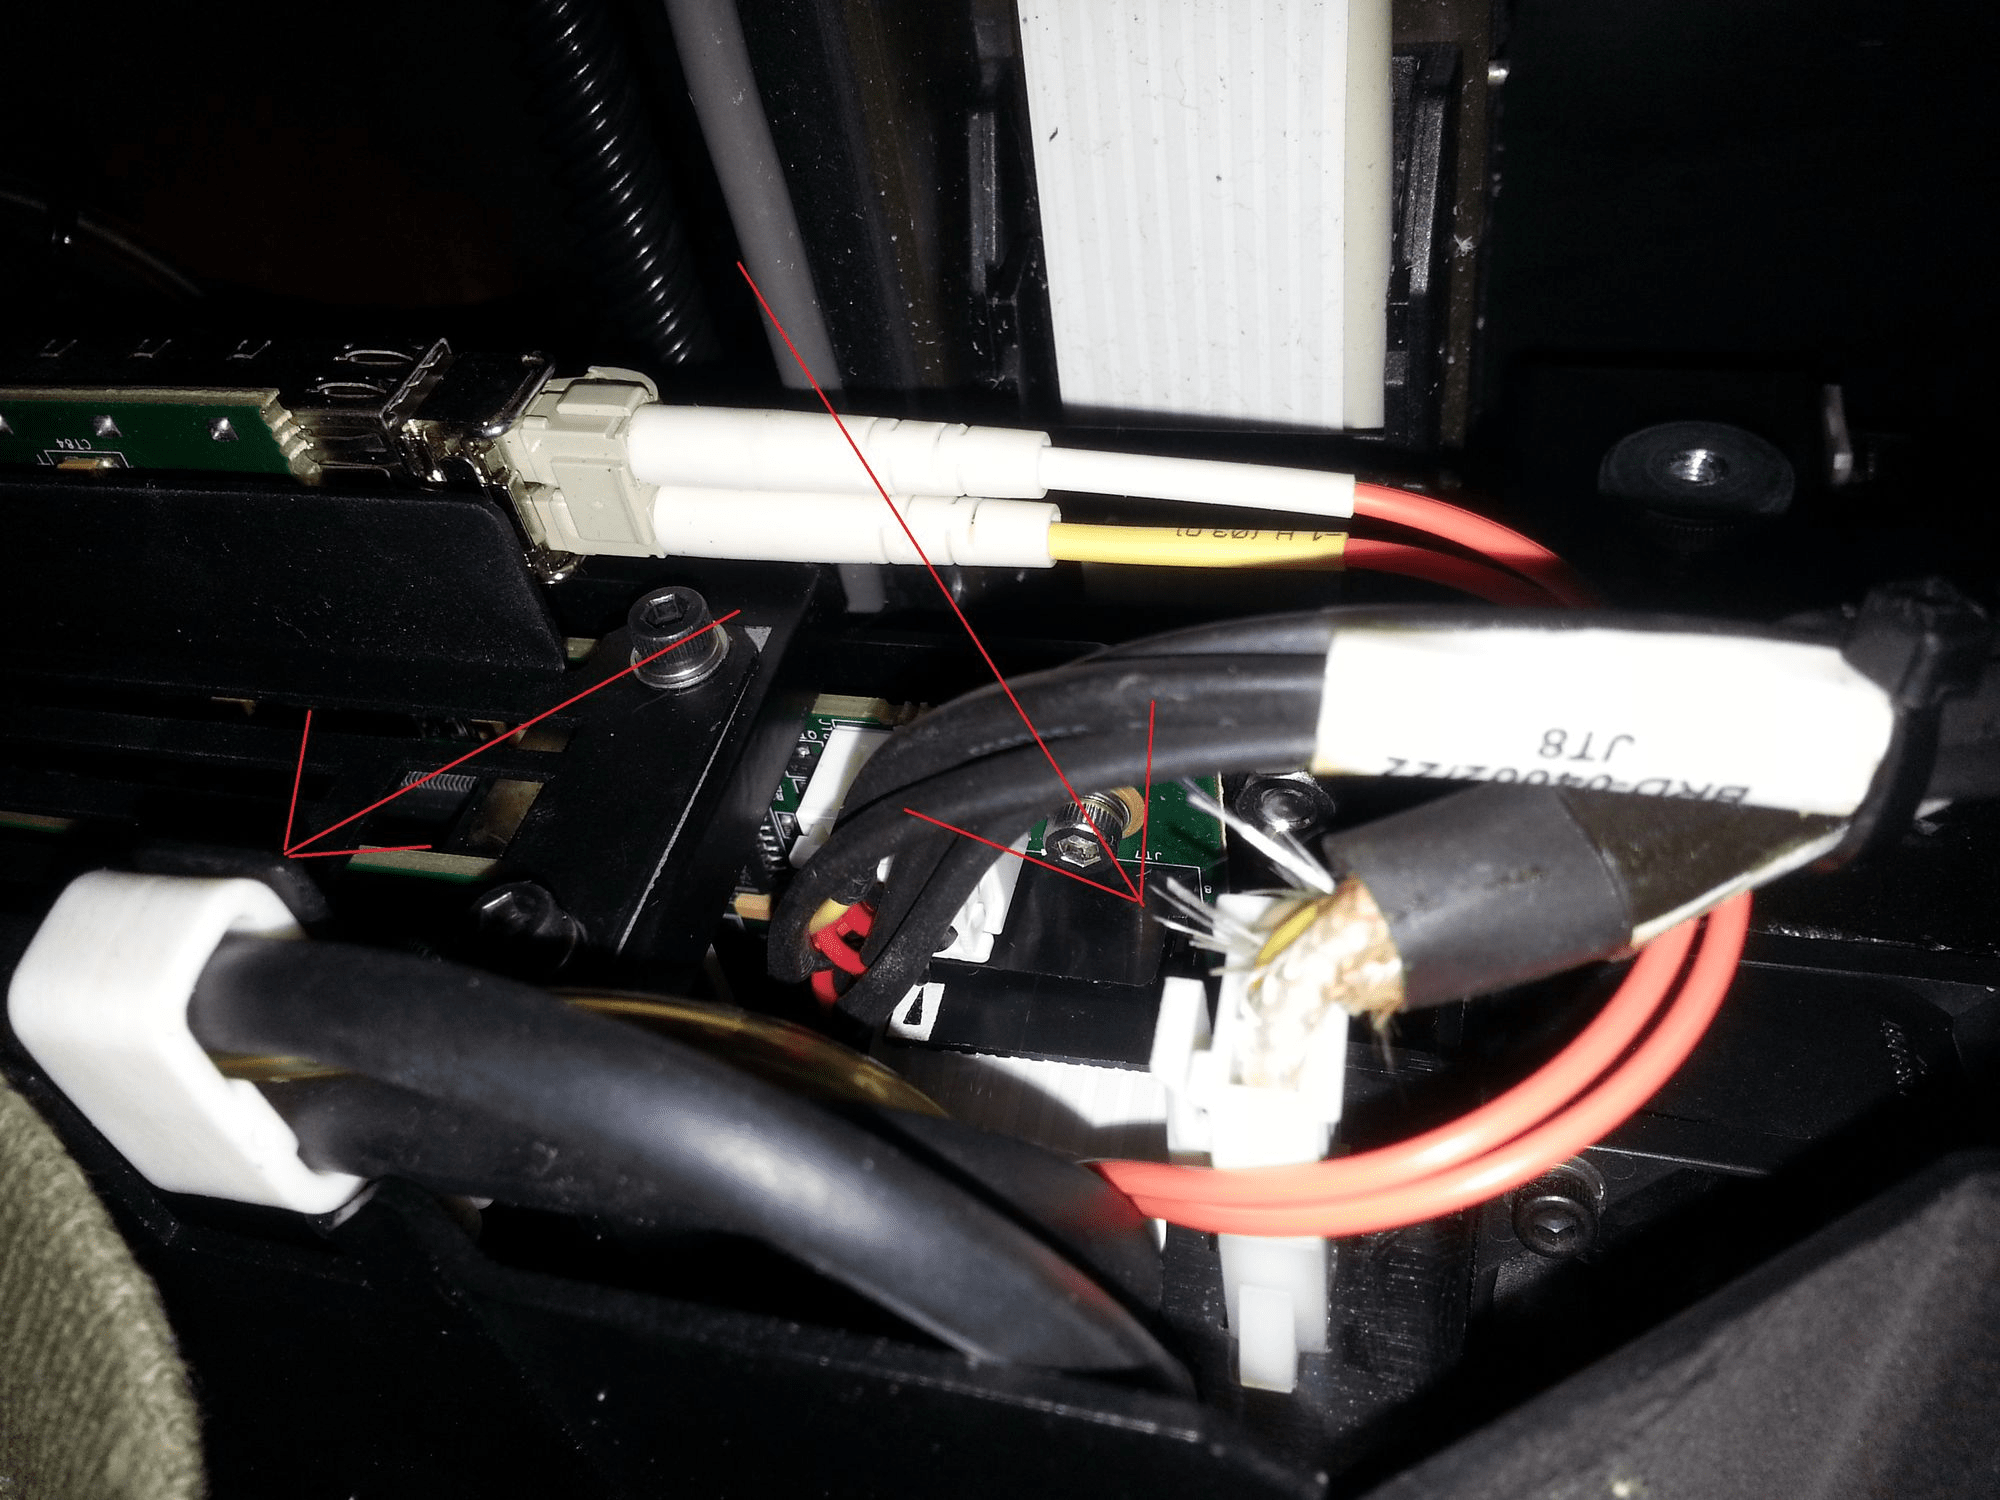
- Open the cover to the printer. Find the 2 cables that go from the UV assembly to the control board and unplug them.
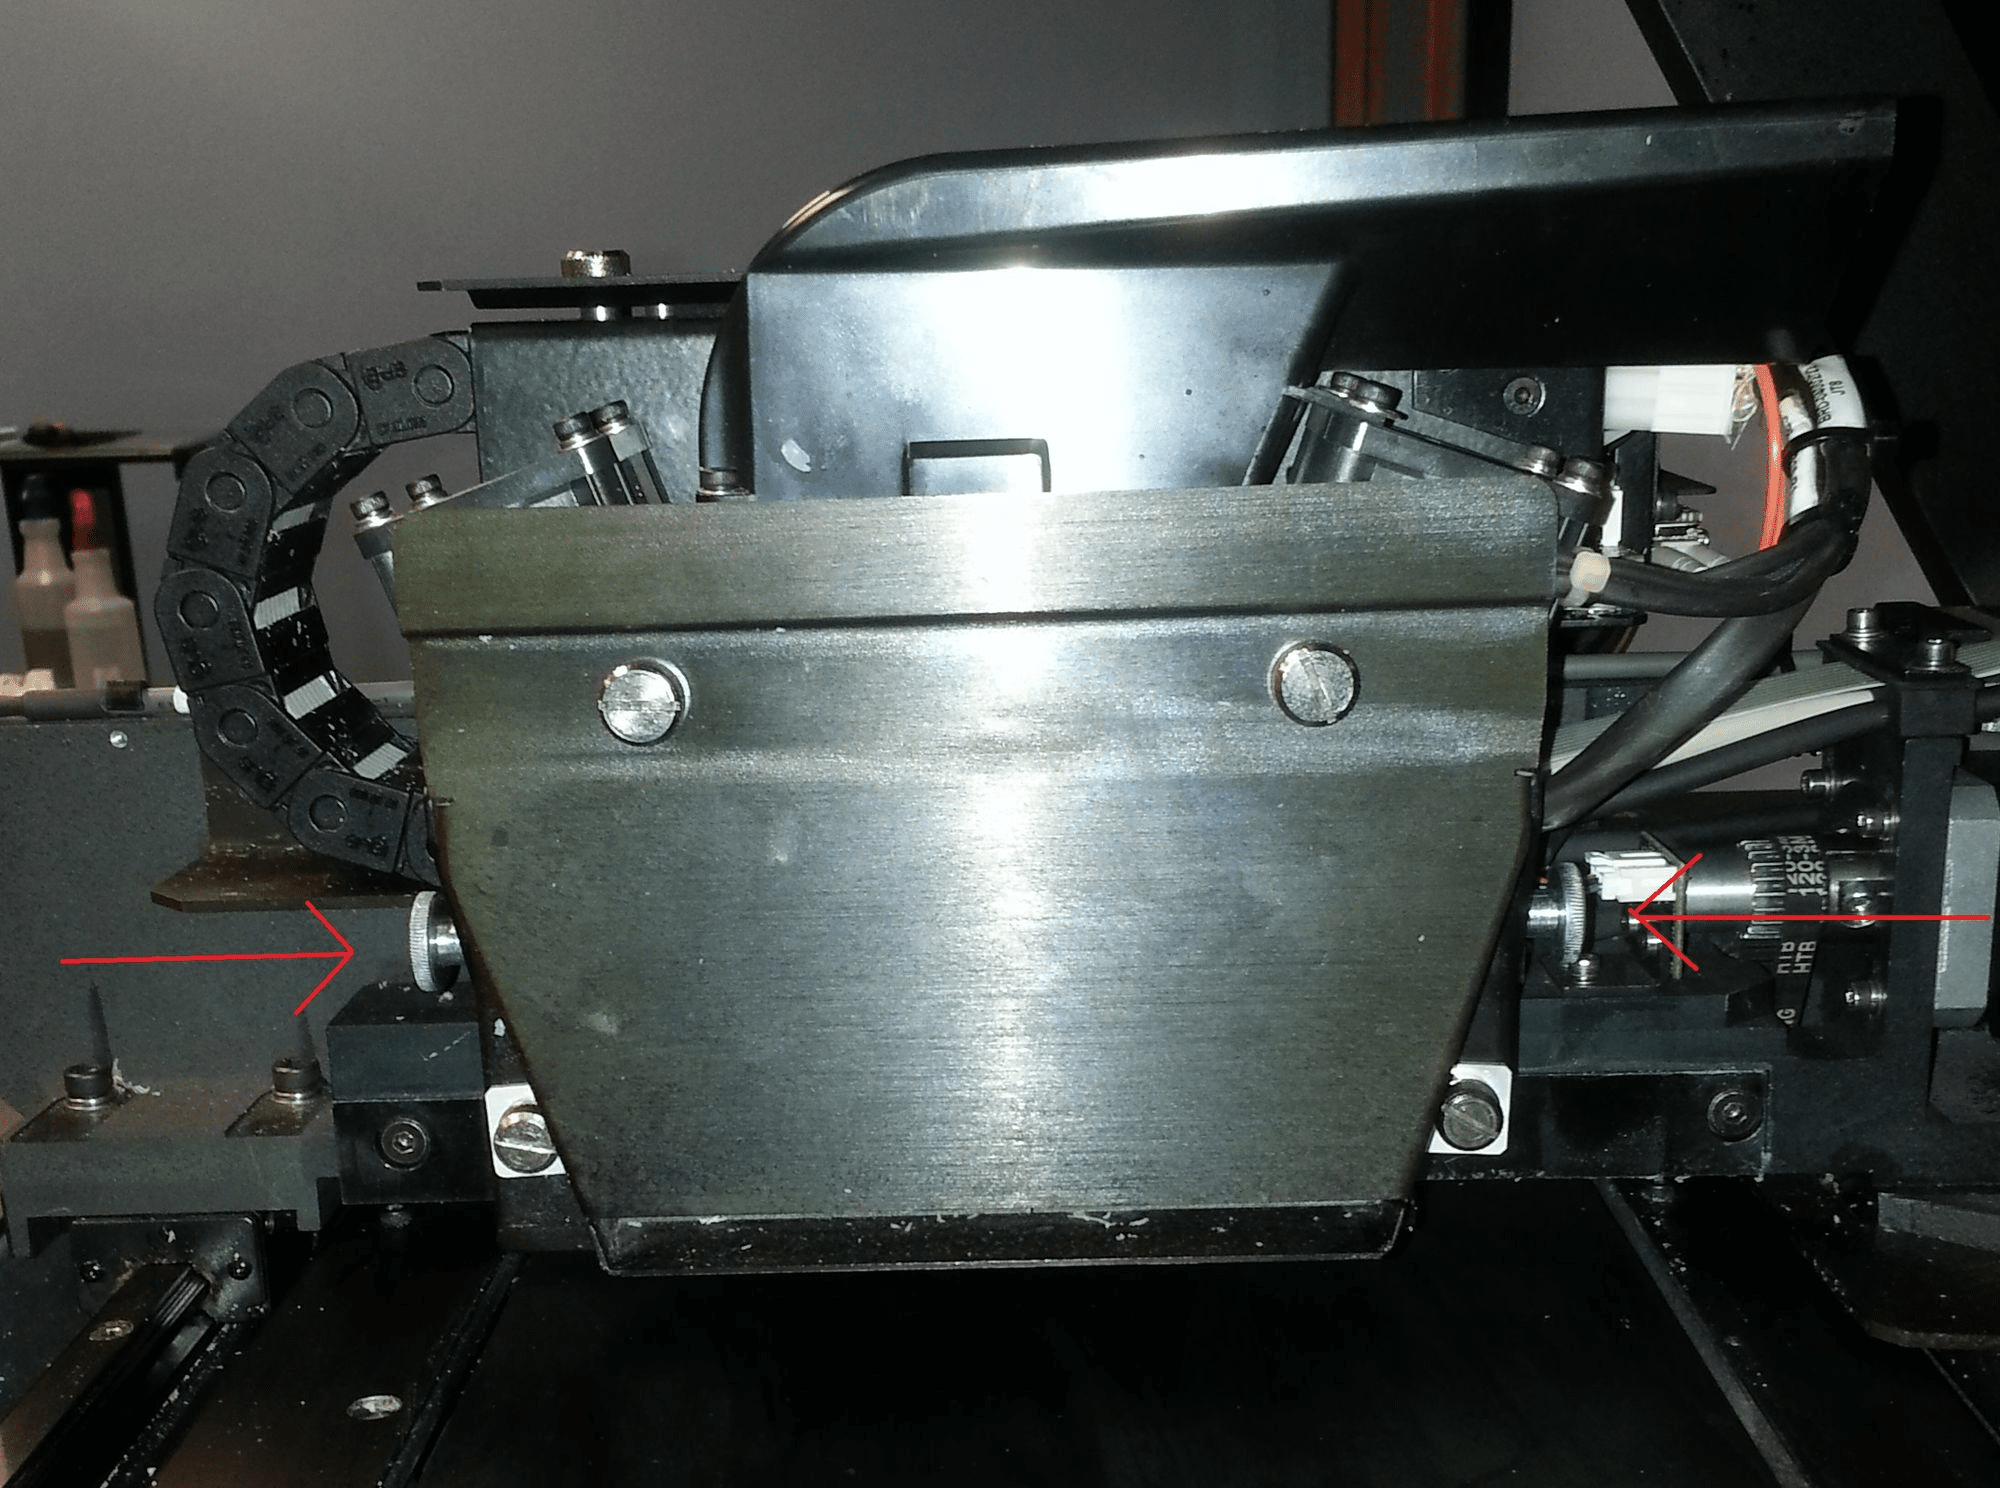
3. On the right hand side of the block, you will see the old UV assembly. Find the 2 thumb screws and loosen them. Lift the UV assembly up and off of the block.
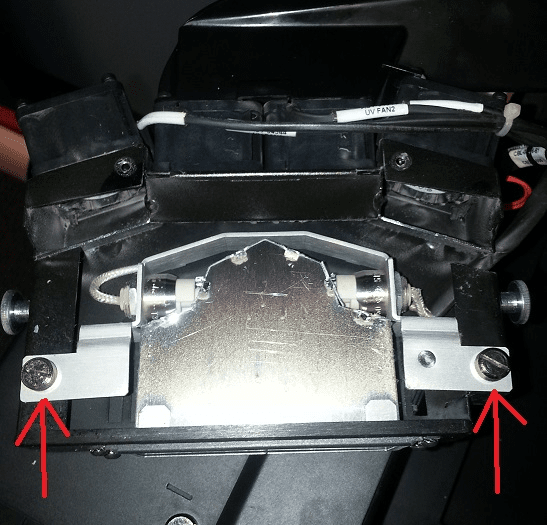
4. Next, remove the thumb screws on the front of the UV Assembly. (You may need a flathead screwdriver for these)
5. There are two more thumb screws under the metal plate. Remove those and pull out the UV lamp. Cut the wire tie and remove the cable.
6. Put the new UV lamp in its place. Reassemble UV assembly.
7. Place the UV assembly on the block, tighten the screws and attach the cables.
8. Follow the procedure for calibrating the UV lamp.
To calibrate a UV lamp on desktop printers:
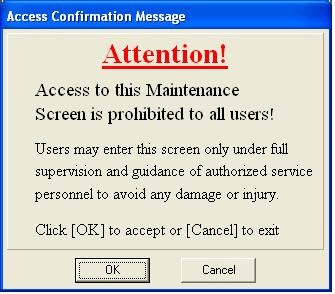
- Put the machine in maintenance mode. Place the mouse curser in the bottom right hand corner of the screen and press CTRL + ALT + M. A window will pop up. Click ok.
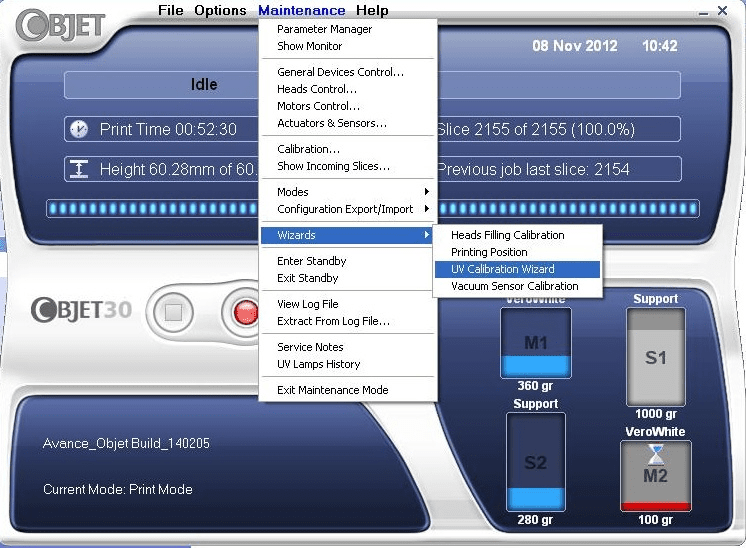
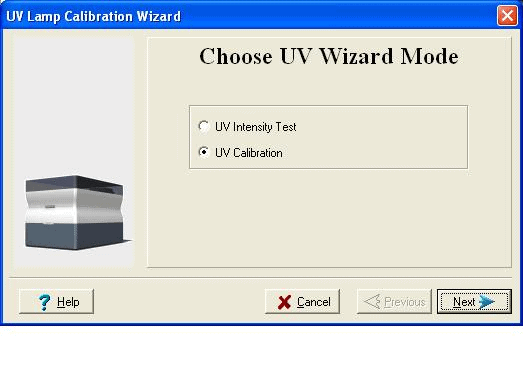
2. You should now see a “Maintenance” option on the top of the screen. Click “Maintenance” > “Wizards” > “UV Calibration Wizard”
3. The wizard will guide you through the process. Click next. Make sure that UV Calibration is selected, not intensity test.
4. Clean the tray and close the cover.
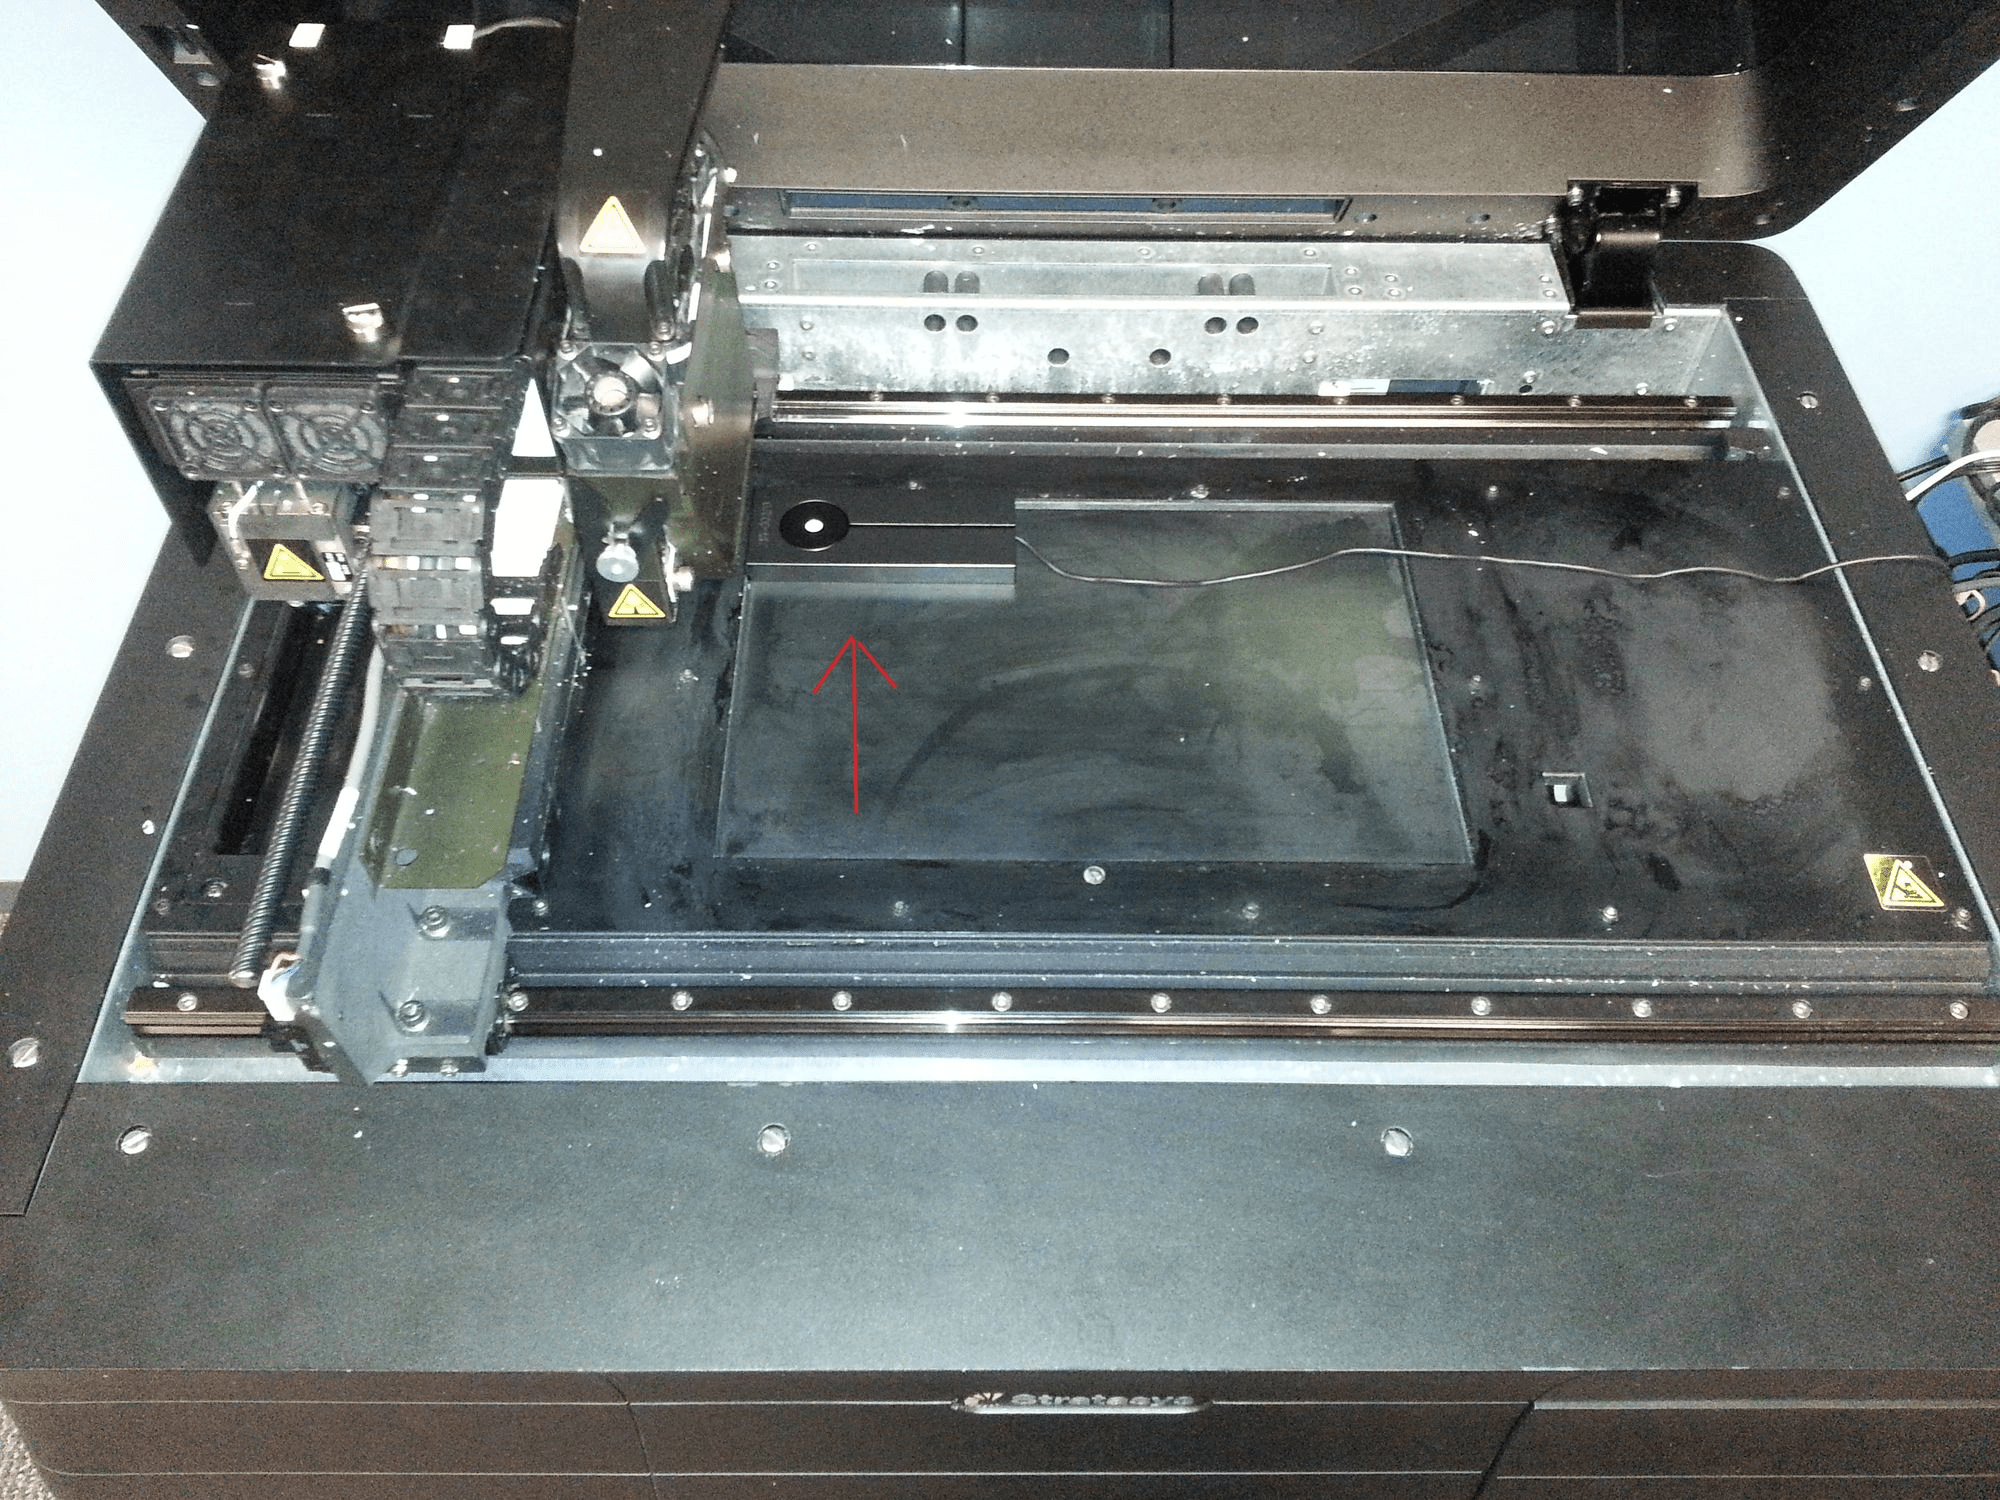
5. Wait for the printer to finish moving the axis. Place the UV sensor on the back left corner of the tray.
6. Close the lid. Turn the UV meter on. Make sure that the switches are both in the up position. Click next and wait for the UV lamp to warm up.
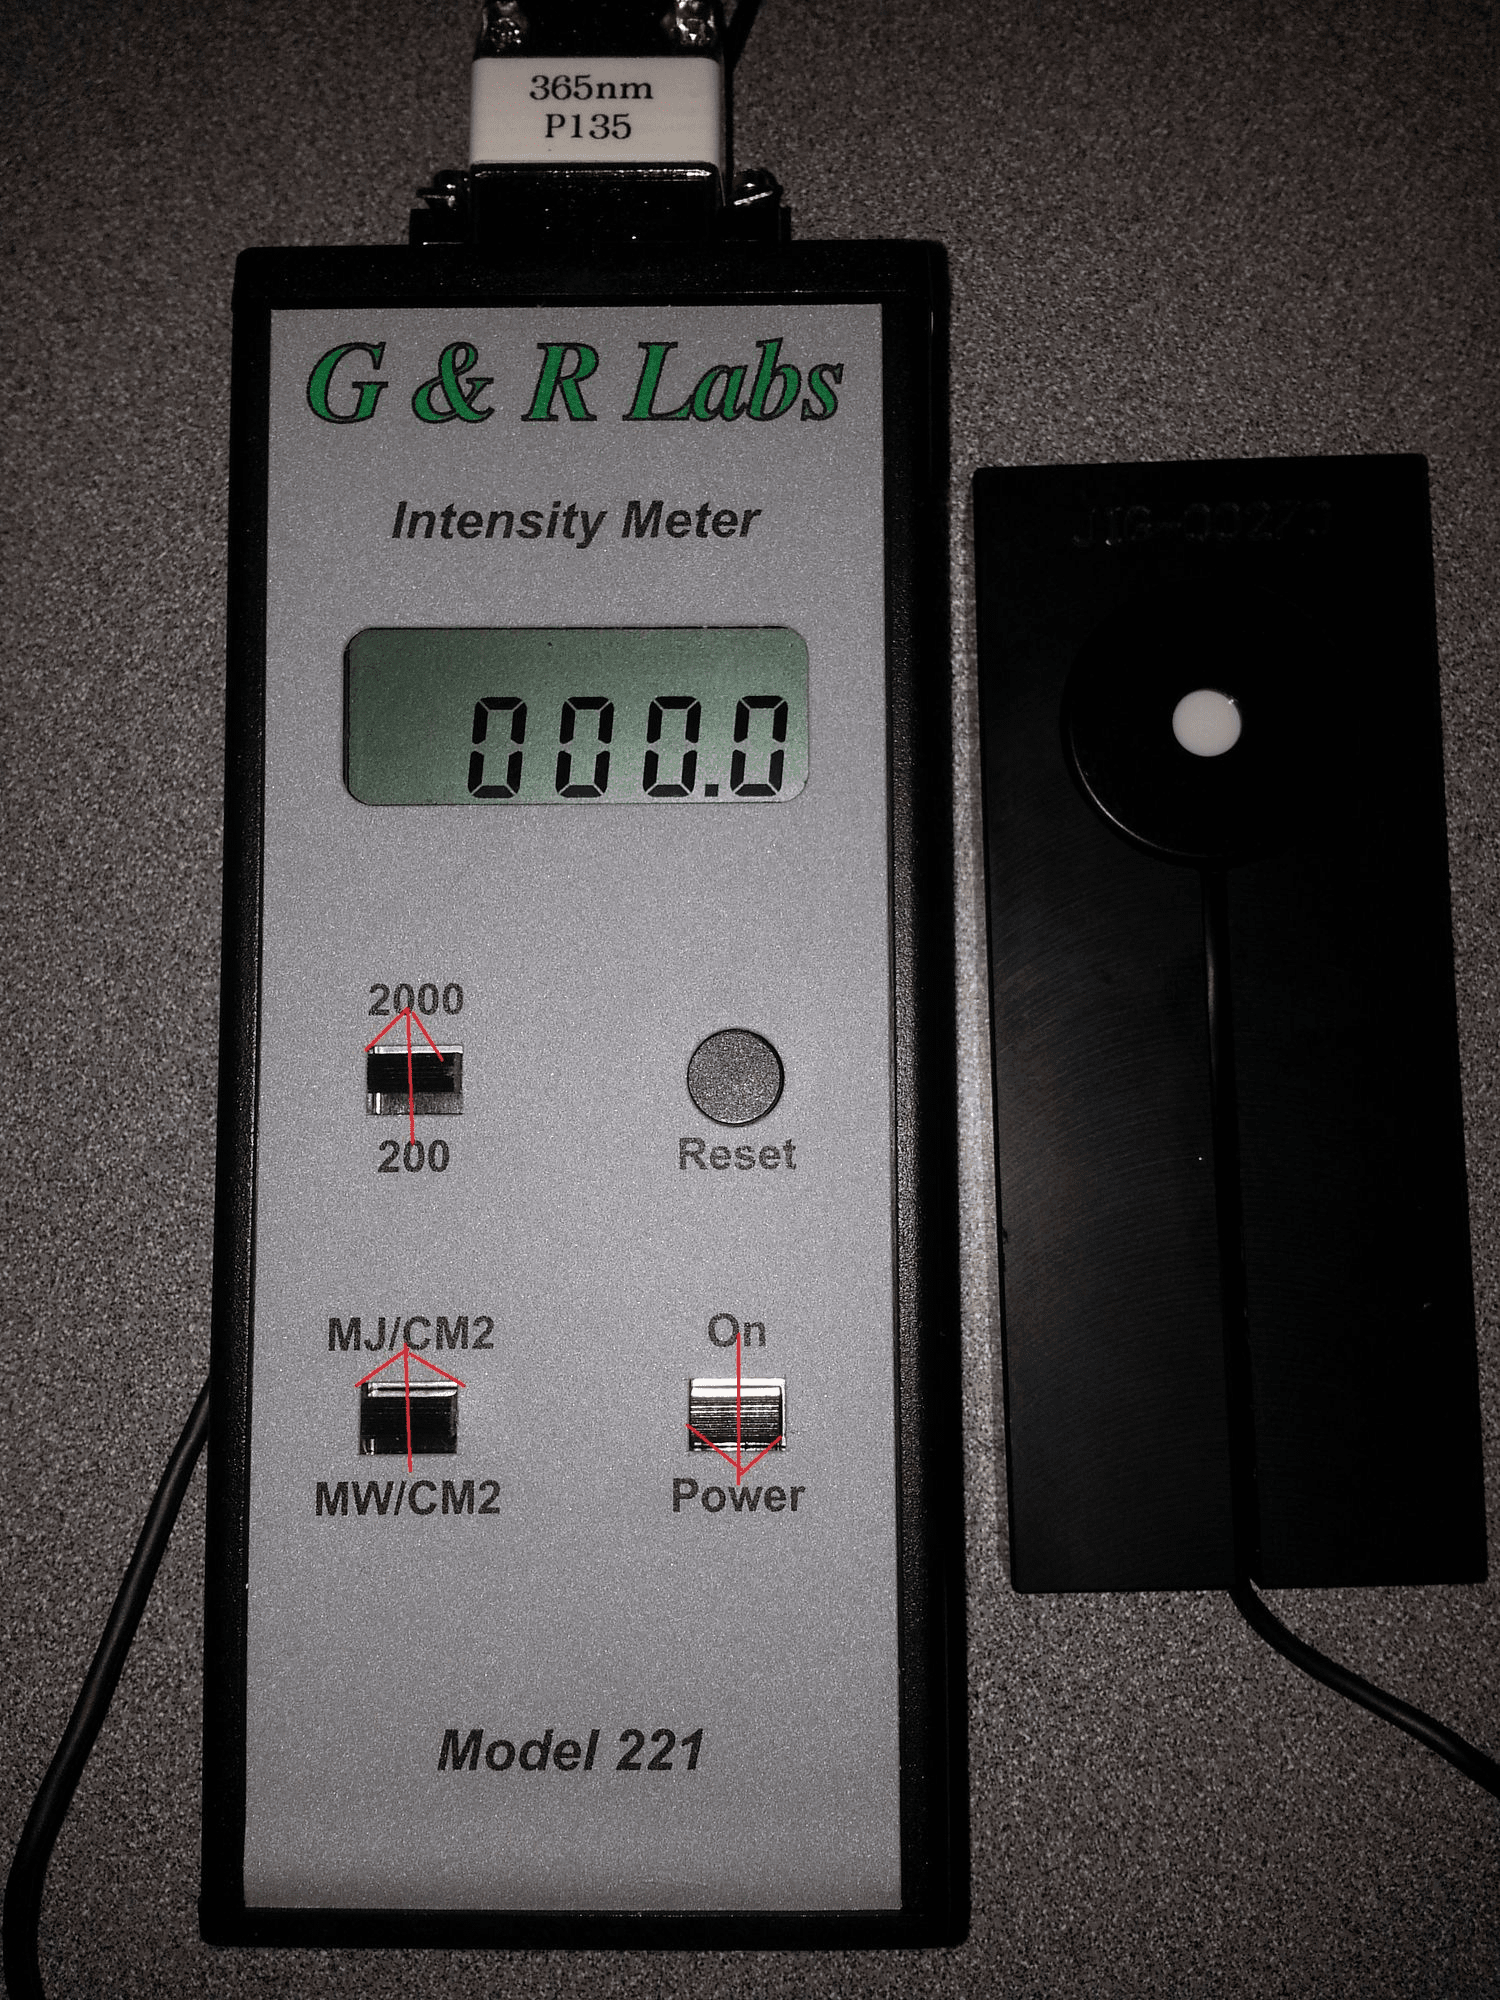
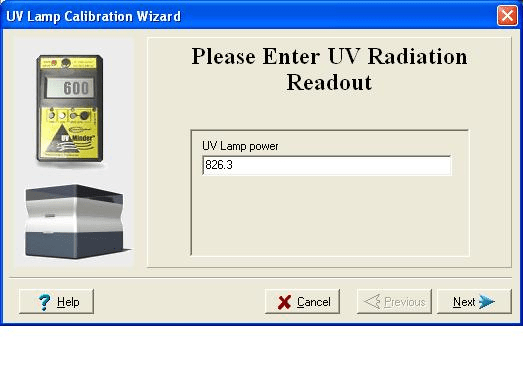
7. Wait for the wizard to prompt you for a UV lamp power reading, and then enter the number from the UV meter. Reset the meter, and then click next. The wizard may have you reset the meter and run through the power reading again if an adjustment needs to be made. If it does, enter the new number from the UV meter.
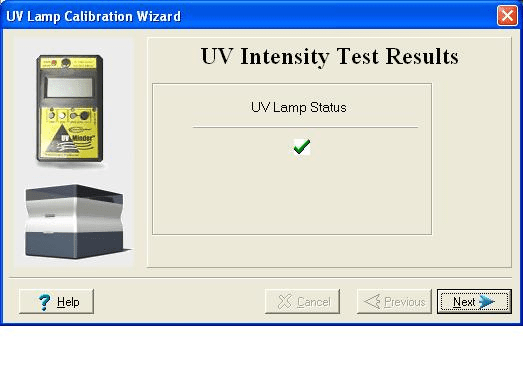
8. If the meter calibration completed successfully, you will see a screen with a green check mark. If your UV meter cannot be recalibrated to the strength needed, there will be a red x and you will have to replace the assembly.
Daniel Lindsay | Field Service Engineer
Computer Aided Technology, Inc.

 Blog
Blog