Using PBR Materials in SOLIDWORKS Visualize
Using PBR Materials in SOLIDWORKS Visualize
PBR or Physically Based Rendering materials are a set of shading models that attempt to create a higher level of realism and rendering quality and provide a standard for materials across multiple rendering programs.
Tech Tip: It is possible to create your own PBR Material by going to Add > New Appearance and choosing PBR Material as the Appearance Type. However, it is highly recommended to use one of the many available PBR Materials found in online libraries.
There are two main workflows when using PBR materials: Metallic / Roughness and Specular / Glossiness
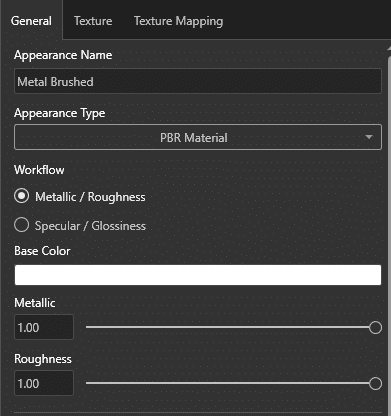
Metallic / Roughness
Choose this workflow whenever working with Metallic based materials.
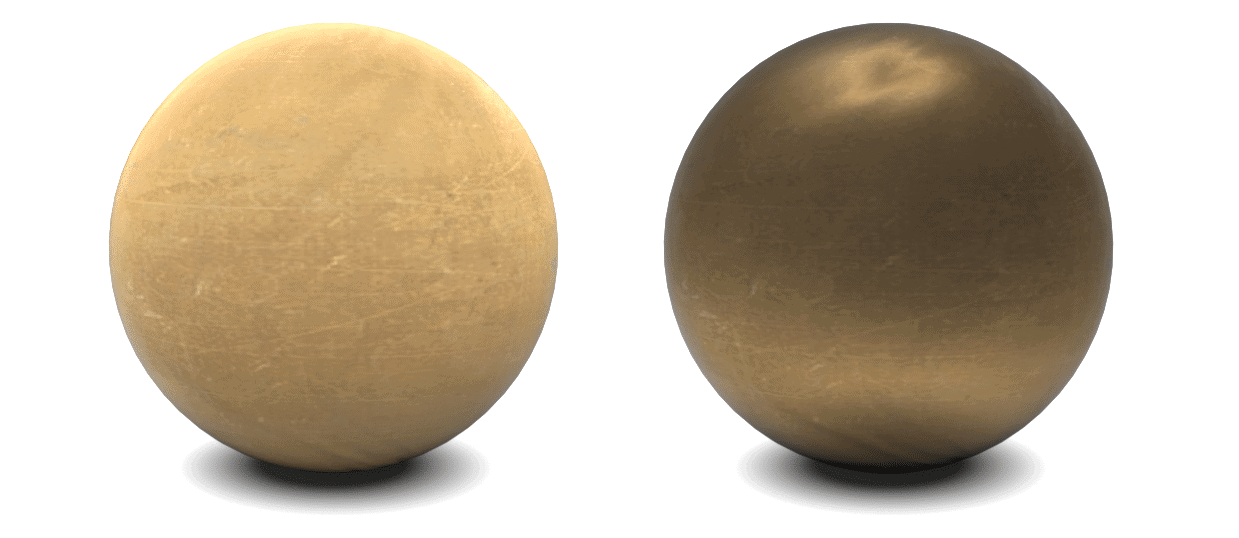
Metallic
The Metallic input controls how “metal-like” your surface will be. Non-metals will have a value of zero (left) and metals will have a Metallic value of one (right).
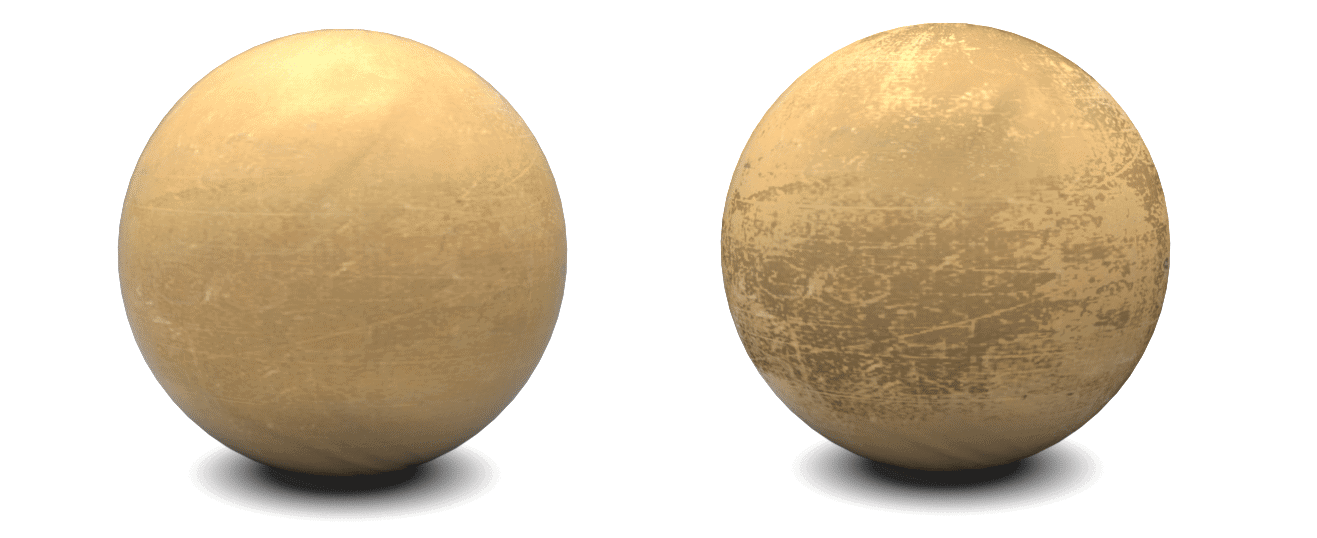
Roughness
Roughness controls how rough or smooth a surface is. Rough surfaces scatter reflected light in more directions than smoother materials. Smooth surfaces will have a value of zero (left) and rough surfaces will have a value of one (right). You will generally see the most interesting results near 0.5.
The other workflow is Specular / Glossiness.
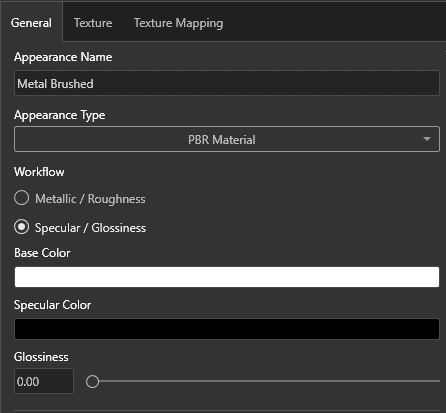
Specular / Glossiness
Choose this workflow whenever dealing with non-metallic materials.
Specular Color
The Specular color is a raw color with no lighting information. This is the color that will appear as micro occlusions or small-scale shadowing represented as creeping through the Base Color.
Glossiness
This is an inverse of the Roughness scale. One is smooth while zero is rough.
Tech Tip
When it comes to Textures – most PBR Materials that you can get from online libraries provide the texture maps for you. These can be altered but are meant to come as-is. You may have to manually map the texture maps by selecting each texture box and map it to the appropriate texture file.
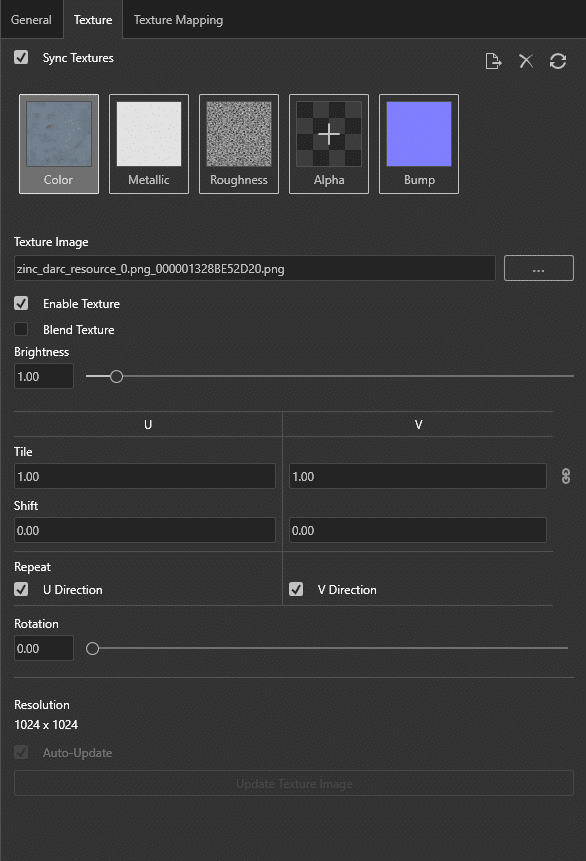
Additional settings for PBR materials:
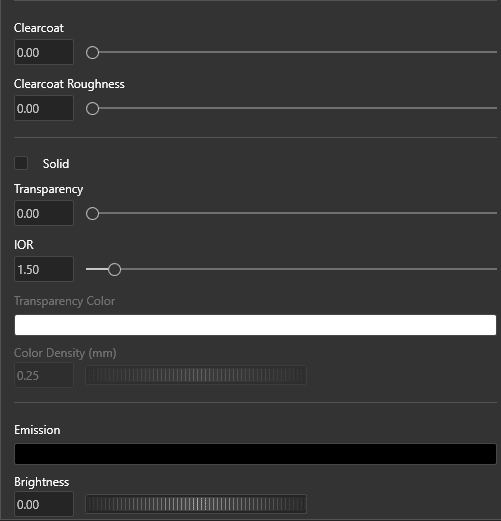
Clearcoat
Gives the paint a shiny, wet look typical of a clearcoat on top of a metallic paint.
Clearcoat Roughness
Determines how much the clearcoat diffuses specular highlights. A value of zero causes no diffusion, which makes the clearcoat appear smooth and shiny.
Solid
Switches between two-sided verses and one-sided properties.
Transparency
Affects the transparency of the Texture Maps to see the Base Color or Specular Color.
Tech Tip
You may have to enable Blend Texture on the Color or Specular Maps to see this slider take effect. Zero is opaque, one is transparent.
IOR (Index of Refraction)
Controls how appearances with transparency bend light passing through them. It indirectly affects reflectivity.
Transparency Color
Sets the tint acquired by light passing through partially transparent appearances with the Solid option enabled.
Color Density
Determines the density of the color on the simulated surface. Color Density affects the color saturation with the Solid option enabled. The denser the surface, the deeper the color.
Emission
Causes the appearance to emit light into the scene.
Brightness
Sets the brightness of the light.
Jordan Puentes
Application Engineer
Computer Aided Technology, LLC.

 Blog
Blog