Using Mate Controller, SolidWorks Configurations, and Composer to Create Easy Animations for Your Technical Publications
Using the SolidWorks Mate Controller, and the new functionality in Composer 2021, I am able to create quick and easy animations for my downstream technical publications. As I assemble my design, I continue to work with the mates I know and understand. I also use mates like Distance, Angle, LimitDistance, LimitAngle, Pathmate, Slot, and Width to help control the locations of my movable components.
These same mates mentioned above are also used by SolidWorks’ Mate Controller. The Mate Controller tool lets you manipulate specific values of these mates to help control the degrees of freedom and ultimately the ‘position’ of your design. You can then save and recall saved positions and mate values, and then create animations based on those saved positions.
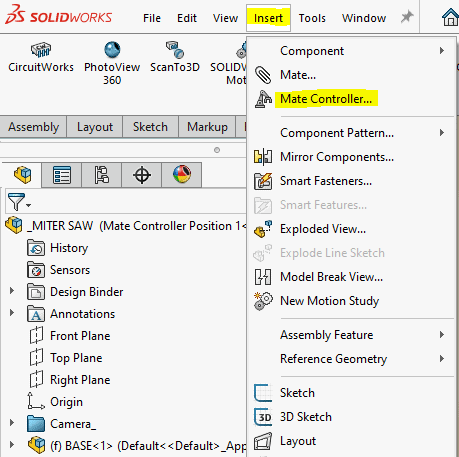
The steps in using the Mate Controller are very simple. After starting the Mate Controller tool from the Insert pull down menu, the first step is capturing all the supported mates by hitting the ‘Collect All Supported Mates’ button, as seen in the picture below.
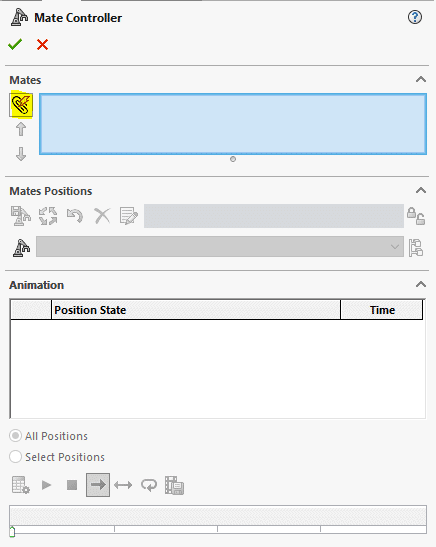
With your list of controllable mates, you can now create additional ‘Postions’. Simply select the ‘Add Position’ button, give the position a name, and then adjust the distant value(s) of the mates that correspond to your new positions. I have included a couple of examples in the images below.
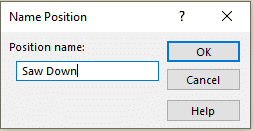
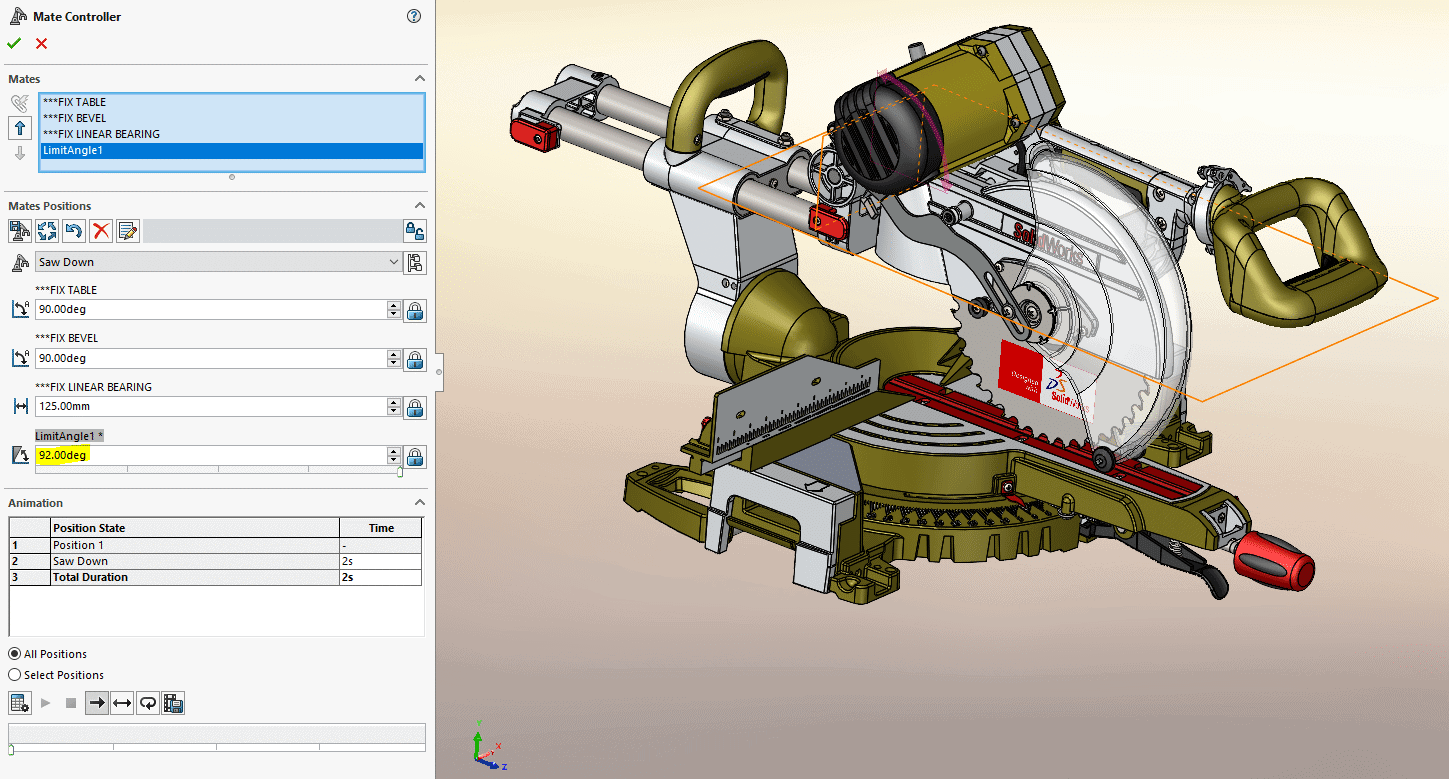
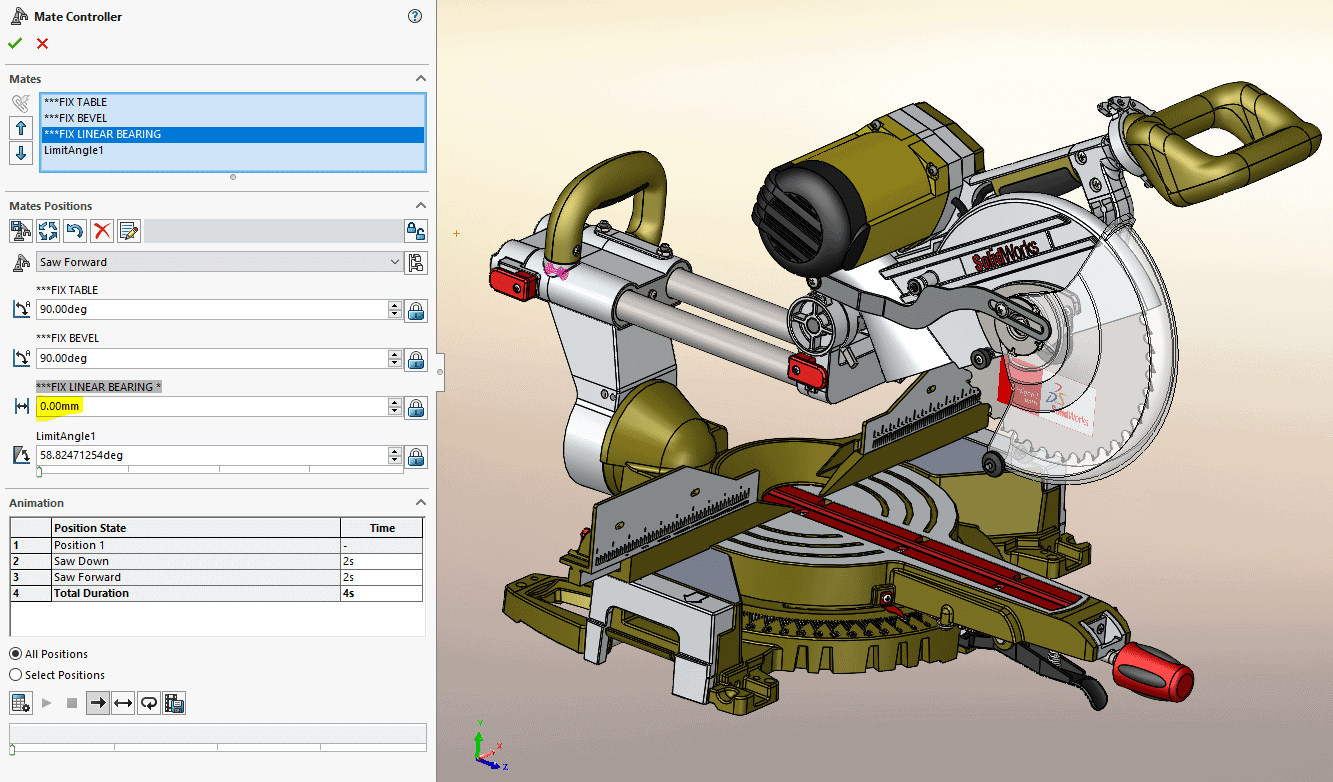
Once you have all your new positions, you can then create simple animations through the save as button at the bottom of the Mate Controller property manager. This will create an AVI, MP4, or other video types that can be shared with end users.
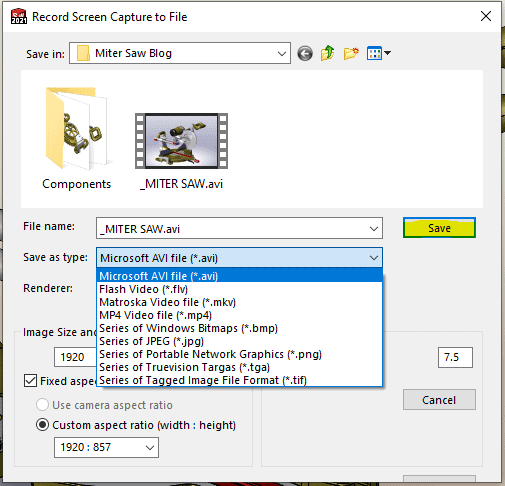
Now, as this may be enough for some, others might find it even better to bring this information into SolidWorks Composer, where you can do even more with your animations, like create animated section and detail views, or add text and notes to the animation itself.
In order for Composer to take advantage of these new positions created in SolidWorks, you just simply need to create Configurations of these positions. To do this, simply select a position from the pull-down menu and then hit the ‘Add Configuration’ button, as seen in the picture below.
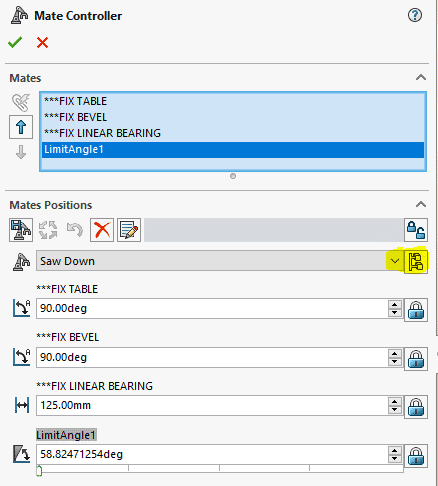
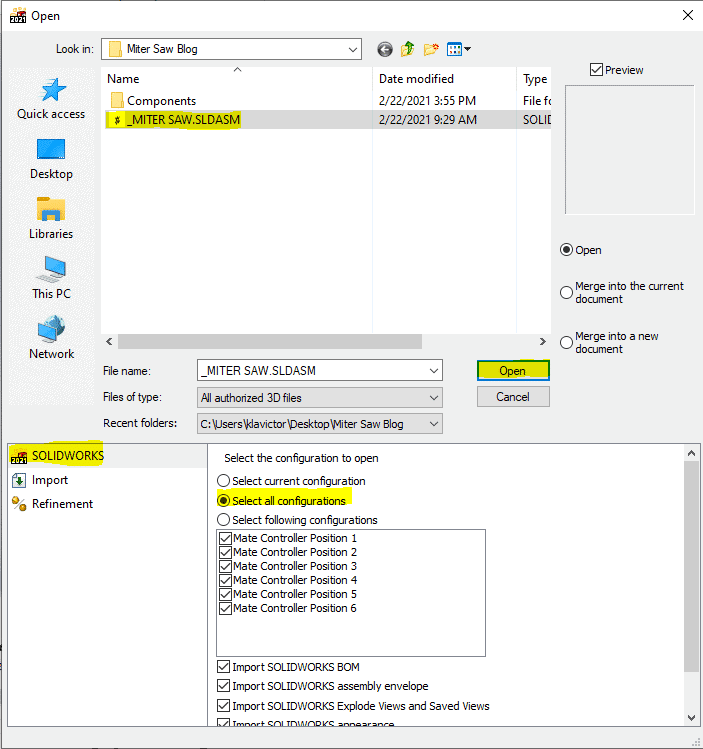
Once you have done this for each position, you are ready to import into SolidWorks Composer. From the Open dialogue window of Composer, select the SolidWorks assembly, the SolidWorks import option on the left, the ‘Select All Configurations’ option, and then the ‘Open’ button. At this point, we don’t have to reinvent the wheel, as we can now take advantage of all those wonderful SolidWorks configurations (Note: As you can see in the image below, in my first attempt I used generic configuration names like Mate Controller Position 1, 2, etc).
Once we are in Composer, we are ready to create our static images and animations for all of our technical publication needs. Now one simple method for starting/creating animations is to drag and drop views from the view tab onto the Composer Timeline. To create these views, simply select the appropriate configuration from the Configuration tab and then select the ‘Create View’ button from the Views tab, as seen in the image below. You will then have one view for each configuration.
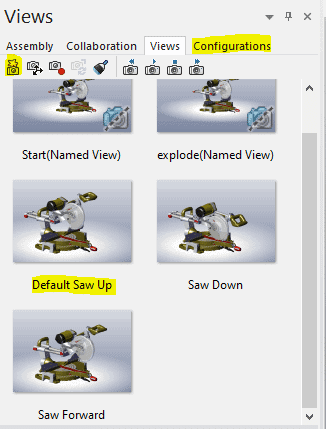
The next step is dragging your views into the Composer timeline.
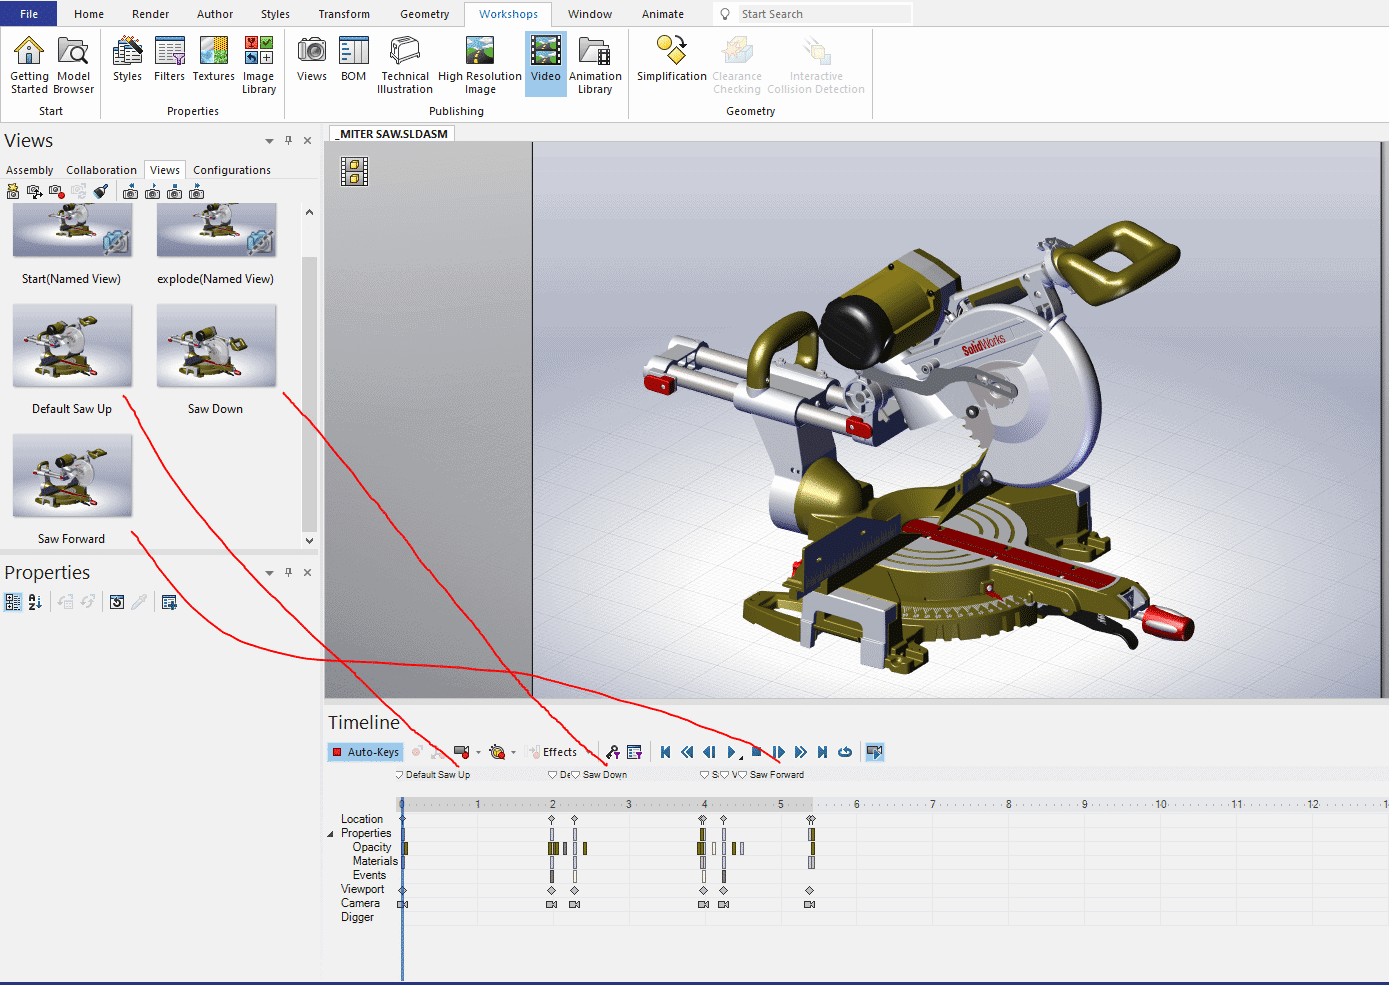
Now since each configuration contains its own unique set of ‘Actors’, there is still a bit more work to be done to get the animation just right. You will still need to create additional view keys and adjust the opacity settings of the Actors. As this is not as straight forward, I’ll leave that topic for another day. However, if this is something of interest to you, the best way to learn about the full breadth of Composer tools is through CATI’s dedicated SolidWorks Composer training class. Just reach out to your local Business Development Manager or myself for further details.
Ken LaVictor
Sr. Application Engineer
Computer Aided Technology, Inc.

 Blog
Blog