SOLIDWORKS Trim Surface
SOLIDWORKS Trim Surface is a great tool to use for trimming intersecting surfaces. Trim surface allows you to cut back a surface using a different surface, a plane, or a sketch when using this tool. Let’s go through the basics of the trimming surfaces in SOLIDWORKS and how the options impact your final results.
Types of Trim Types
There are 2 trimming types.
- Standard: Uses one plane, surface, sketch, curves and more as the trimming tool.
- Mutual: Uses multiple surfaces to trim one another.

In the Selections area, you have a few options.
- Surfaces Trim Tool: These are the surfaces, planes, curves, or even sketch entities, which can all be selected from the graphics area or from the Surface Bodies folder.
- Keep selections: Retains the surfaces listed in the Pieces to Keep.
- Removed selections: Discard the surfaces listed under Pieces to Remove
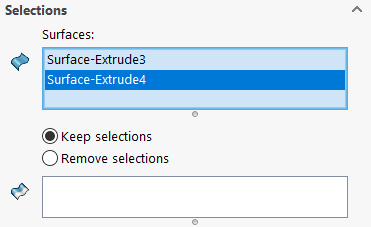
There are some preview options that are available.

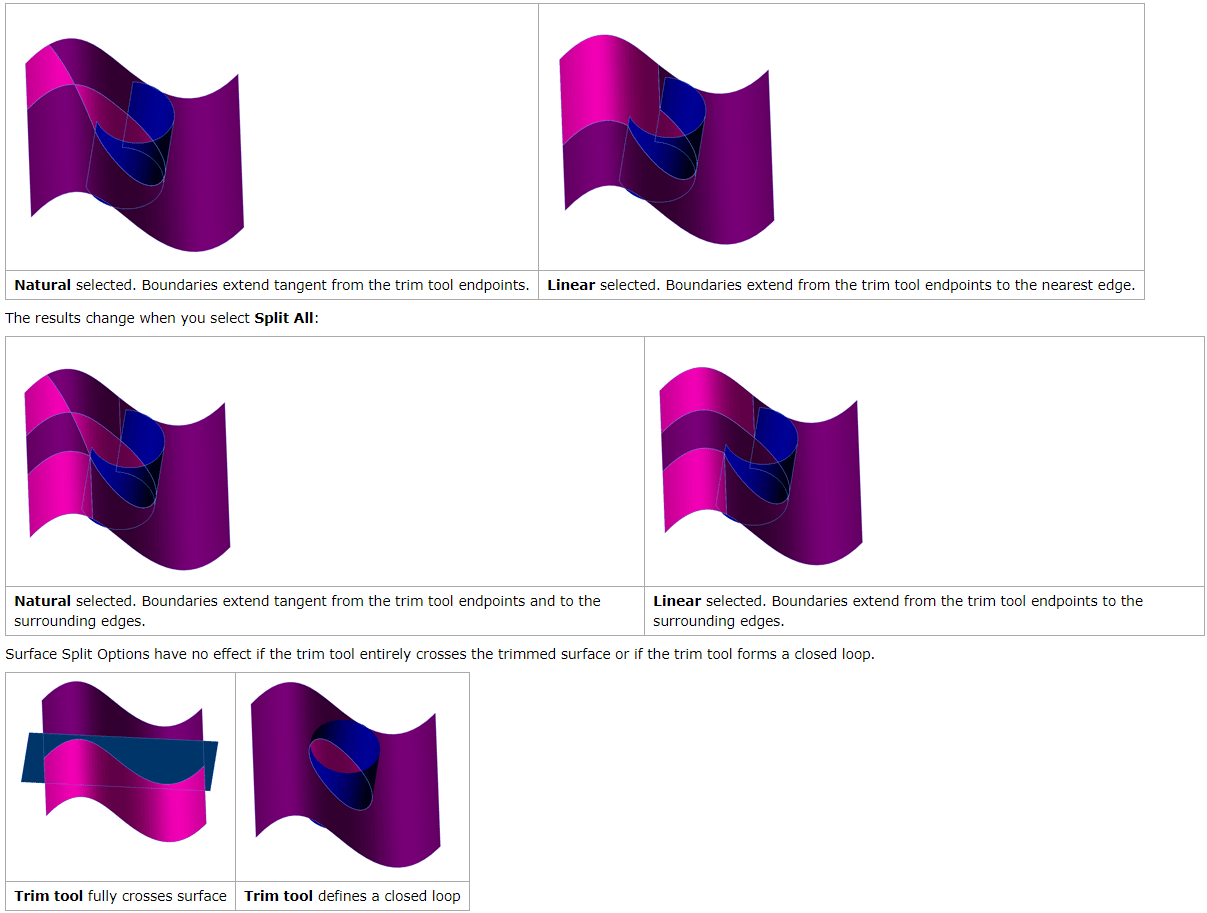
There are some Surface Split Options as well. Use these options to change how the trim tool edges determine the trim boundaries.
- Natural: Boundaries extend tangent from the ends of the Trim tool.
- Linear: Boundaries extend from Trim tool endpoints to the nearest edge
Here are some examples.
SOLIDWORKS Trim Tool Walkthrough
Let me walk you through the surface trimming steps. I’ll take a lesson right from the Surface Modeling class. In this example, I’ll use the Mutual trim type because I have three surfaces as the trimming tool.
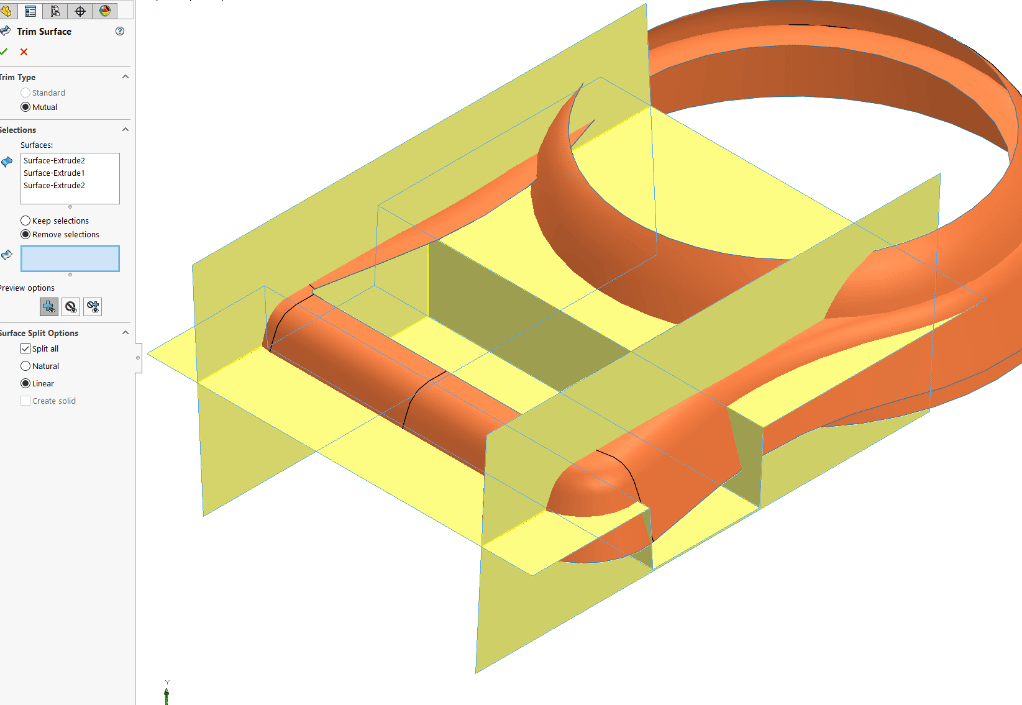
Then I’ll select surfaces that I want to remove. Notice, I’m using the preview option to “show both included and excluded surfaces”. The blue selections are the portions of the surface that SOLIDWORKS will remove. Meanwhile, the yellow sections are the portions of the surface that SOLIDWORKS will keep.
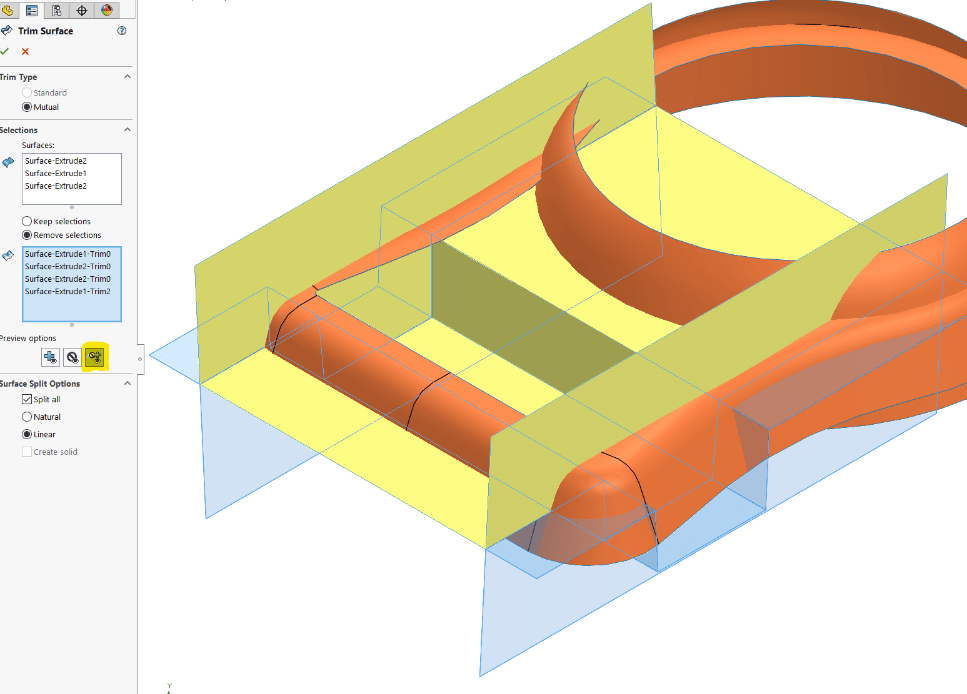
This completes my first trim feature. Now here comes the second. I will use the Mutual trim type and select two surfaces as the trimming surface. But this time I will keep portions of the surface.
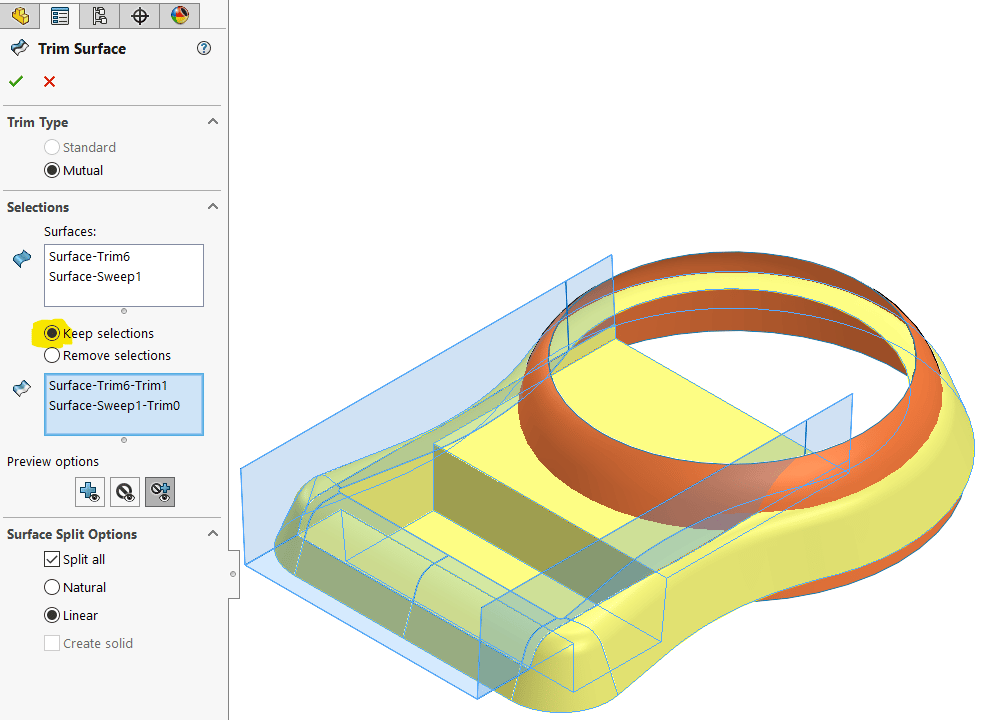
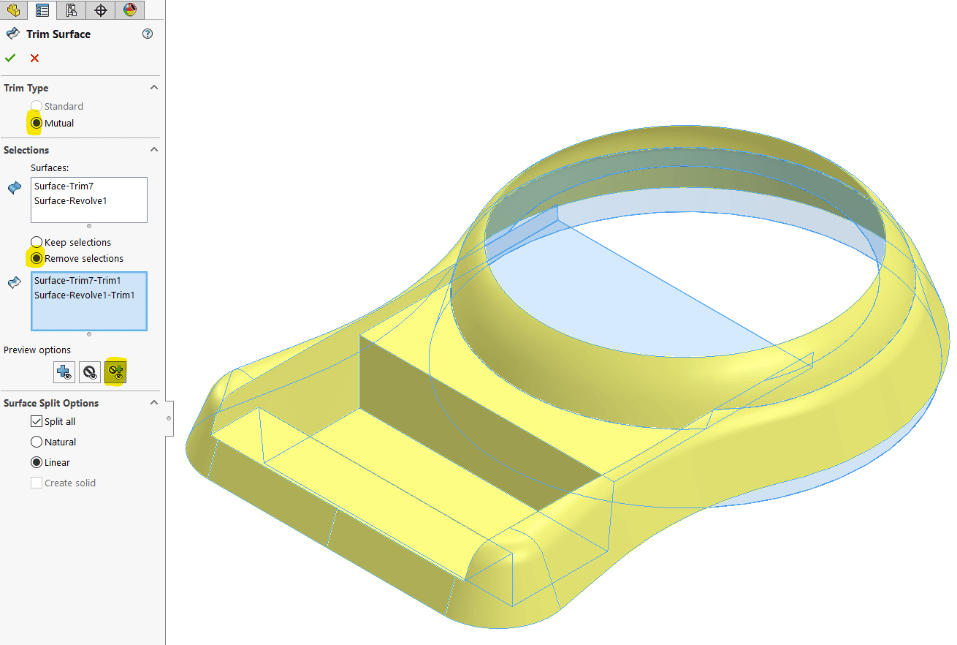
Now, let me complete my final trim feature. The trim type is Mutual and two surfaces as the Trimming surface and two surface selections to remove.
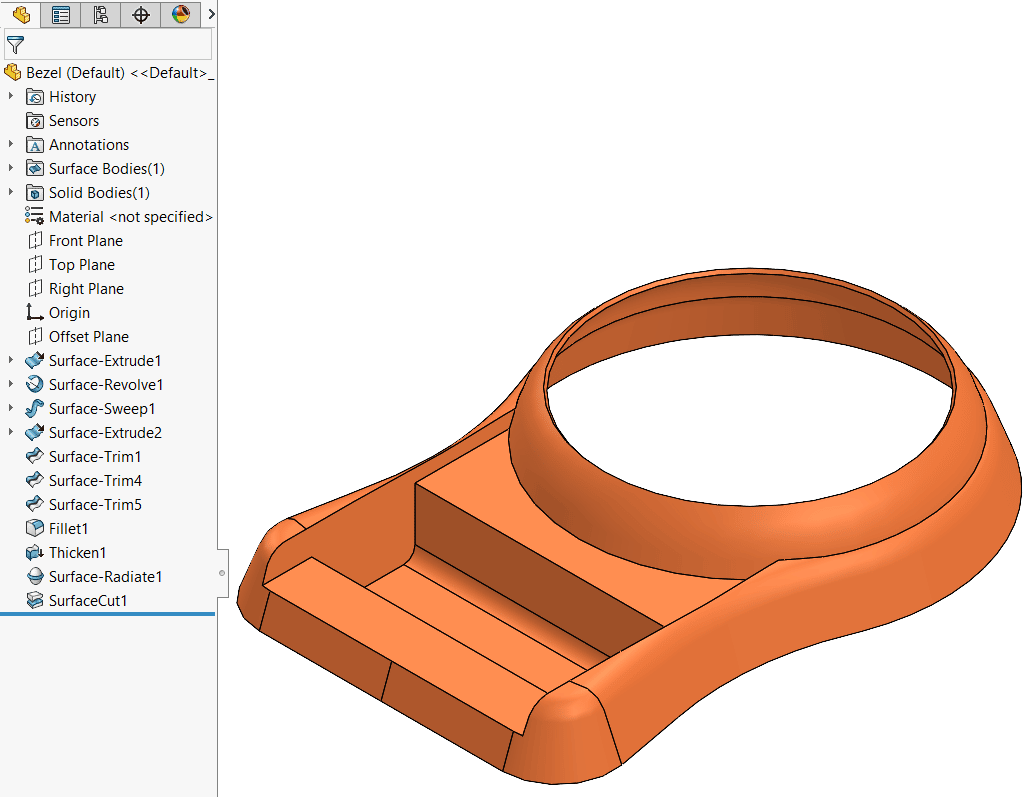
And here you go, our completed part.
I hope you find this helpful. Thanks for reading.
Roger Ruffin
Sr. Application Engineer
Computer Aided Technology

 Blog
Blog