Take Advantage of SOLIDWORKS FREE Tools - SimXpress
SimulationXpress provides entry level FEA, giving you the ability to do basic stress analysis on individual parts. You can quickly determine effects of force and pressure to generate reports to document results.
Benefits of Using SimulationXpress:
- Provides entry level FEA
- Excellent first step and fast initial design check tool
- Gives you a quick approximation and estimate of your design
- Helping you predict how a part will perform under load
- Helps detect potential problems early in the design phase
- Easy to use wizard to apply loads and fixtures to your part
- specify its material
- analyze the part
- view the results.
- You can quickly determine effects of force and pressure to generate reports to document your results.
Downsides of Using SimulationXpress:
- The simplicity of this tool gives its downsides
- Can be run it on single parts only
- Static study only
- Limited Fixtures – can only define a “fixed” fixture
- Limited Load Applications – can only define loads of Force or Pressure
- Can only select faces to apply loads to
- Limited mesh control
- Has limited results you can generate
NOTE: But the upsides far outweigh the downsides for using this FREE tool.
When you are ready to test full assemblies, upgrade to advanced SOLIDWORKS Simulation packages.
You need to quickly activate your Sim Xpress tools to use them. This can be done quickly in 3 easy steps.
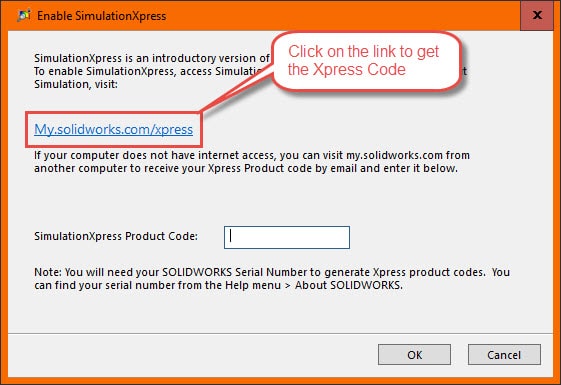
- Click on the link to get the Xpress code.
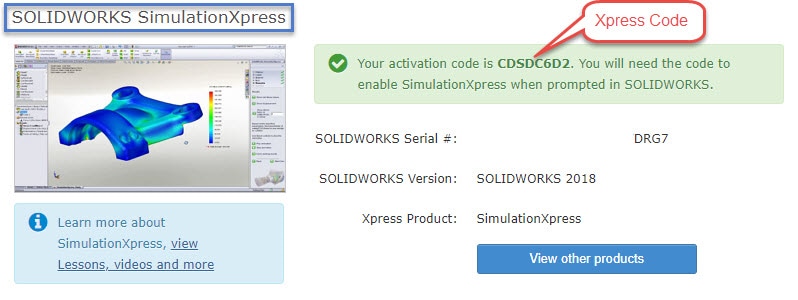
- You will need to login to your my.solidworks.com account
- Just copy and paste the code in the activation box and click the OK button.
Note: Activating your Xpress Tools is a one-time process.
How To Activate Your Simulation Xpress Tools
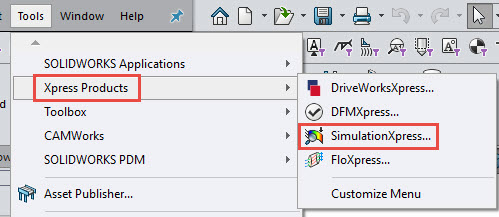
Step 1: Click on Tools » Xpress Products » SimulationXpress
Step 2: Click on the link My.solidworks.com/Xpress in the window that opens.
Step 3: Highlight and ‘Ctrl+C’ to copy your activation code.
Step 4: Click inside the dialogue box window and paste (Ctrl + V) your activation code, then click ‘OK’.
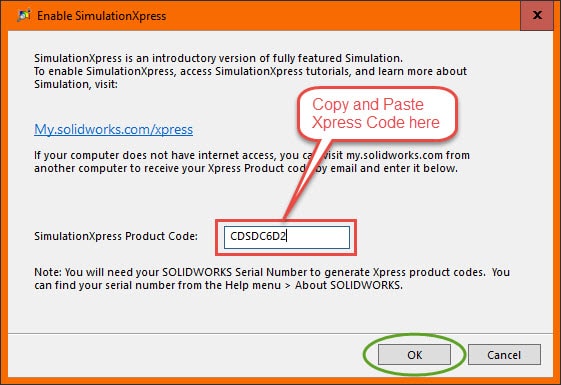
Step 5: Click the ‘OK’ button.
After Activating SimulationXpress:
Loading SimulationXpress will initially launch the wizard. You can step through the wizard, or, if you prefer, you can manually assign loads and fixtures. The wizard guides you through setting preferences, adding fixtures, applying loads, viewing results, and creating reports.
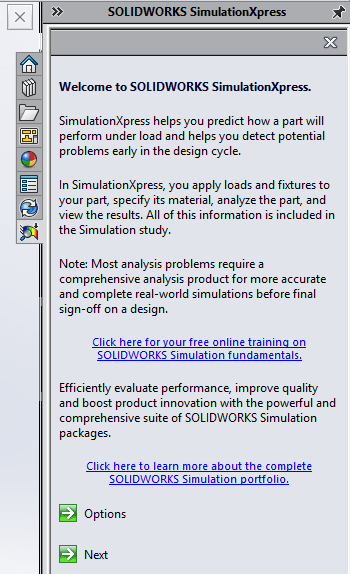
Here is the list of steps for using SOLIDWORKS Simulation Xpress:
- Apply Materials
- Apply Fixtures
- Apply Loads
- Mesh
- See Results
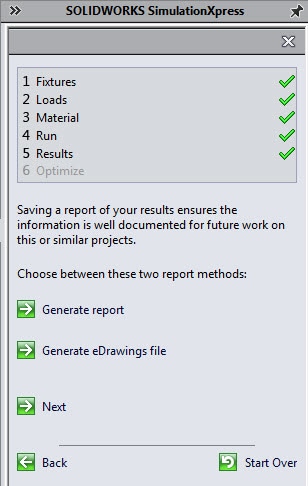
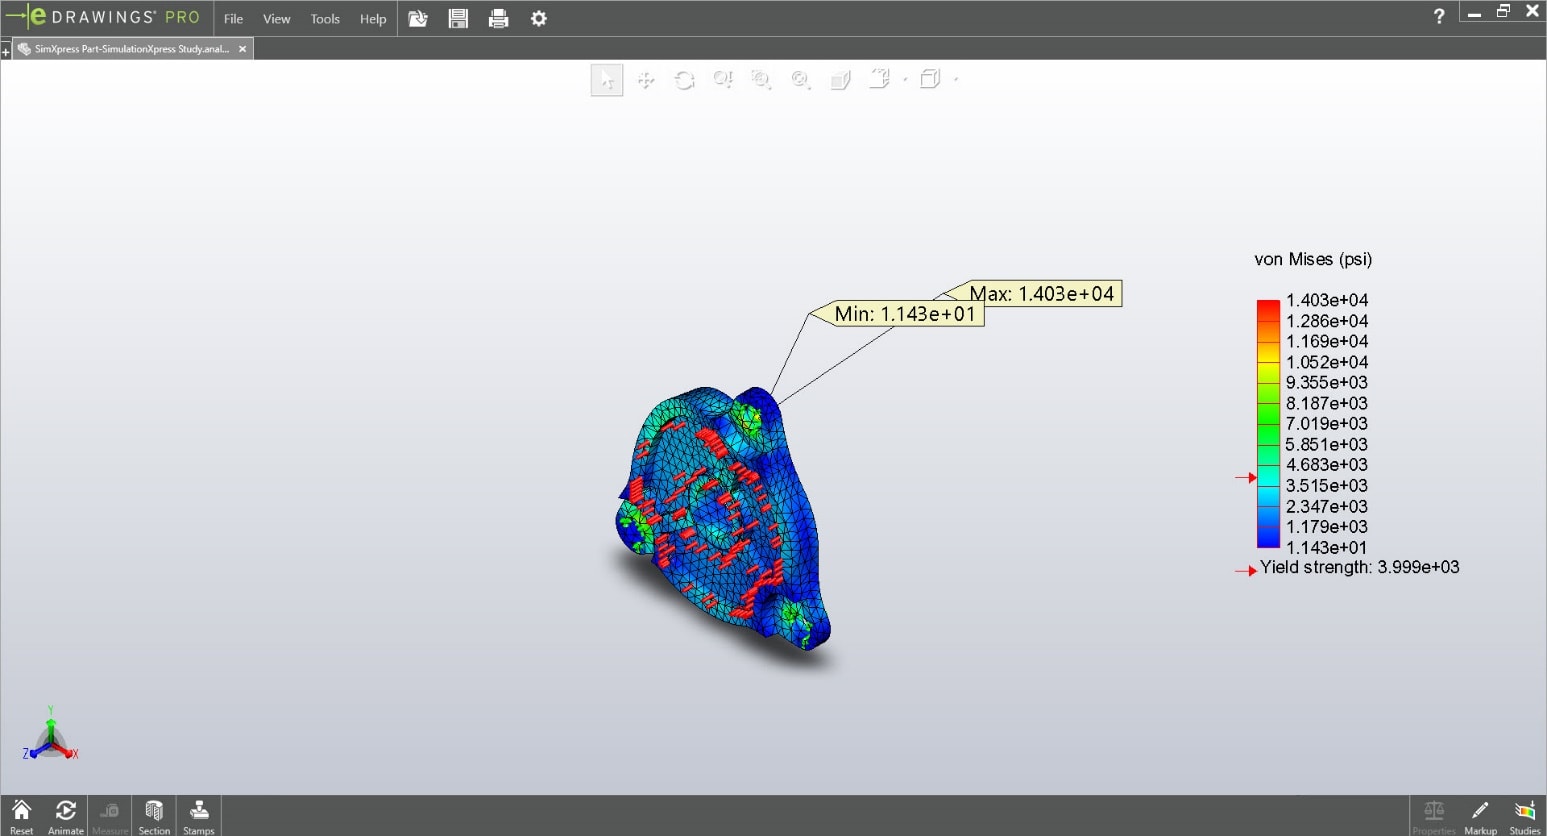
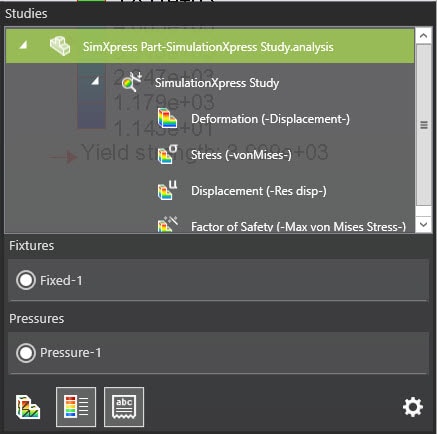
Step 6: Once the study has been run, you can display results for Stress/Displacement/Deformation and Factor of Safety. 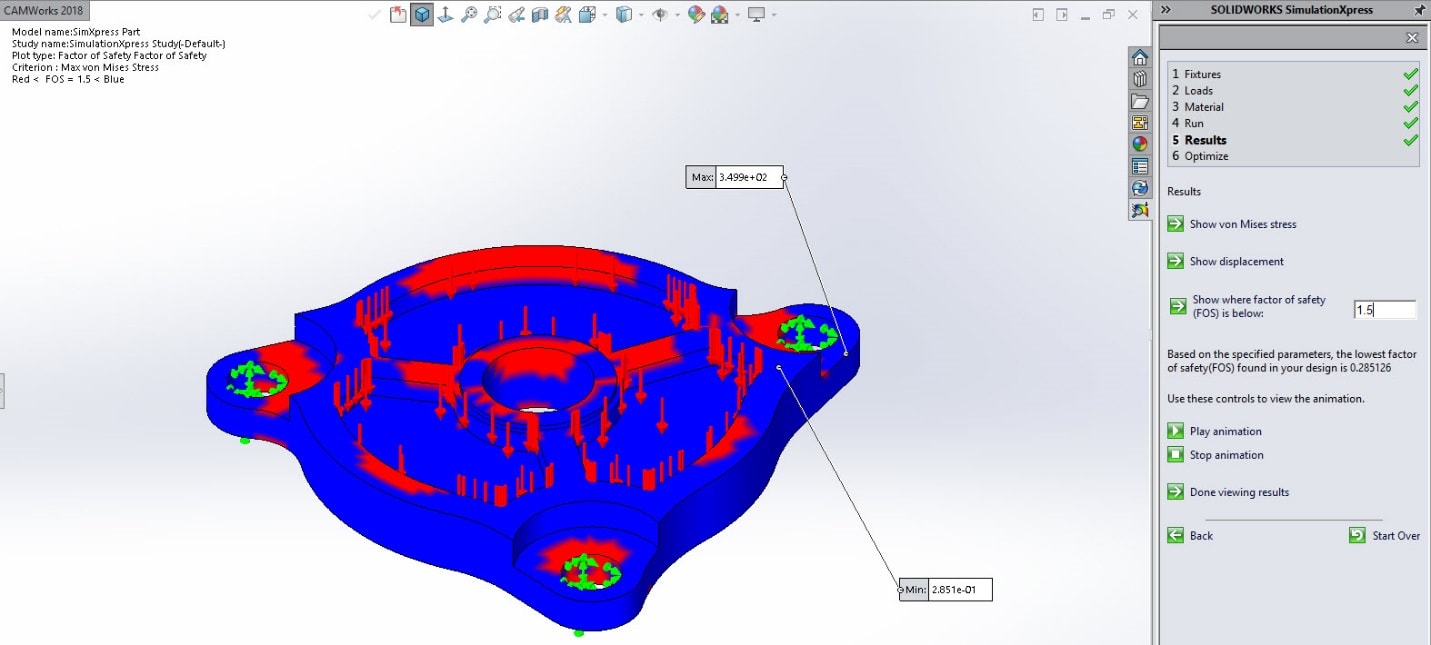
NOTE: For stress/Displacement/Deformation, you can play animation to show the results.

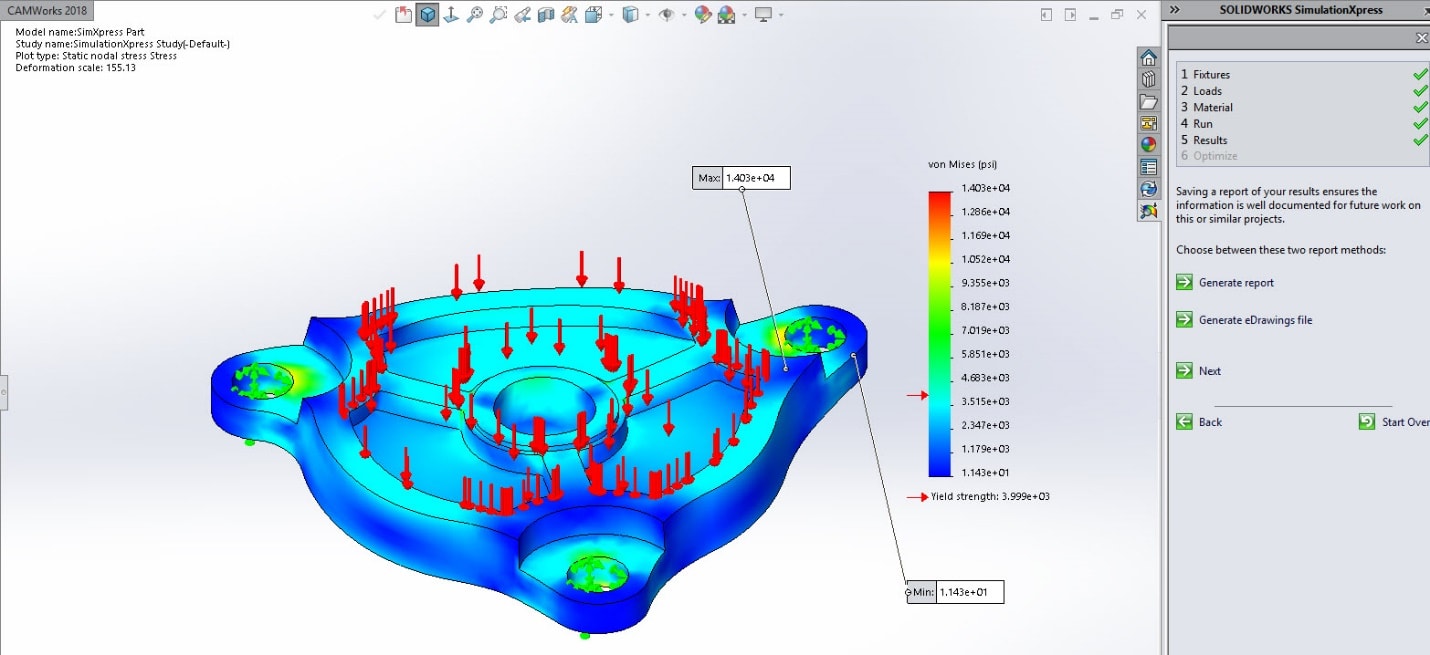
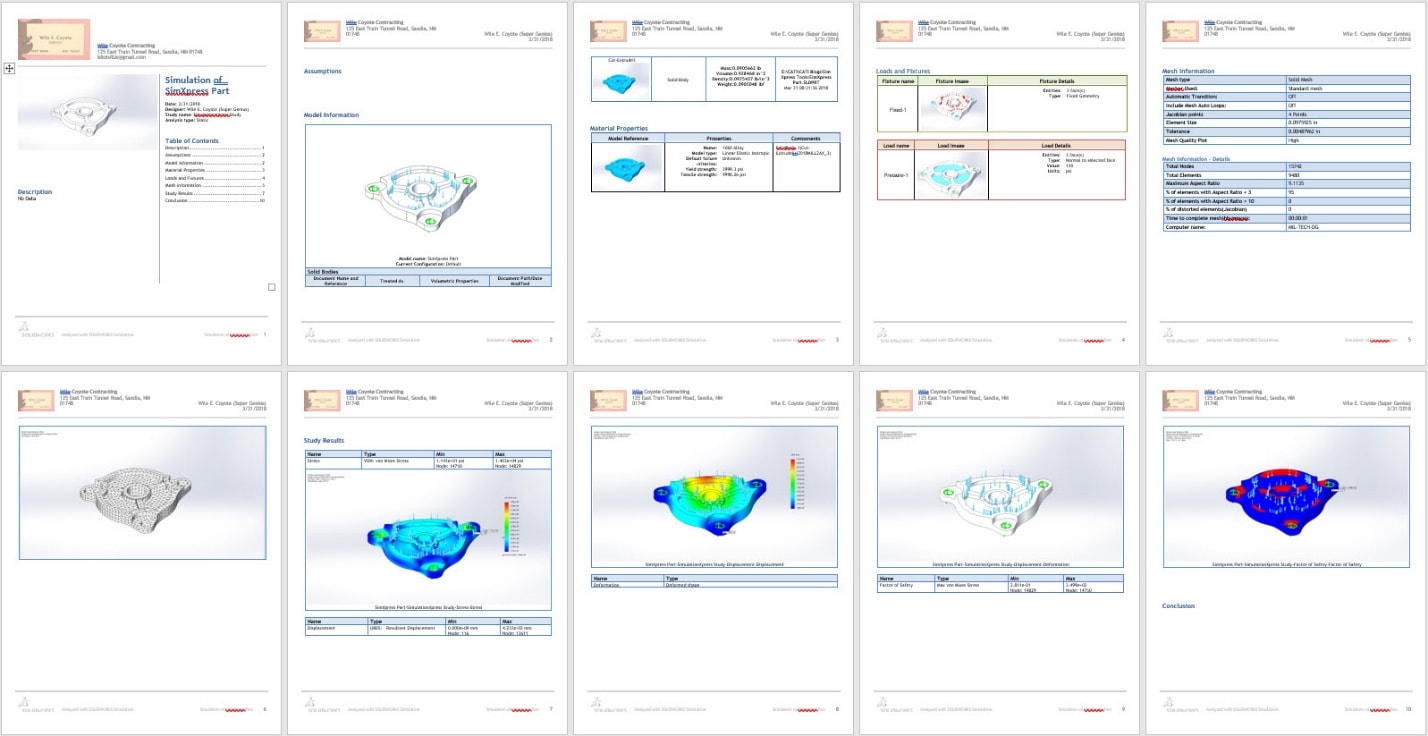
Step 7: Once the results are completed, you can generate a Word document report showing a vast amount of data. 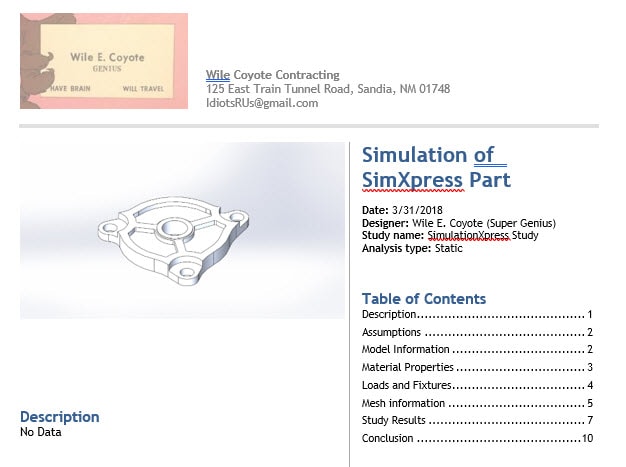
Step 8: Along with reports, you can also create an eDrawings file containing the SimulationXpress results. NOTE: You can get eDrawings for free here if you do not already have it.
Extra Notes & Some Tips and Tricks
NOTE: If you click on the link ‘Learn more about SimulationXpress’
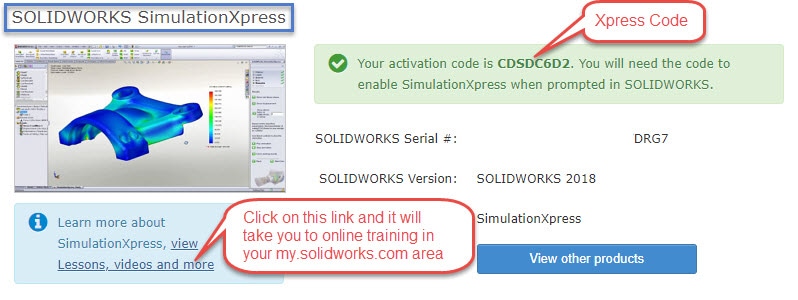
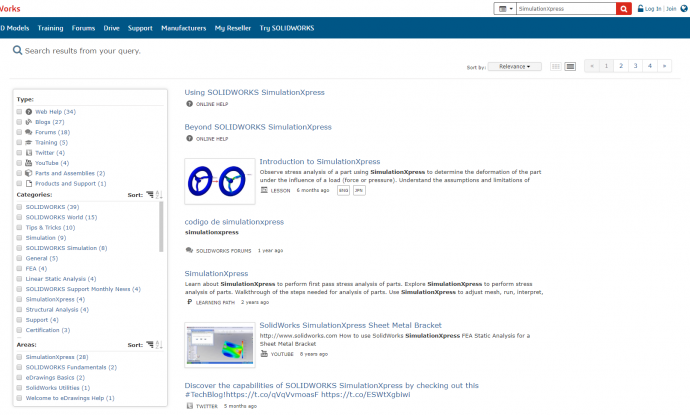
http://my.solidworks.com/search/list/1?q=SimulationXpress
It will take you to your my.solidworks.com Lessons and Training areas related to SimulationXpress.
If you click on the link ‘Click here for free online training on SOLIDWORKS Simulation Fundamentals’. It will take you to your my.solidworks.com Lessons and Training areas related to SimulationXpress.
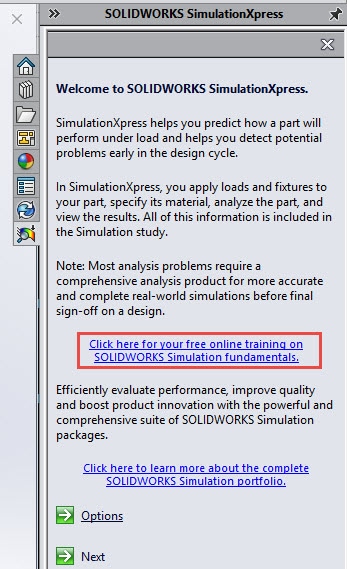


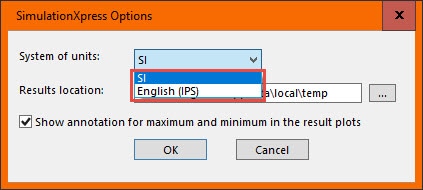
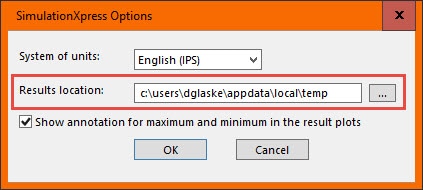
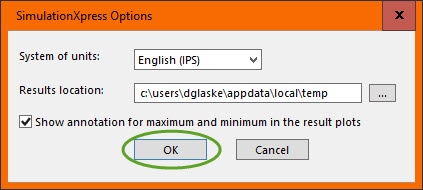
One more tip. If you want to change your units from SI to PSI or vice versa. You need to click on ‘Options’ at the beginning of the SimulationXpress wizard.
SimuationXpress may have its limitations, but it is still a powerful and efficient tool you can use to your advantage.
I hope this makes you a more efficient SOLIDWORKS user!
Don Glaske
Field Technical Services Manager
www.cati.com

 Blog
Blog