SOLIDWORKS Electrical: Adding Rows and Columns to Title Blocks
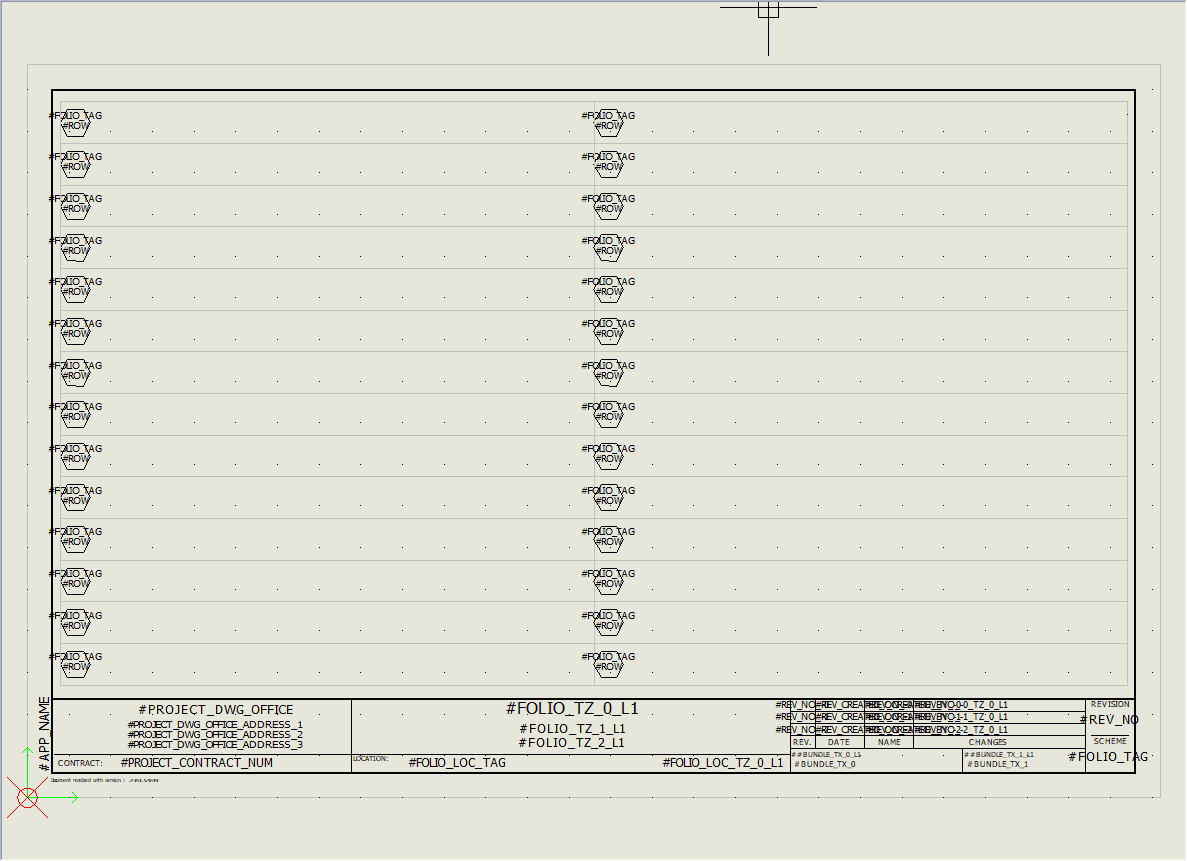
When setting up a title-block in SOLIDWORKS Electrical, you can import an existing dwg to reduce the amount of work needed to create it. The drawing portion will be done. Navigate to Library→Titleblock Manager→Import DWG.
After importing you’ll need to delete any text that will change from one project to the next (or even one page to the next), replacing it with attributes instead. Where some people find difficulty is setting up the rows and columns.

There is a #ROW and #COLUMN attribute, but placing them in the titleblock is not the only thing you need to do. Remember that attributes only display information that exists somewhere else; they don’t produce any information.
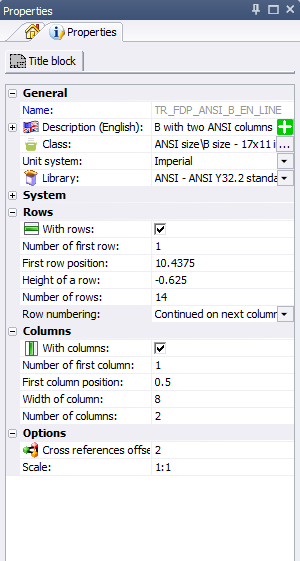
Take a look at the property panel below, and you’ll notice there are two checkboxes: “with rows,” and “with columns.” Check whichever boxes are applicable to your need, and then you can input the properties that control how many rows there are on the page.

Number of first row/column:
What order number do you want applied to the first row on the page? Usually this is 1. Even if you like to start numbering at 100, it is better to handle that with the row formula at the project level.
First row/column position:
The coordinate that you want the system to use as the TOP of the row, or the LEFT side of the column. For rows, that is usually the top edge of the page, with maybe a little margin. You might have the attribute placed somewhere different, such as the middle of the row/column, but that is fine.
Height/width of a row/column:
How tall or wide is each row/column. Usually this takes some math. How many rows do you want on the page, and how much space do you have? Since most people start at the top left of the page, row heights are usually negative, and column widths are positive.
Number of rows/columns:
Number of vertical rows you need. If you want two columns of 14 rows then this is 14, not 28. Also, note that it is possible to have rows/columns outside of the page area. The program doesn’t know how to interpret the outline and stop making rows. If you have room for 14 rows, and have 14 attributes placed, but put 16 in this field, with rows continuing on a 2nd column, then you’ll see rows 1-14, and then 17-30.
Row numbering:
Set row numbers continue on the next column, which is common if you place row attributes in every column. Or set to restart the row numbers in each column, which is common if you just have the rows in the margin, with many columns.
Brian Cooke
Electrical Application Engineer
Computer Aided Technology, Inc

 Blog
Blog