SOLIDWORKS: Cleaning Up Drawings by Adjusting Dimension Extension Lines
The amount of information displayed on our SOLIDWORKS drawings can be massive. It is easy to end up with a cluttered drawing, having dimensions and annotations all over the place. Let’s take a look at some options for the dimensions and their extension lines. These will give you some tools that are certain to help clean things up.
Auto Arrange Dimensions
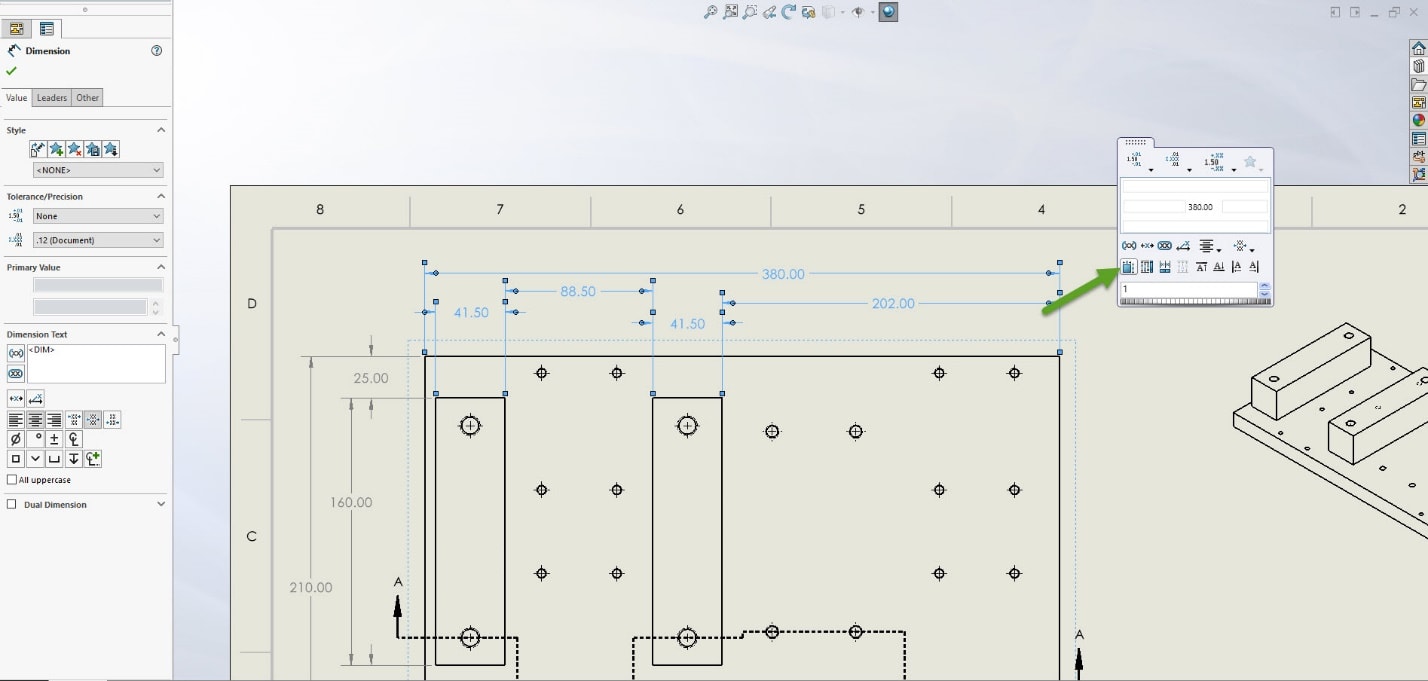
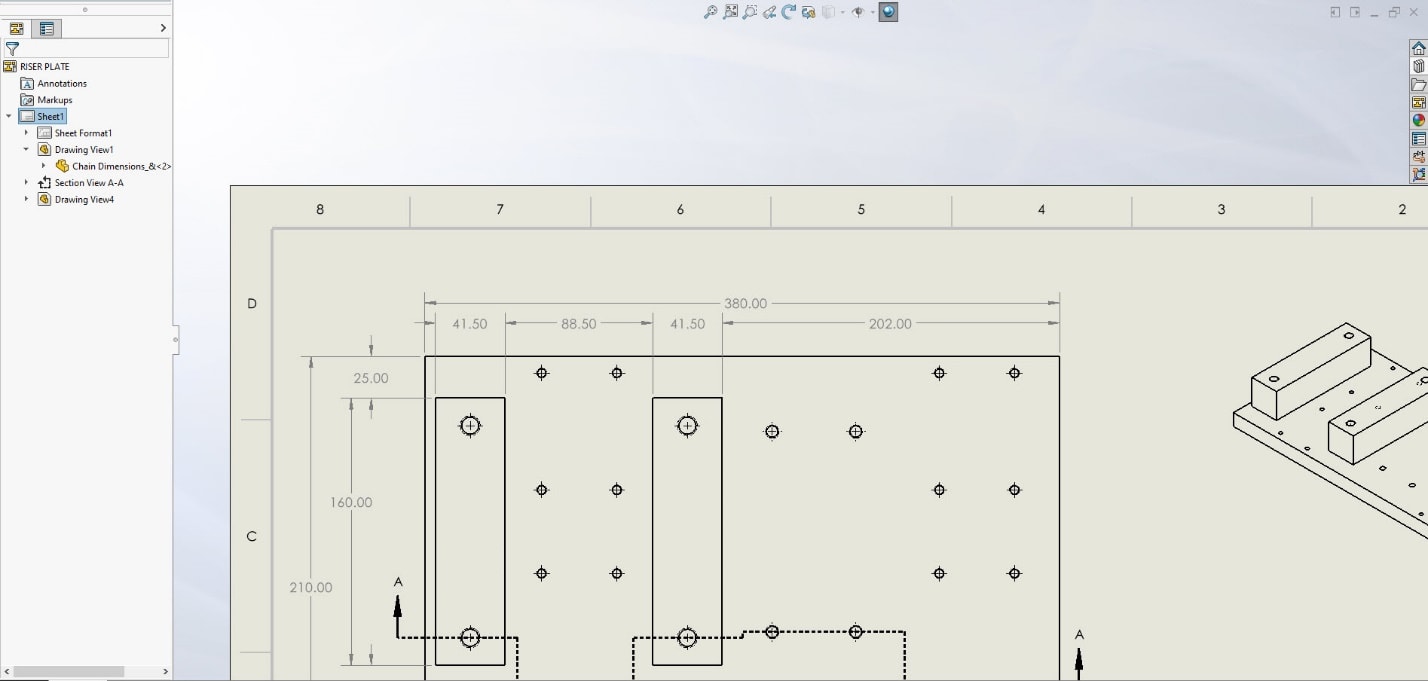
Using the Auto arrange tool is a quick and easy way to organize dimensions. Select the group of dimensions that you want to arrange and on the pop-up toolbar click the “Auto Arrange”. You will end up with more compact and aligned dimension layout.
Breaking Extension and Leader Lines
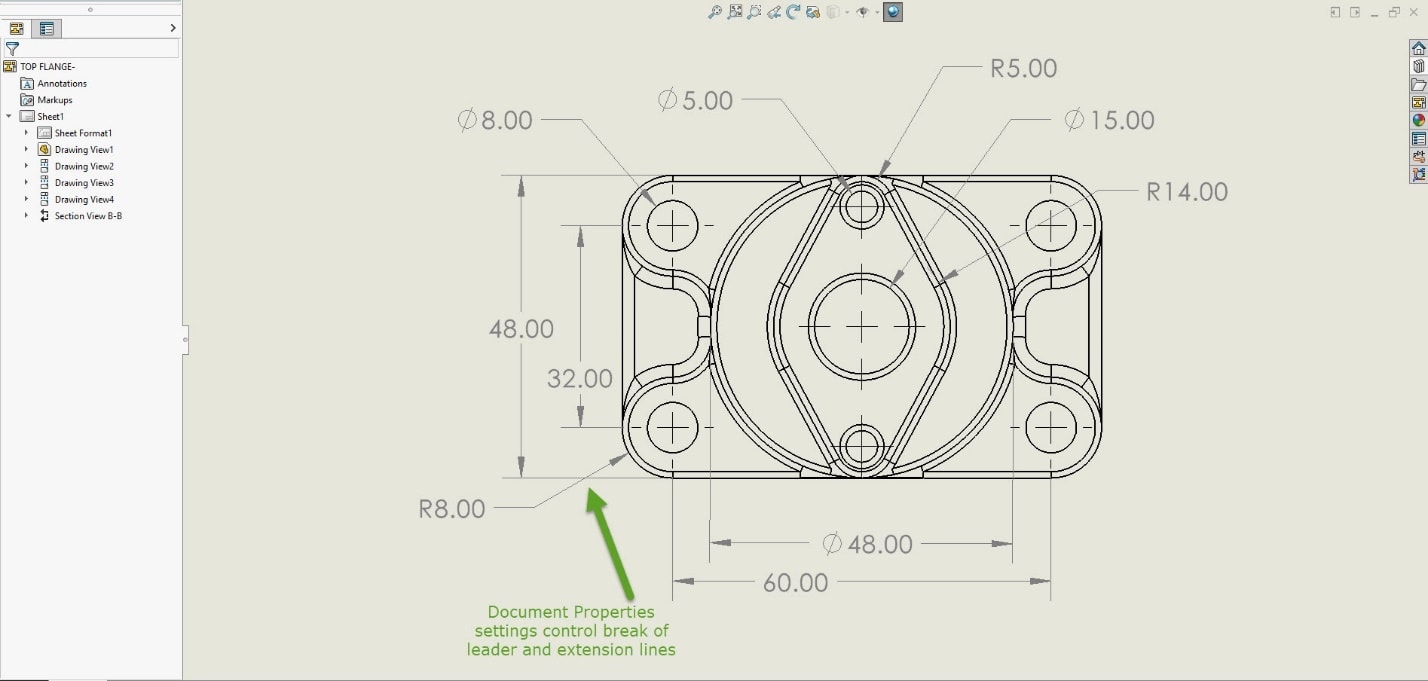
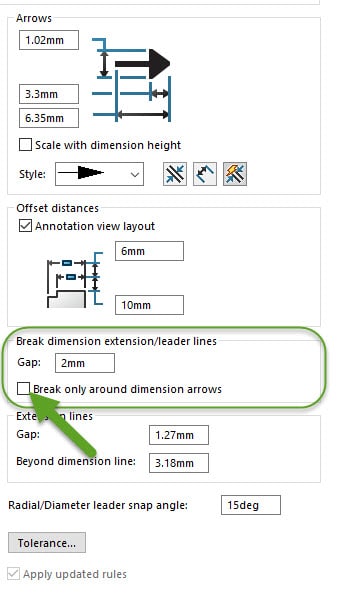
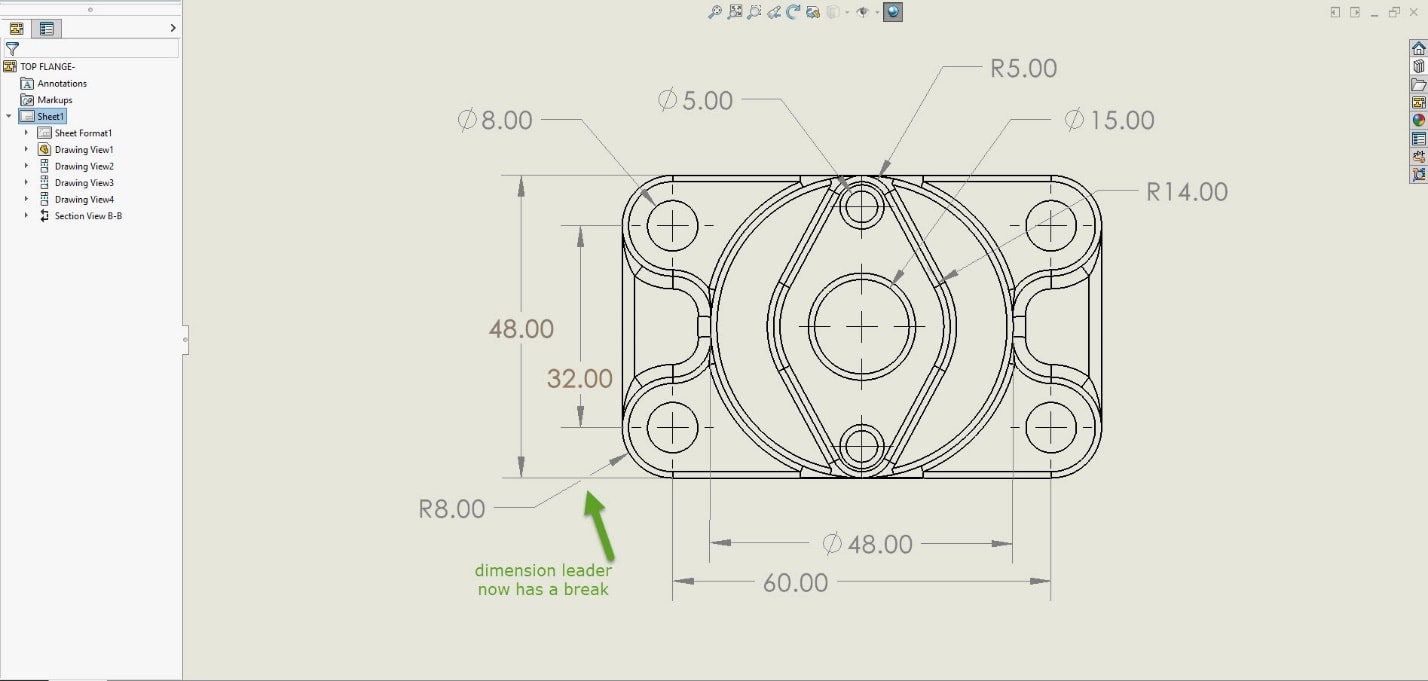
It is common for annotations to have their leader lines cross each other. This can be cleaned up by putting a gap, or break, in one of the leaders. SOLIDWORKS has a few settings for the break lines. You can adjust the size of the gap. You also can define if they break where the lines cross or only of a line crosses a dimension arrow.
This setting is found under:
Document Properties -> Dimensions -> Break Dimension Extension/Leader
Extension Line Display Options
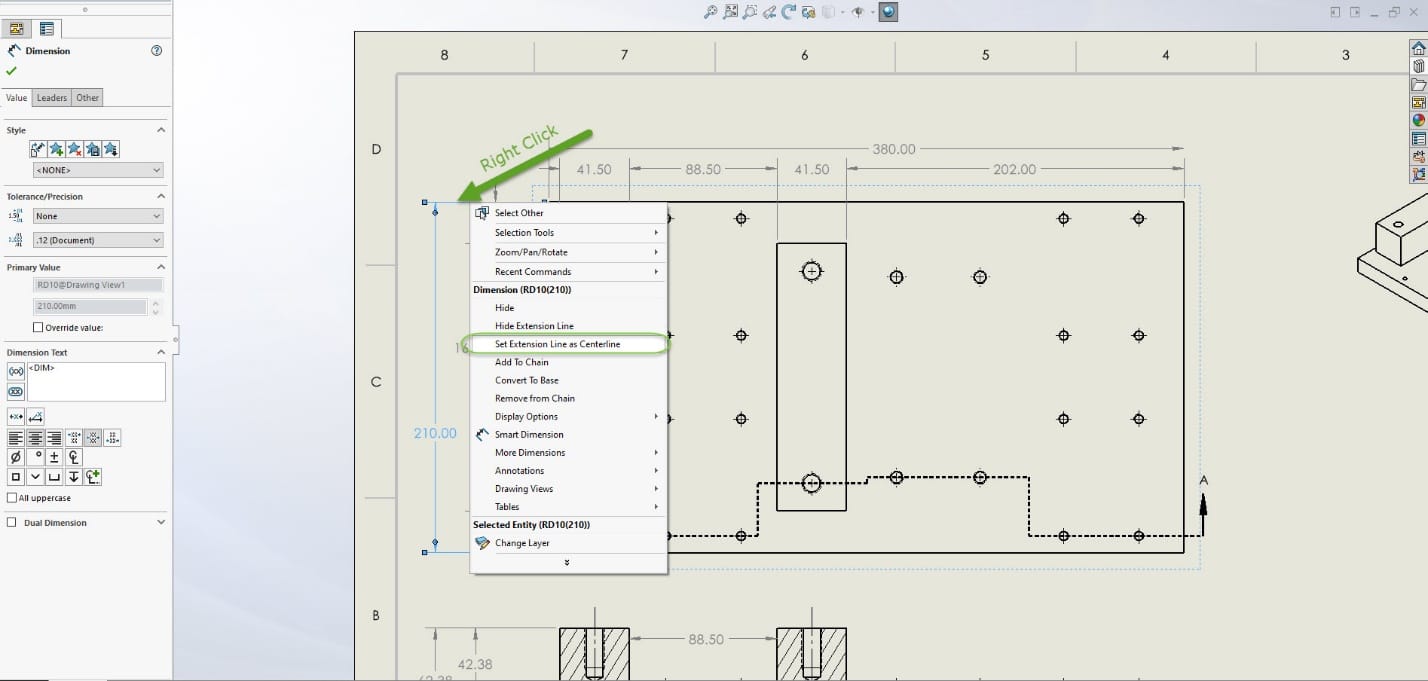
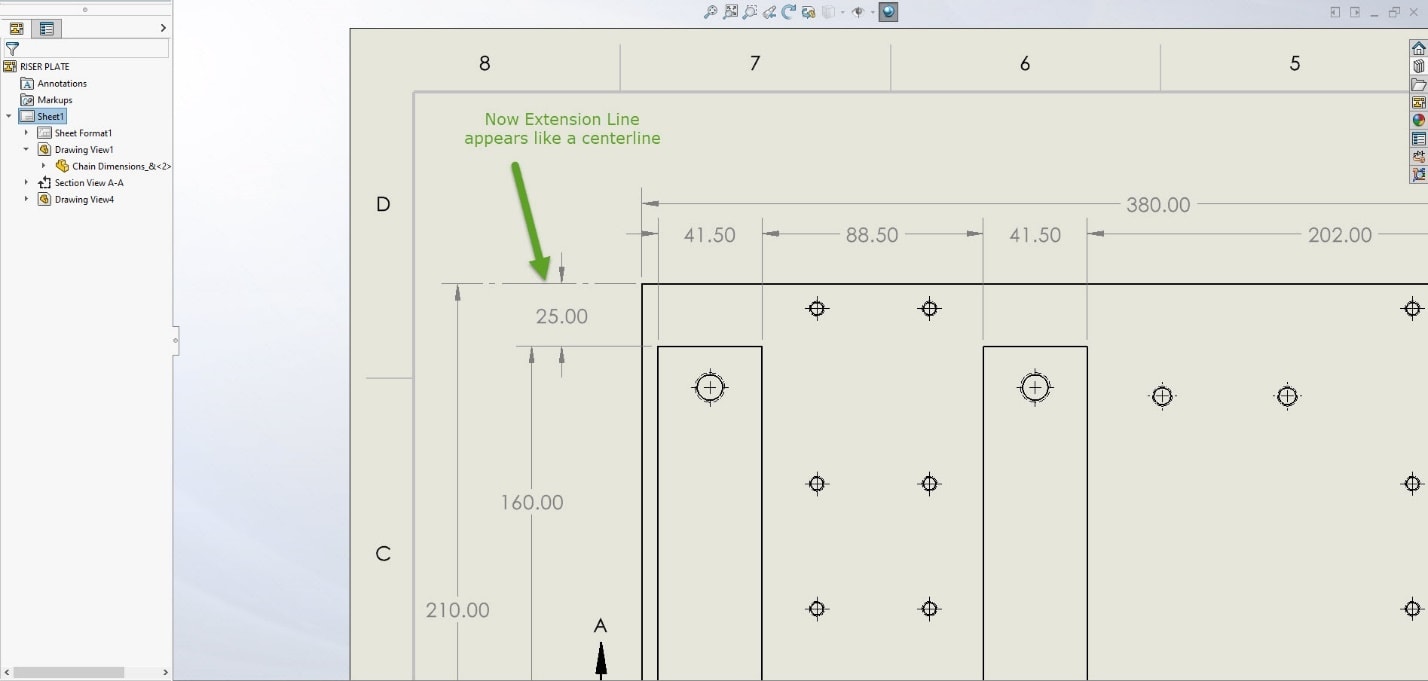
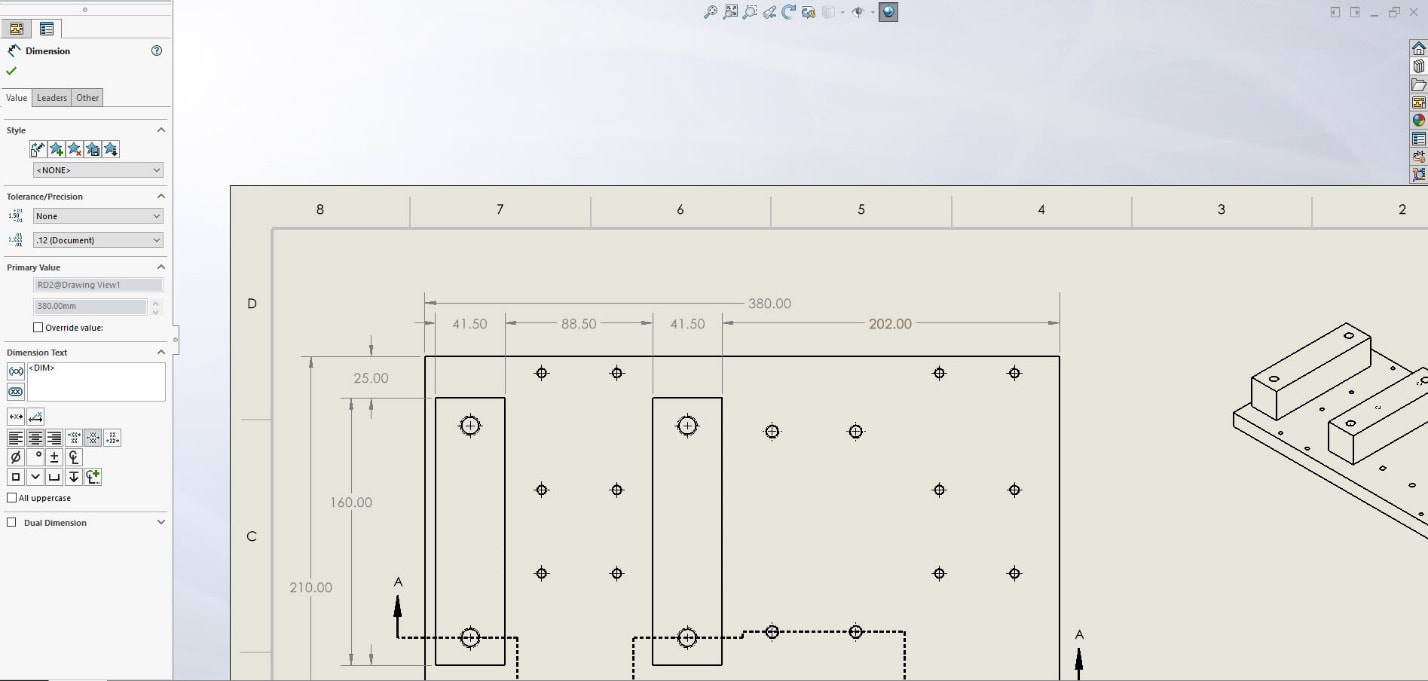
Individual extension lines have a few options, too. They can be set to display as the dashed styled line that matches your settings for “centerline”. This is done with a right-click on the extension line and choosing “Set Extension Line as Centerline”.
Similarly, you can hide these extension lines. Right-click on the undesired extension line and select “Hide Extension Line”. 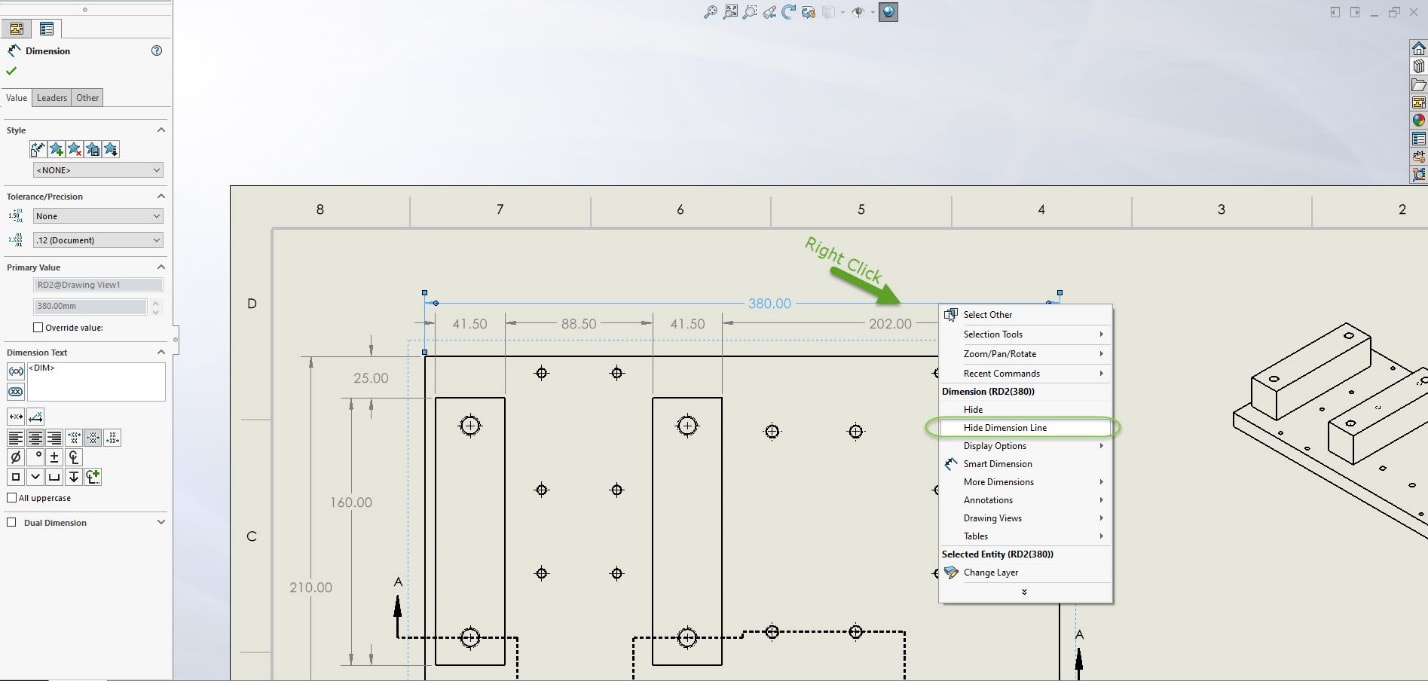
Multiple Leaders
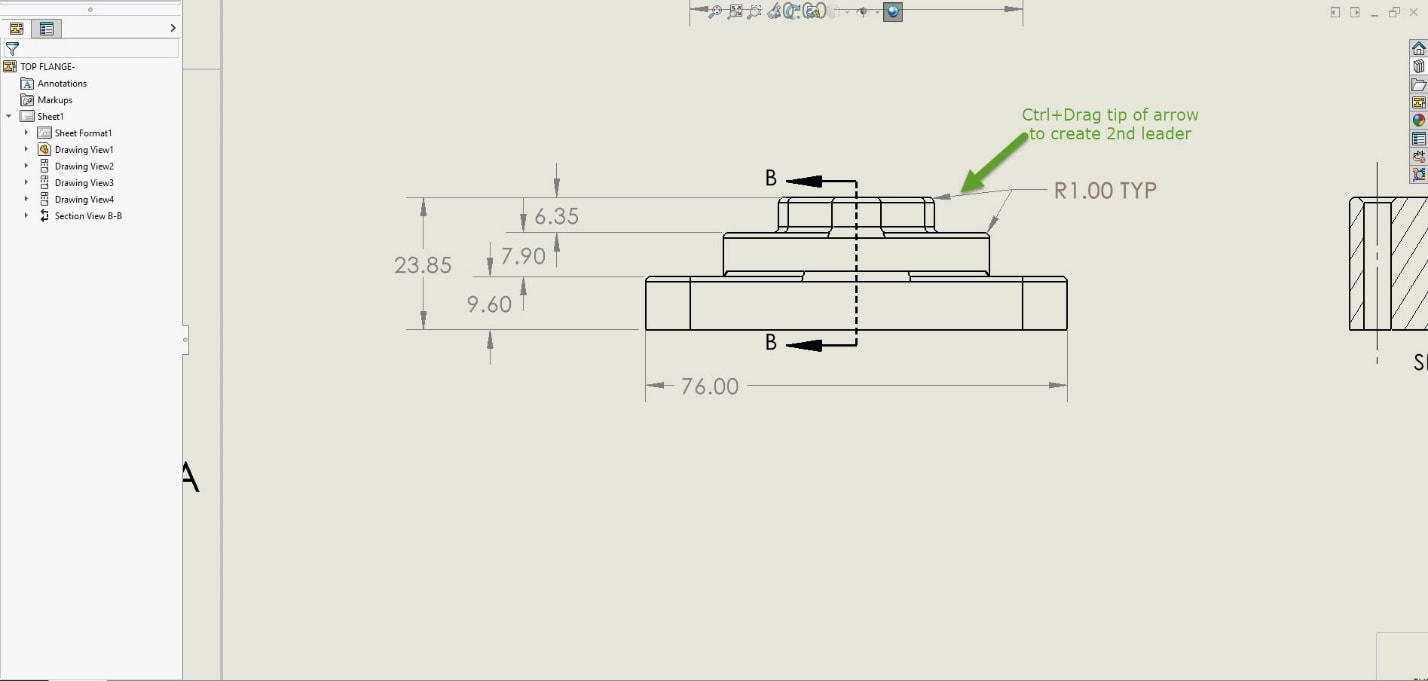
Annotations can have multiple leaders. To do this, you essentially copy the existing leader to create a second one. Hold down the control key and drag the tip of the current arrow to place the new leader.
These simple tips will help you get your SOLIDWORKS drawings cleaned up and ready for approval.
Greg Buter
Managing Application Engineer, CSWE
Computer Aided Technology, Inc.

 Blog
Blog