Scan to 3D Print
For many years, Additive Manufacturing has leaned heavily on the Computer Aided Design (CAD) world to print parts. Until recently this was in the form of STL (Standard Tessellation Language) files. STL files are a collection of points that create a 3D Object. Lately, I have noticed more and more manufacturers moving towards native CAD Data for Printing.
One technology is still making great use of the STL file, and that is 3D Scanning. 3D Scanners collect data about a physical part in form of points, sometimes called a point cloud. Sound familiar?
Below is the main Toolbar in VXModel. VX Model is one of the Add-Ins for the suite of software that is usually purchased with a Creaform 3D Scanner. Lets go a few of tools and requirements that you might use in order to go from a 3D scan, right to 3D Printing.

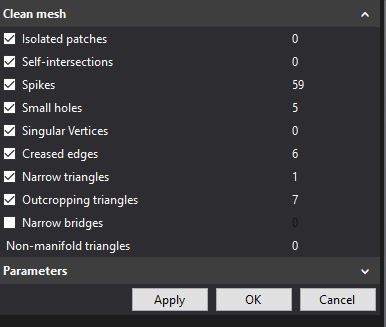
The First step after scanning, and possibly merging, is to use the Clean Mesh Wizard. The clean mesh will Automatically take care of small holes, spikes, and self-intersecting areas of the scan. After performing the operation, carefully look over your model to make sure it is acceptable. If something looks off, use CTRL-Z (undo) to come back and un-check the clean mesh step that caused any undesired geometry.

If you’d like to take these automated fixes a little bit further, you could use the commands located in the “Improve” area of the main tool bar. From there you could use more advanced smoothing, hole filling, and de-featuring.
Another neat trick I’ve learned recently that could be used in additive is the “Extrude Boundary” Command, found in the Edit section of The toolbar. I’ve used this in order to force surfaces to be parallel in a scanned part. Why would you want that? Building in layers will cause certain artifacts in to show up in our part builds. In the case of non parallel surfaces in the Z Direction, we would notice a stair stepping affect. This looks ugly if the part wasn’t intended to be stepped.
Lastly after you are satisfied with your model, you should perform a check to make sure your model is “Water Tight”. You can use the Water Tight remesh button to tell you if it is already water tight. Having a water tight (fully enclosed body) is a requirement for any 3D Printer.
Have you used any other tools to make your scans “Printable”? Let me know in the comments.

 Blog
Blog