Save Time with the AutoDimension Tool in DraftSight
The AutoDimension tool in DraftSight is a huge time saver and clearly is an incentive for adopting DraftSight!
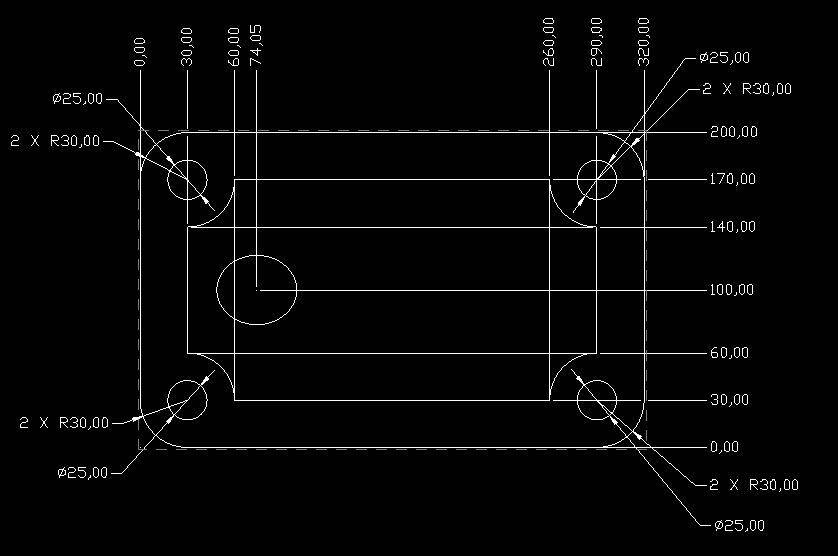
The AutoDimension tool automatically creates Baseline, Continued, and Ordinate dimensions for the selected entities. To select the entities, we enclose them in a Dimensions Bounding Box.

Drag a box around the entities to be dimensioned. We see a dashed line around the selected entities.
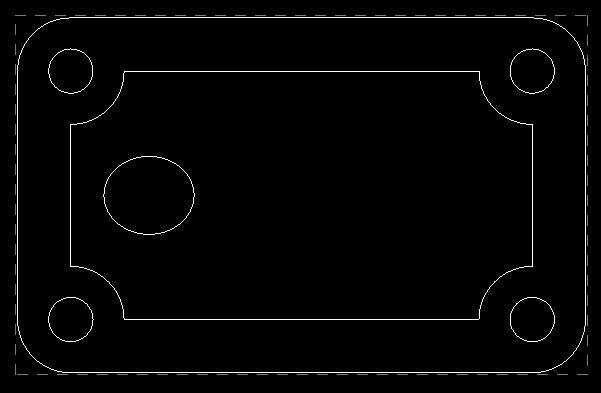
The dropdown next to the Bounding Box gives you options to:
- Create a Bounding Box
- Delete the Bounding Box
- Append Items to the Bounding Box;
- Remove Items from the Bounding Box;
- Update the Bounding Box.
With the Bounding Box created and the entities selected, we activate the AutoDimension Tool.

And the AutoDimension Palette shows in the Right Panel:
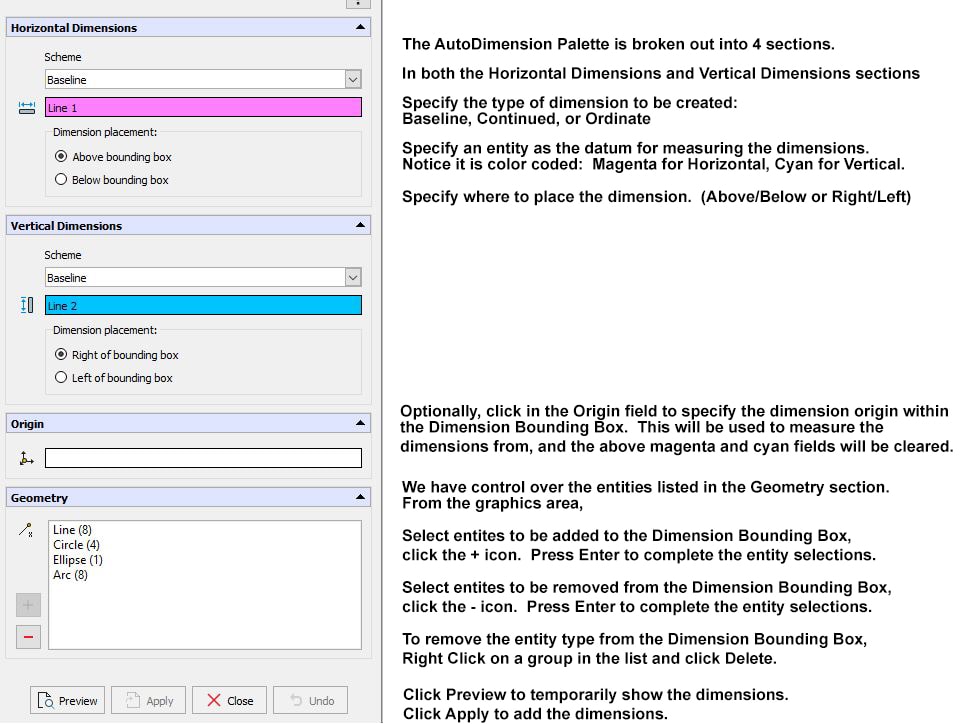
At least one Dimension Bounding Box must exist in the drawing. DraftSight selects the first Dimension Bounding Box created. To select another Dimension Bounding Box, simply double click it while the AutoDimension command is active, it appears with a dotted line and highlighted orange.
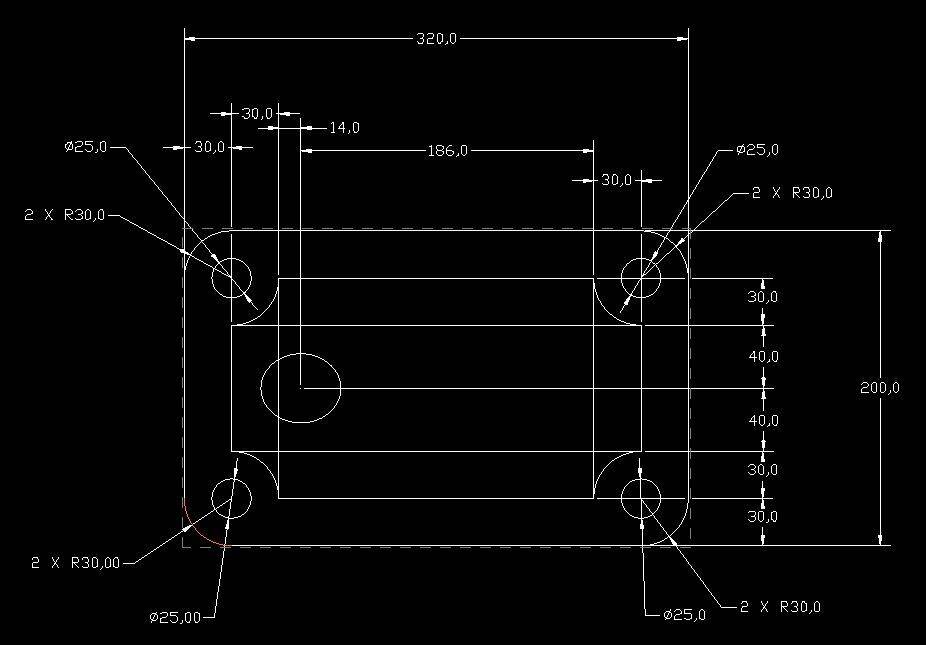
The AutoDimension command creates linear dimensions, however it does not create angular dimensions. It creates radial dimensions for arcs, diameter dimensions for circles. For ellipses, only the ellipse centerpoint is dimensioned.
Example of Baseline dimensions:
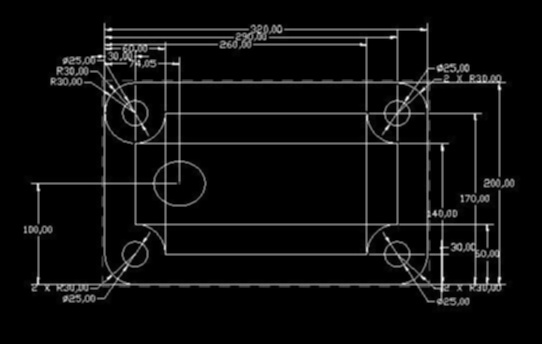
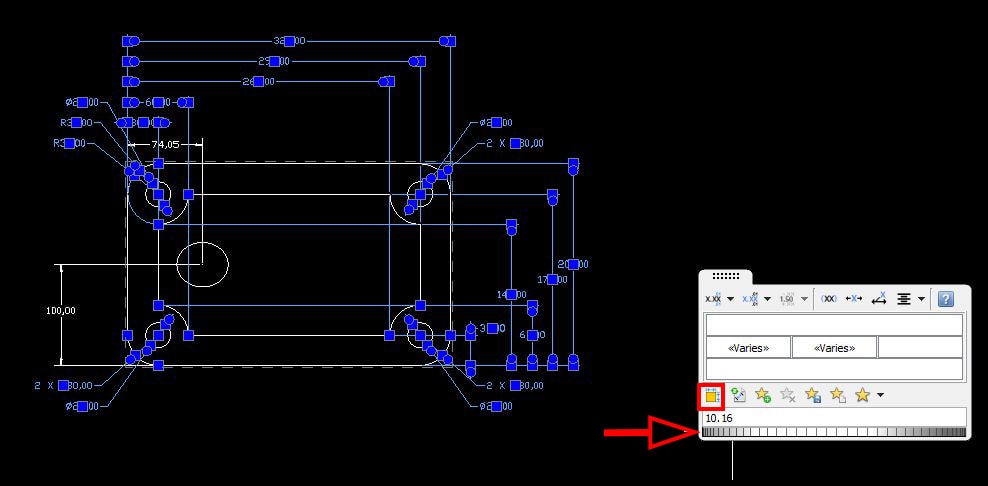
 Use the Dimension Palette to easily clean up the dimensions. Box select the dimensions and swipe over the Dimension Palette icon.
A window opens with formatting options for the selected dimensions. Select the Auto Arrange option, and use the Slider to adjust the spacing between dimensions.
Example of Continued Dimensions:
Example of Ordinate Dimensions:
Using the AutoDimension command in DraftSight can have a significant savings on the time spent detailing 2D Drawings. For more information about DraftSight and its differentiators over AutoCAD, please see to the following blog:
DraftSight for the AutoCAD User
Laura Nickerson, CSWE
Application Engineer
Computer Aided Technology


 Blog
Blog