Navigating your SOLIDWORKS Display Pane
This blog will break down the columns of the Display Pane and tell you how to use them.
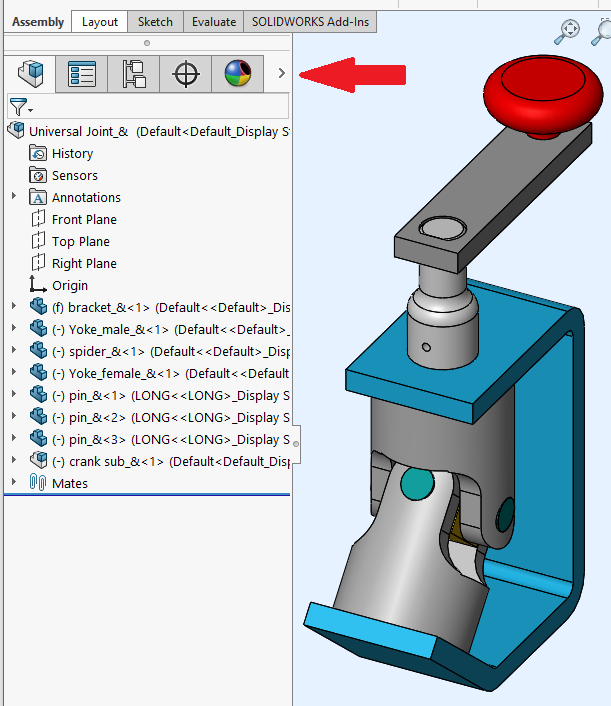
Hiding or showing your SOLIDWORKS Display Pane is done with an arrow to the right the Feature Manager Tree tab. Clicking the arrow expands to show the Display pane. Collapsing the Display Pane is done by clicking the arrow again. It will change direction based on whether it is collapsed or expanded as shown below.
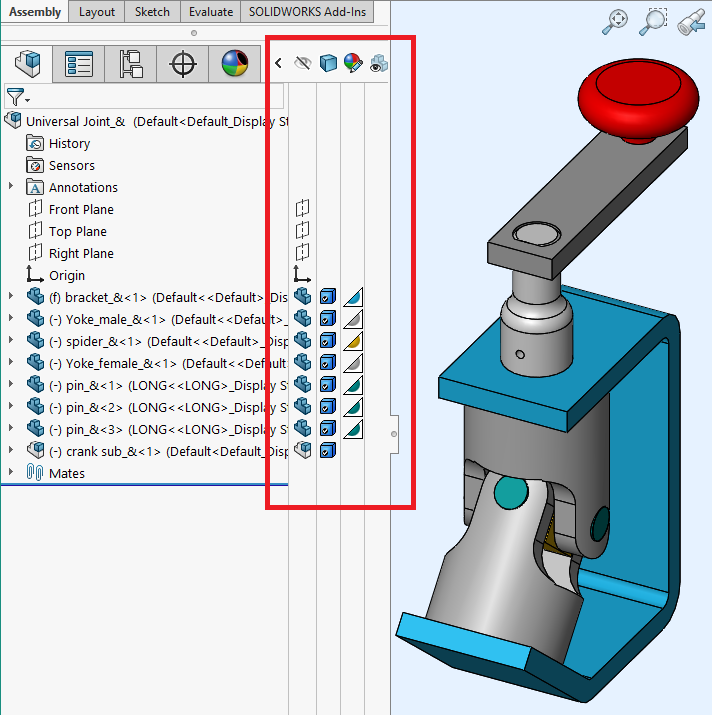
Breaking down the Display Pane Columns
- HIDE/SHOW

- This column can hide a part or show a part by LEFT CLICKING on the part icon next to the part name in the feature manager tree.
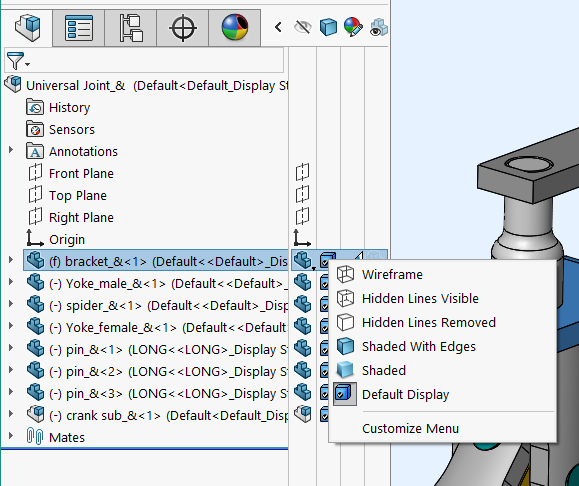
- DISPLAY STYLE

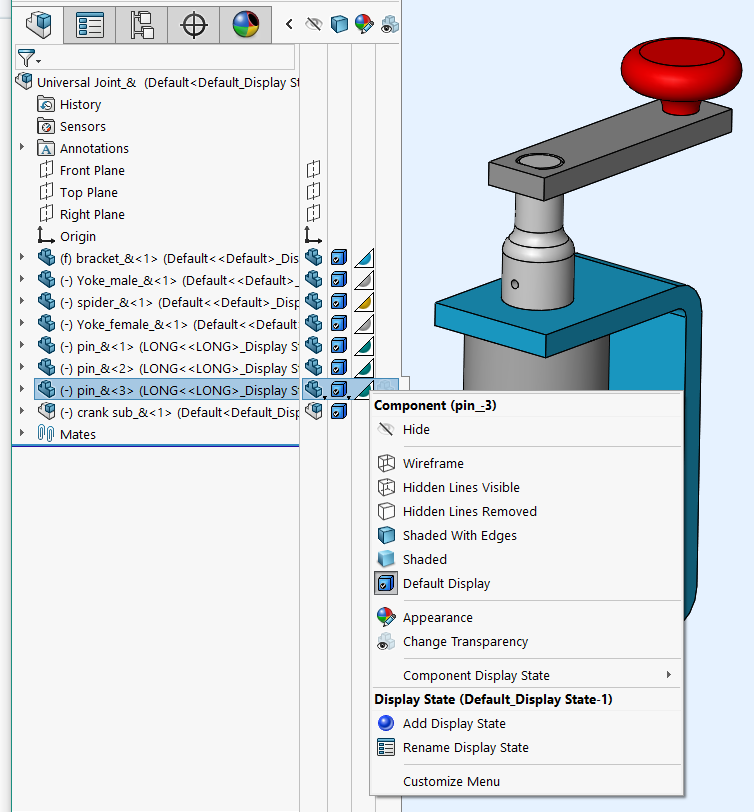
- You can change display state for each individual part by LEFT CLICKING in this column next to the part name in the feature manager tree. A left click brings up that parts display style options.
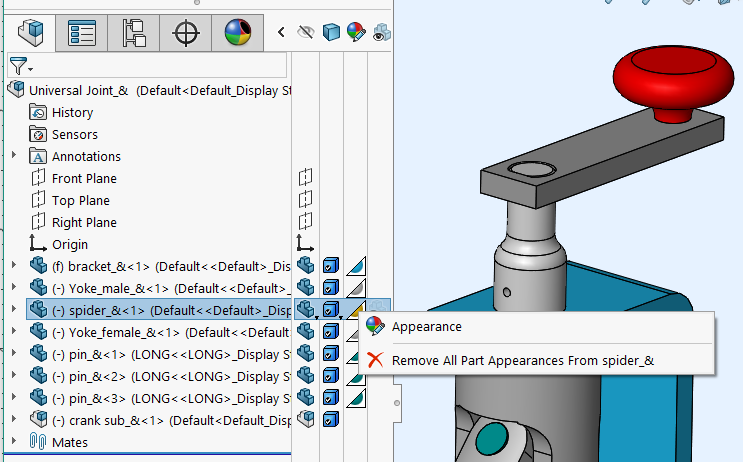
- APPEARANCE

- A LEFT CLICK on any of the icons in this column pops up a menu with the option to either edit the appearance of the associated part or to remove all appearances associated with that part.
- When a whole sphere icon
 is visible or the bottom rectangle of a sphere is visible
  , these are referring to what color is applied at the part level.
 - When the top rectangle of a sphere is visible
 , this is referring to what appearance is applied at the assembly level.
- TRANSPARENCY

- A left click in this column can toggle the transparency of a part on and off.
Good to know!
RIGHT CLICKING in any column within a ROW will bring up a menu with all of your Display Pane options for that row’s part.
Start putting that Display Pane to use and have a wonderful day!
Courtney Roemer – Application Engineer, CSWP
Computer Aided Technology

 Blog
Blog