Improving Large Assembly Performance - Part 2
In my last blog post, I decided to talk about MY tips and tricks on improving large assembly performance in SOLIDWORKS. In that first post, I talked about how we could improve performance by modeling some assemblies, like commercial/purchase items, as parts. This tip was actually part of a bigger list of my ‘Part Modeling Tips to Help Improve Assembly Performance’. In part 2, I’d like to now add to that list, because how we model our parts definitely affects performance. Below is a list of some other factors that can greatly affect how long it takes a part to ‘rebuild’.
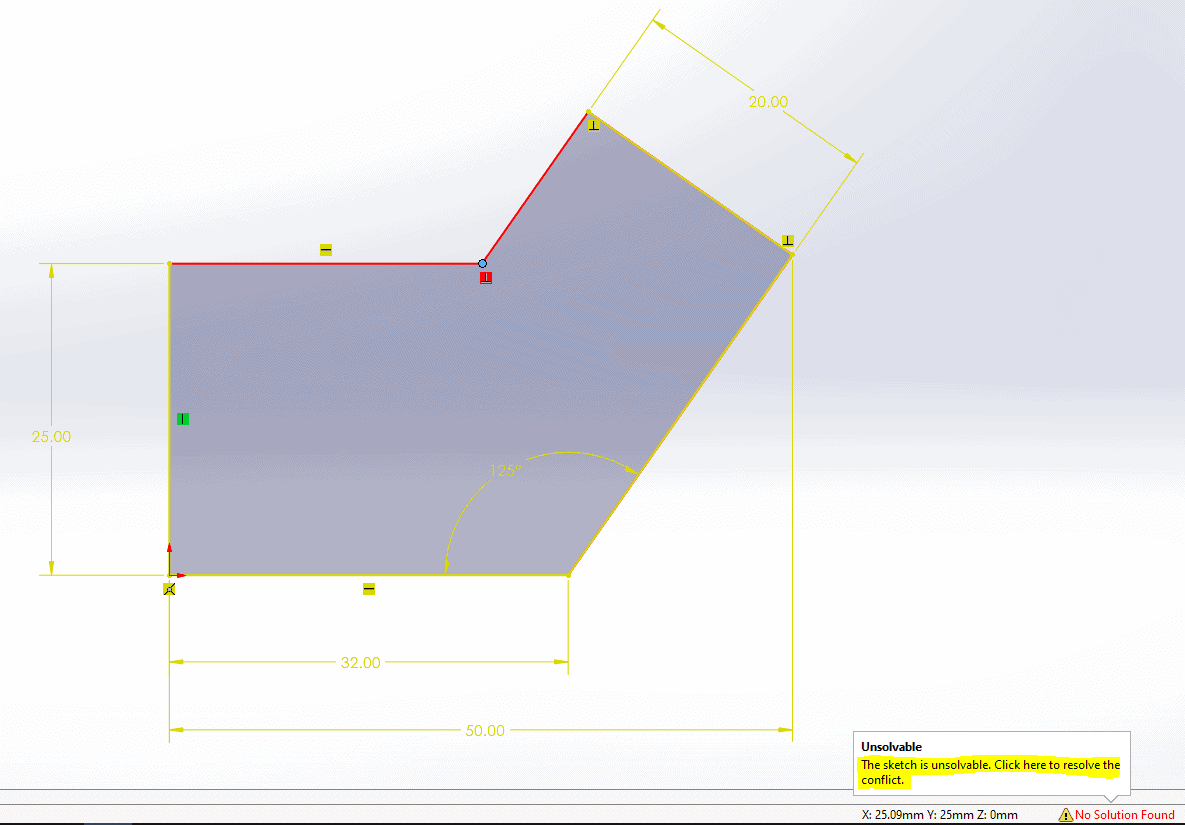
- Fully Define Sketches – A fully defined sketch is a sketch that has enough Dimensions and Relations so that there is nothing missing from the Design Intent of that Sketch. A fully defined sketch is one that turns completely black when all of those Dimensions and Relations have been added. The bottom line is that a fully defined sketch solves faster. Here are a couple of tools that may help with your fully defined sketches:
- Fully Define Sketch: A command that automatically applies dimensions and relations calculated by the SolidWorks application to fully define sketches or selected sketch entities. It is found under: Tools, Dimensions, Fully Define Sketch
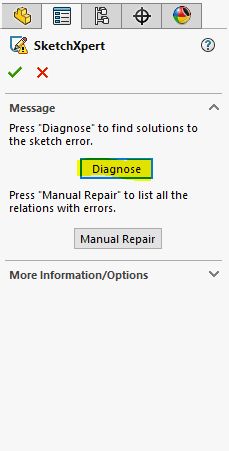
- SketchXpert: A tool that resolves over-defined sketches and proposes possible solution sets. This tool presents itself once there is an over defined sketch like the one seen below. Simply click at the bottom of the screen, as shown, and it will launch the SketchXpert tool.
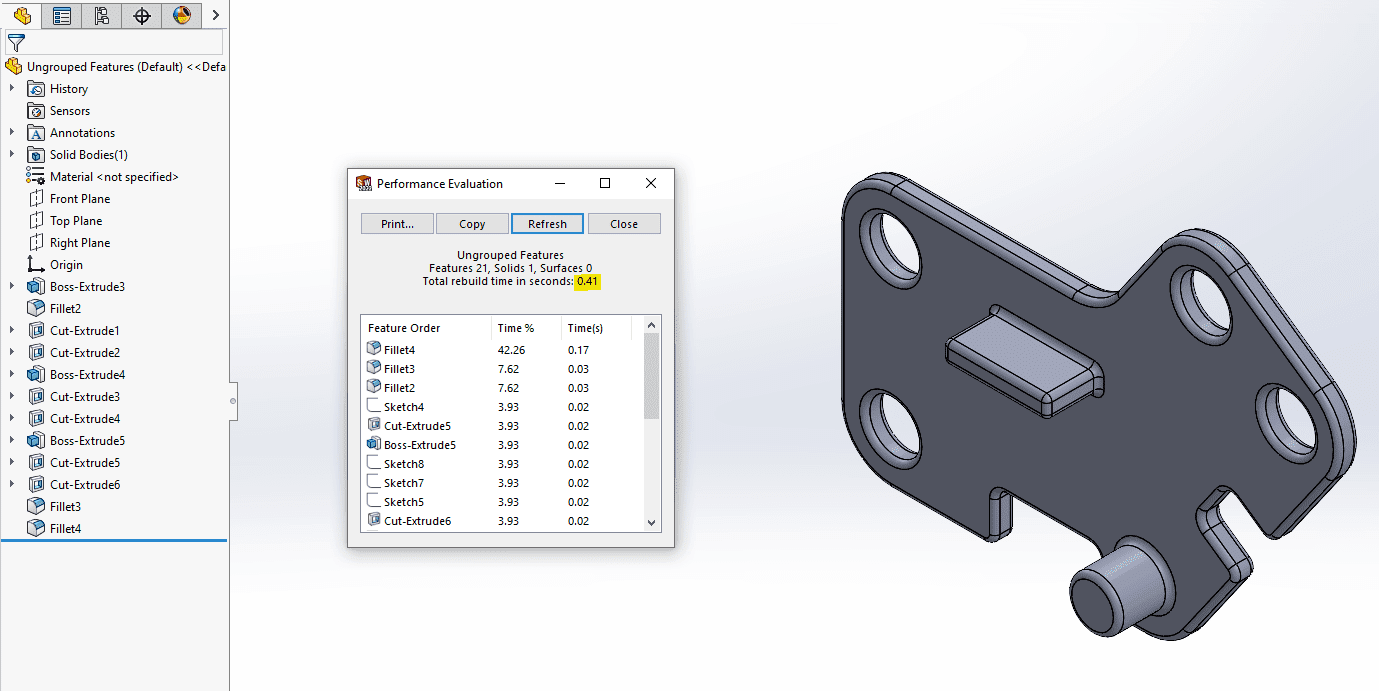
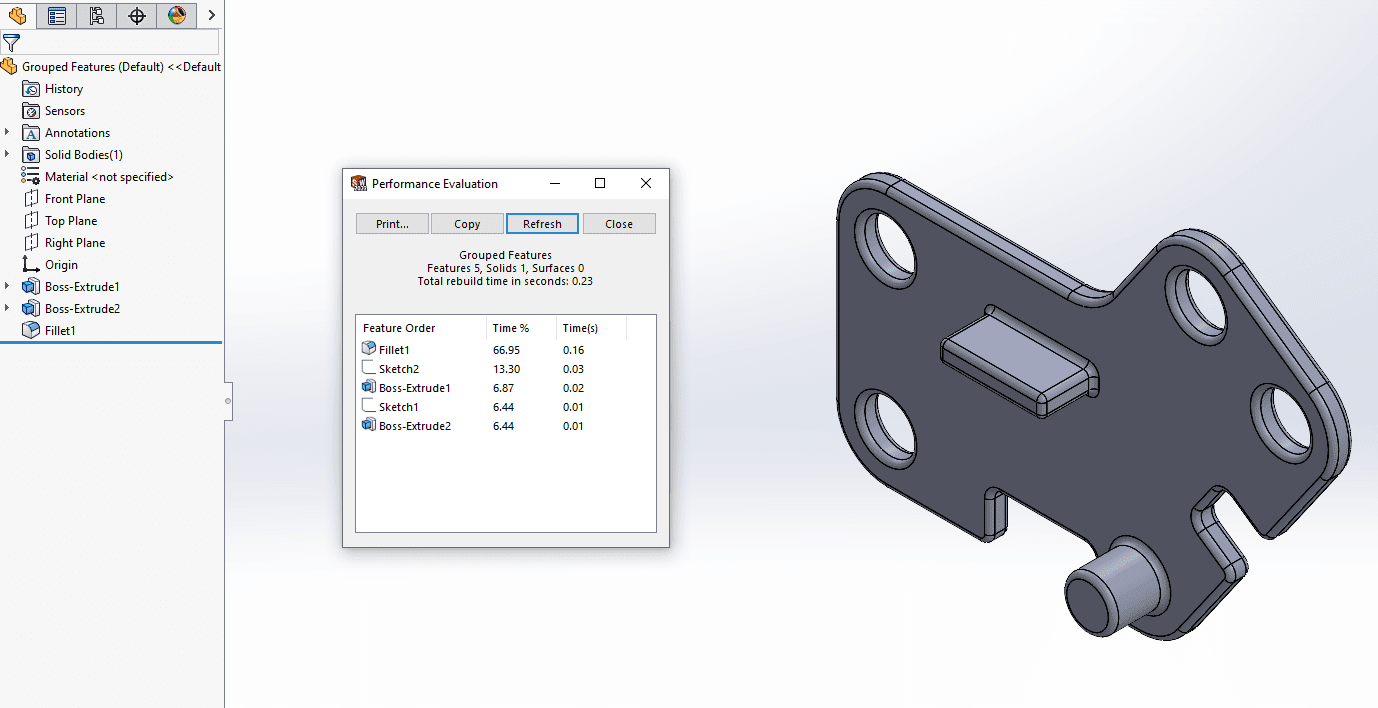
- Group Features Sensibly – Decide which features should get their own features in the Feature Manager tree. Just be sure to be careful of your Design Tables and what features you may want individual control over. But for example, below you will see the benefit of combining features as opposed to having several features represent the same part.
Ungrouped Features – 0.41 second rebuild time
Grouped Features – 0.23 second rebuild time. Almost a 50% rebuild time savings.
- Simplify Imported Geometry – Make sure all imported geometry is fully knitted and turned into a solid. Just use the Import Diagnostic tool which can be found by right clicking on the dumb solid in the Feature Manager Tree. Also, use FeatureWorks ONLY if recreating the feature tree is necessary. And, where appropriate, model assemblies as parts (see Improving Large Assembly Performance, Part 1).
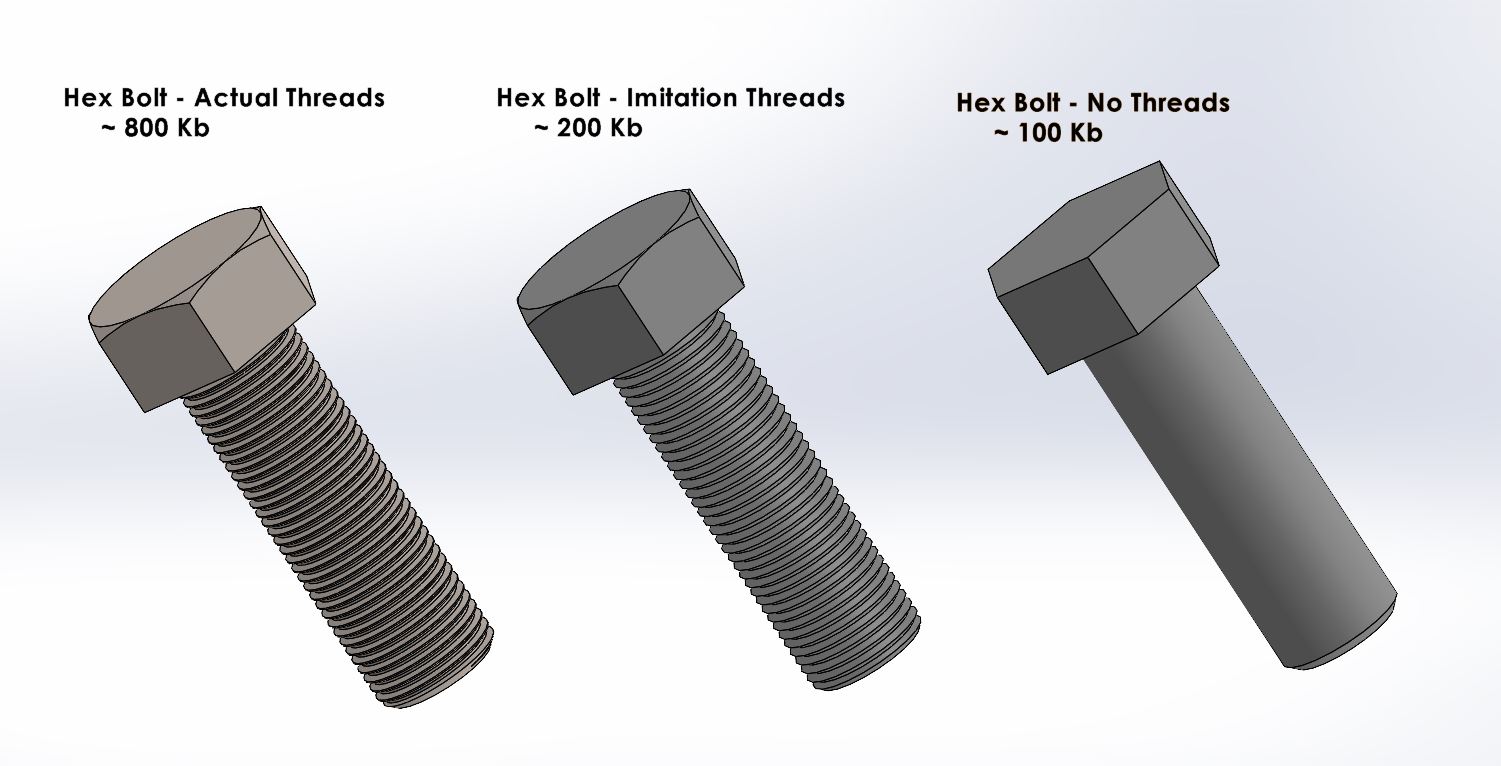
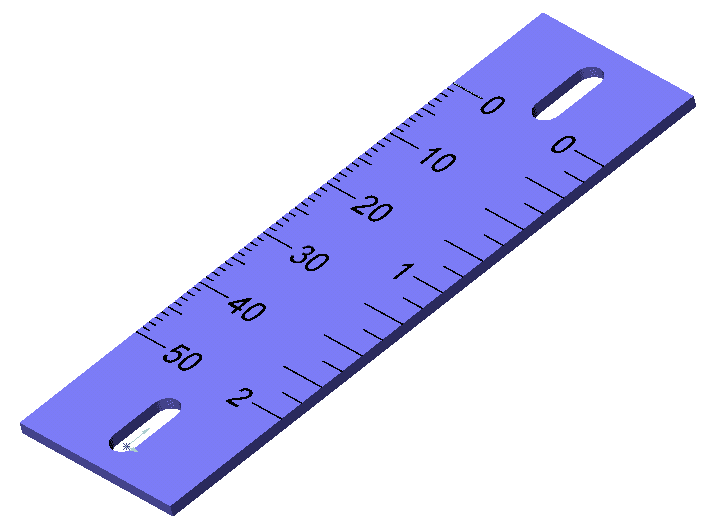
- Minimize Unnecessary Detail – Don’t add any more detail to your parts than absolutely necessary. Not only does it affect file size, but it also greatly affects performance. For example, don’t model actual threads. Use a simplified version as shown below in the picture on the left. And for the detail seen in the picture on the right, use sketch entities and text as opposed to actual features.
- Minimize the Use of Complex Features – Minimize the use of complex sweeps and lofts, as these take much longer to regenerate. See if you can make comparable geometry with revolves. Another example is shown below. DO NOT model an actual spring. Instead, model a cylinder with a helix sketch to ‘represent’ the spring.
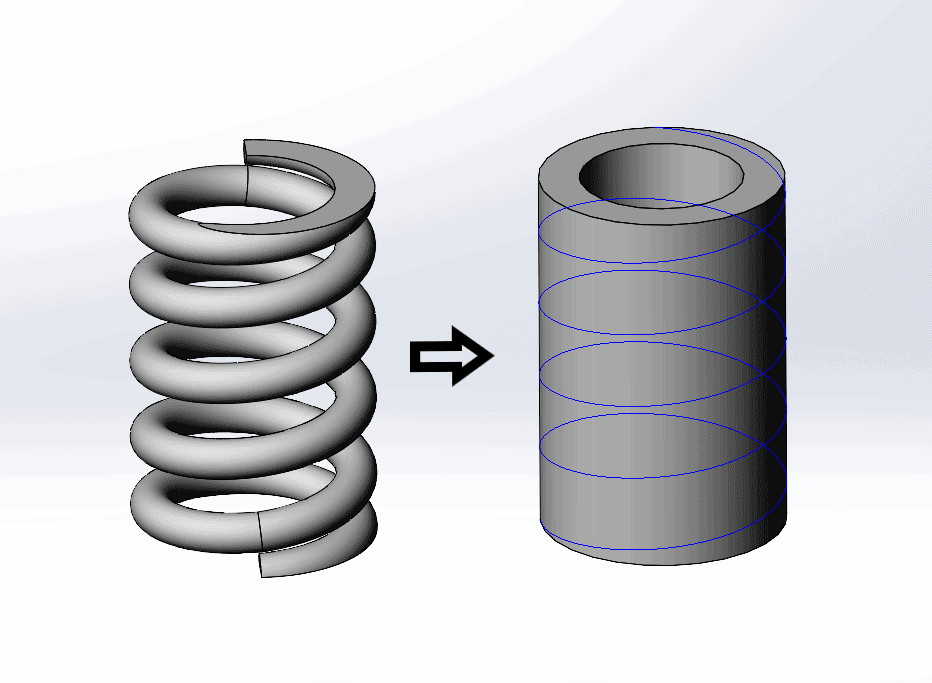
In the above image, the actual spring on the left is around 3,750 Kilobytes and consists of about 77,000 triangles. Whereas the imitation spring on the right is only about 20 kilobytes and consists of only around 400 triangles. If this is a purchase item, with its own part number, why bother adding in all that detail?
So, if you are having issues with large assembly performance, try these part modeling tips. The bottom line: the less detail, the better the performance. And then stay tuned for my next post, part 3, where I introduce you to a couple of part level tools that can be used to help speed up performance.
Regards.
Ken LaVictor
Sr. Applications Engineer
Computer Aided Technology

 Blog
Blog