Get a Better View with Custom Detail Views in SOLIDWORKS
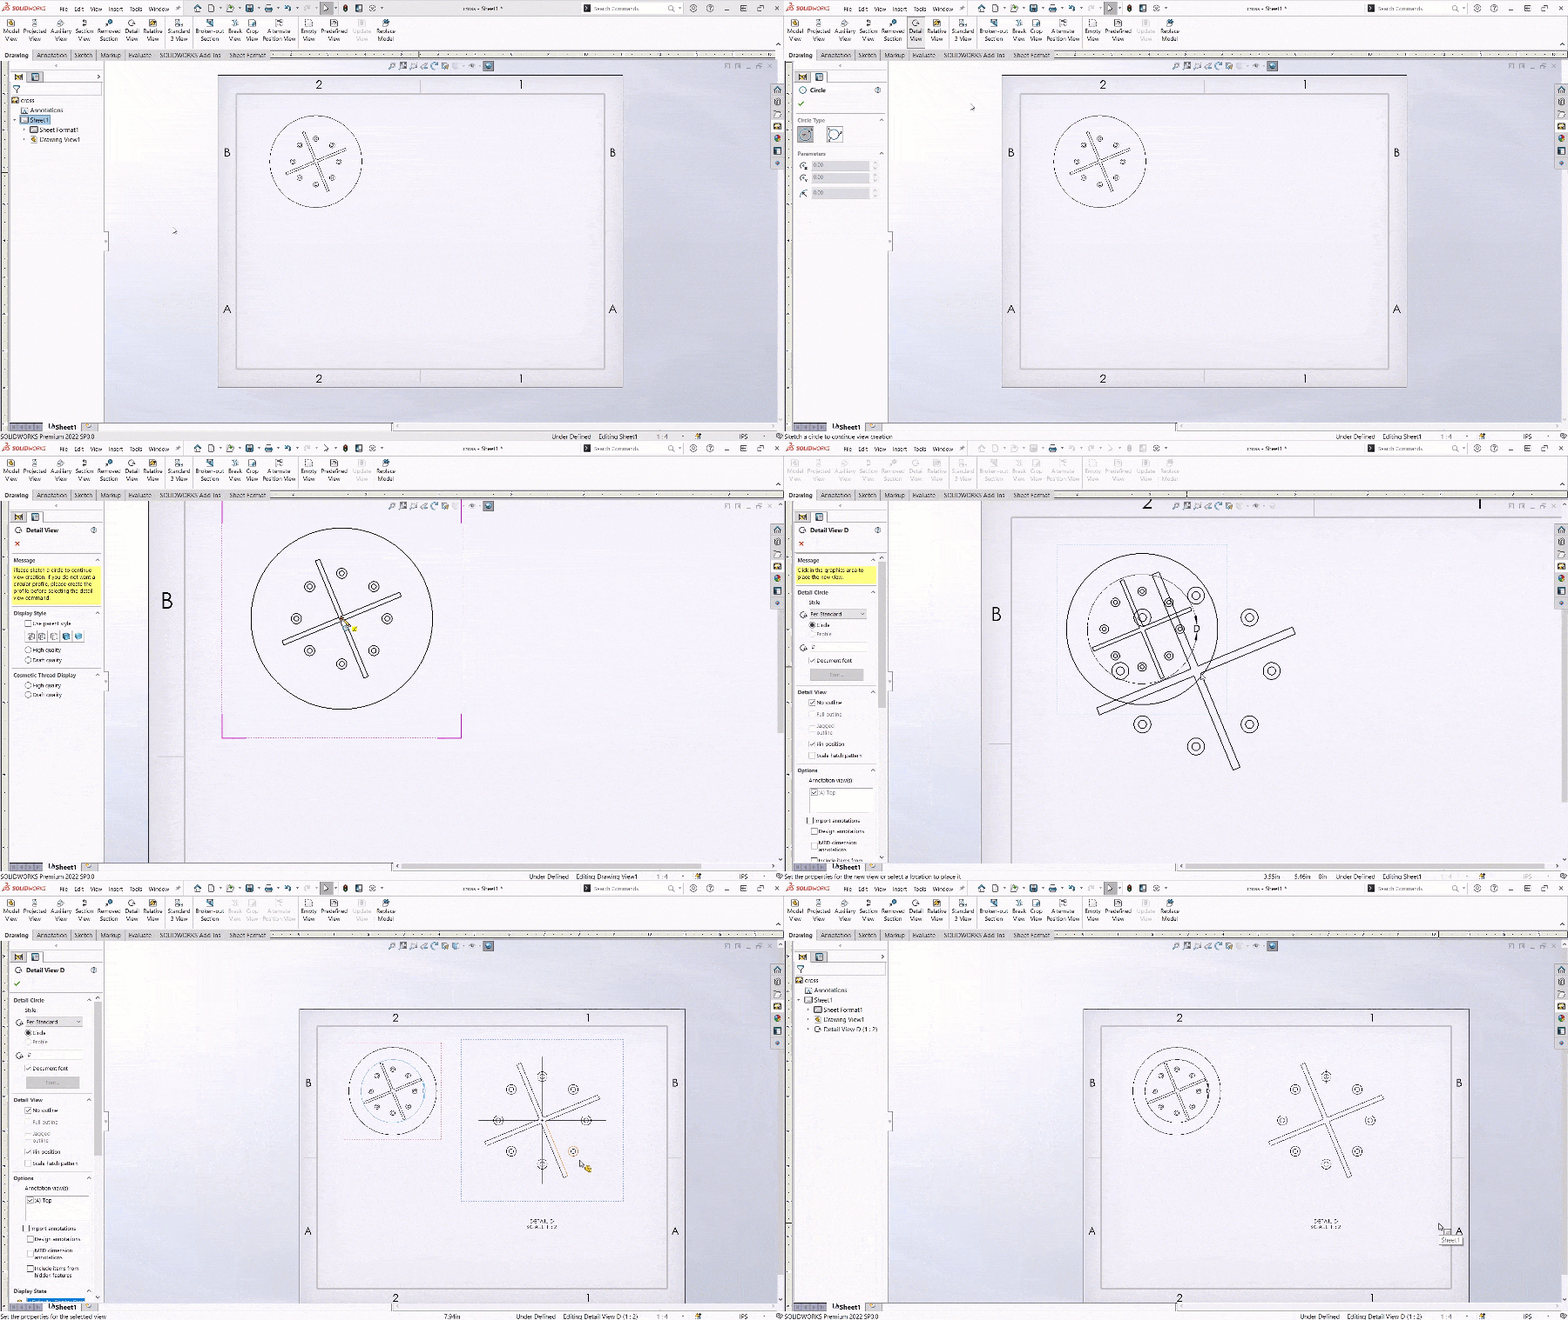
Creating detail views is simple in SOLIDWORKS Drawings. All you have to do is activate the detail view command, draw a circle and BOOM! You have your detail view.
But within that workflow lies a problem. You have to draw a circle…
What happens when the detail you want to capture doesn’t fit within a circle? What if you need a long skinny detail like a slot or want an even more flexible custom detail view shaped like a closed spline?
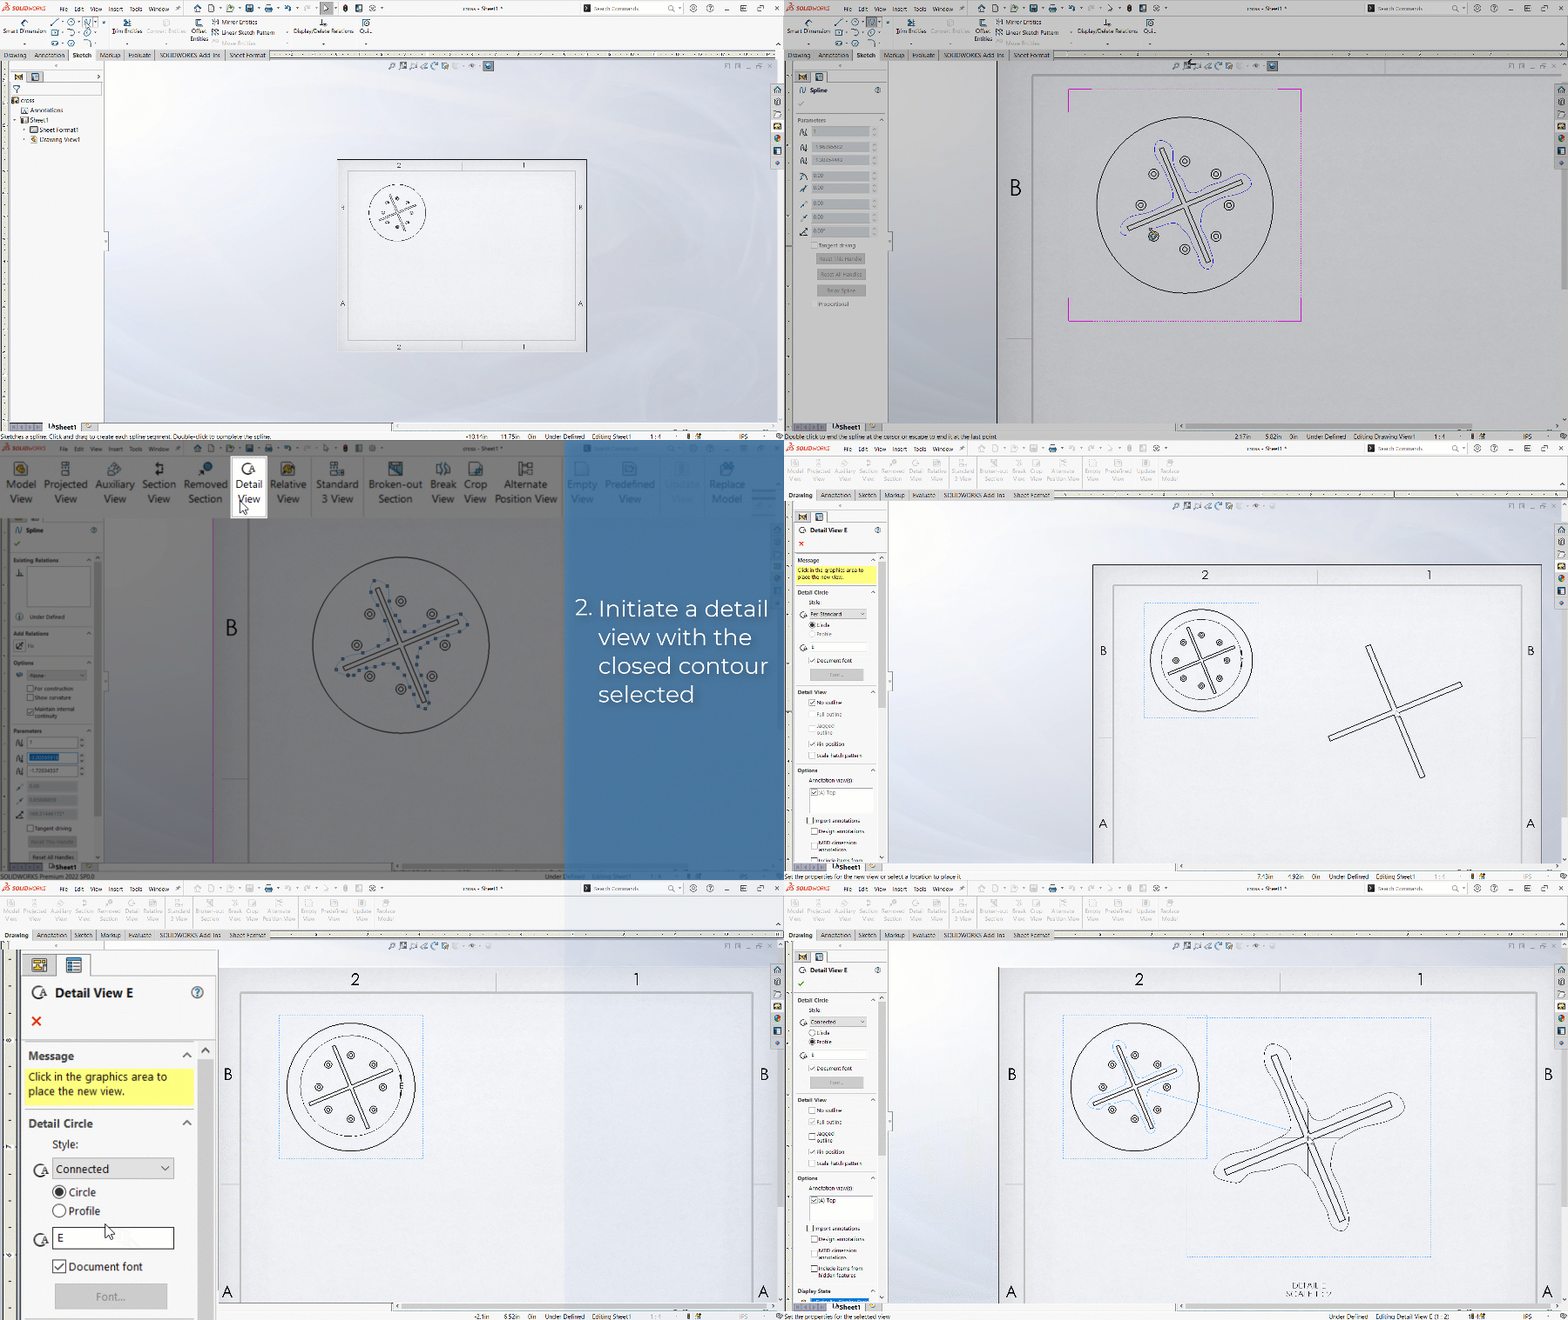
In this drawing I want a custom detail view to capture just the cross in the middle of the bolt pattern. If I used the standard circular view I would be bringing the bolt pattern into the detail view as well as you can see below.

Instead of using a circle to define our detail view, let’s use a custom closed spline to only detail the cross and exclude the bolt pattern from the detail view. To create the custom detail view:
- Create a closed contour sketch around the desired features
- Initiate a detail view with the closed contour selected. This will make your custom closed contour the boundary of the detail view.
- Change the Detail View style from “Per Standard” to any other style you prefer.
- Choose “Profile” from the Style selection radio buttons.

This workflow of predefining the boundary with sketch geometry and THEN initiating the desired drawing view is a common method of getting custom drawing views out of commands. For custom Section Views or Removed Sections, predefine your cutting line with sketch lines and then initiate the command. For custom Broken Out Sections the same workflow applies, predefine boundary, then initiate the command.
Using the above steps, you will be able to make any custom view you could need in SOLIDWORKS Drawings. Check out this article as well to learn how to add location callouts to your drawing views!
Happy Detailing!
Kit MacDonald
Application Engineer
Computer Aided Technology

 Blog
Blog