"Edit All" System Option for File Locations in SOLIDWORKS
Every new software version has so many new features that sometimes, very cool features get overlooked. The Edit All  System Option for File Locations was one I missed and it’s SO handy.
This function is when you need to change multiple File Locations to different locations. Instead of going through each and every folder, this tool will allow us to edit all the locations in 1 single screen. Pretty cool? Let’s check it out!
Open a session of SOLIDWORKS 2017 or later. Go to Options > System Options > File Locations and will see this screen. Next to the Show folders: Document Templates is the Edit All button.
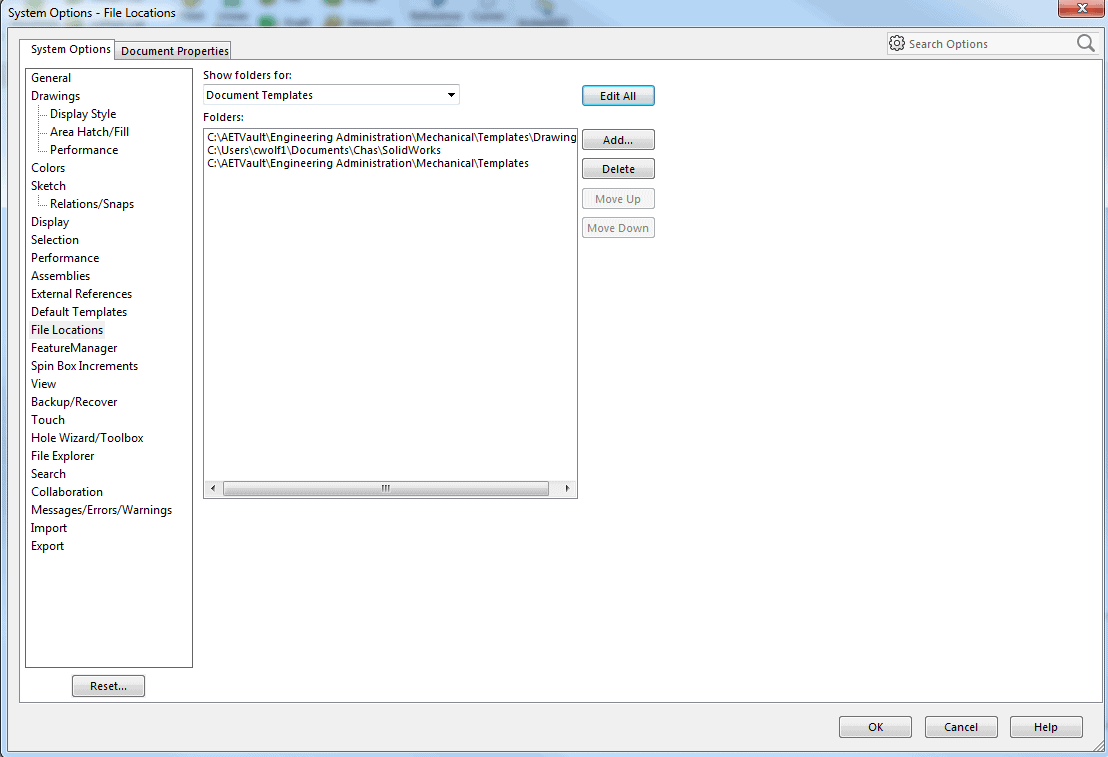
When the Edit All button is selected, the Edit All File Locations window pops up and is ready to edit.
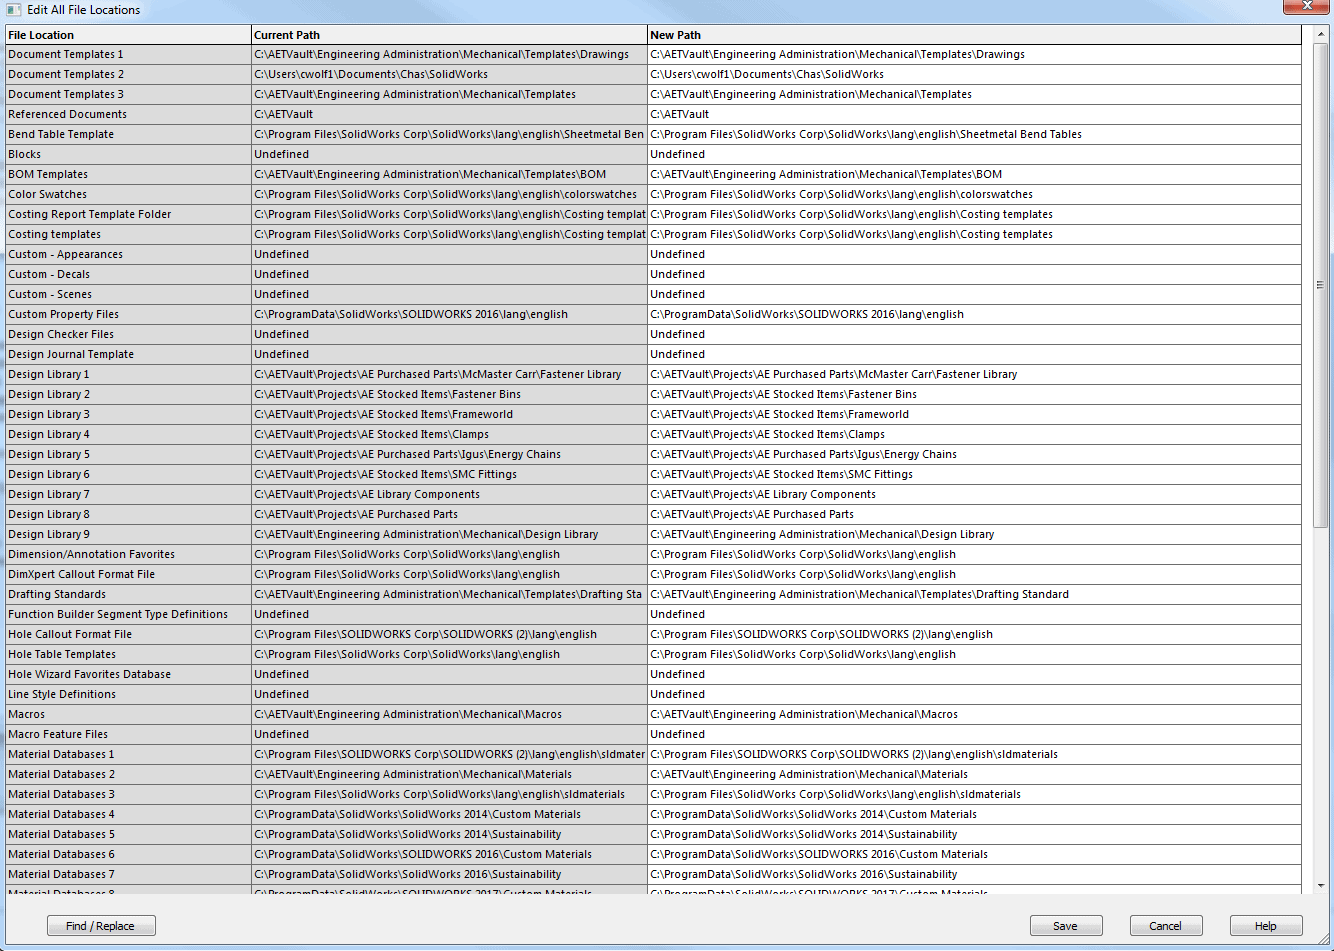
In this example, we can see that the user has a SOLIDWORKS (2) folder from a new installation. There is another folder for SOLIDWORKS from a previous version. Take note of the path of the new installation as we make the changes.

At the bottom of the Edit All File Locations Window, select the Find/Replace button  . This windows appears:
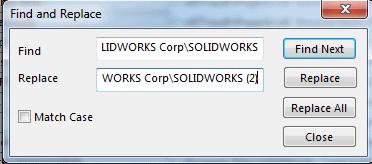
Type in the current File Location in the Find box.
Type in the new File Location in the Replace box.
(Unfortunately you can not cut and paste in a location in the Find or Replace box.)
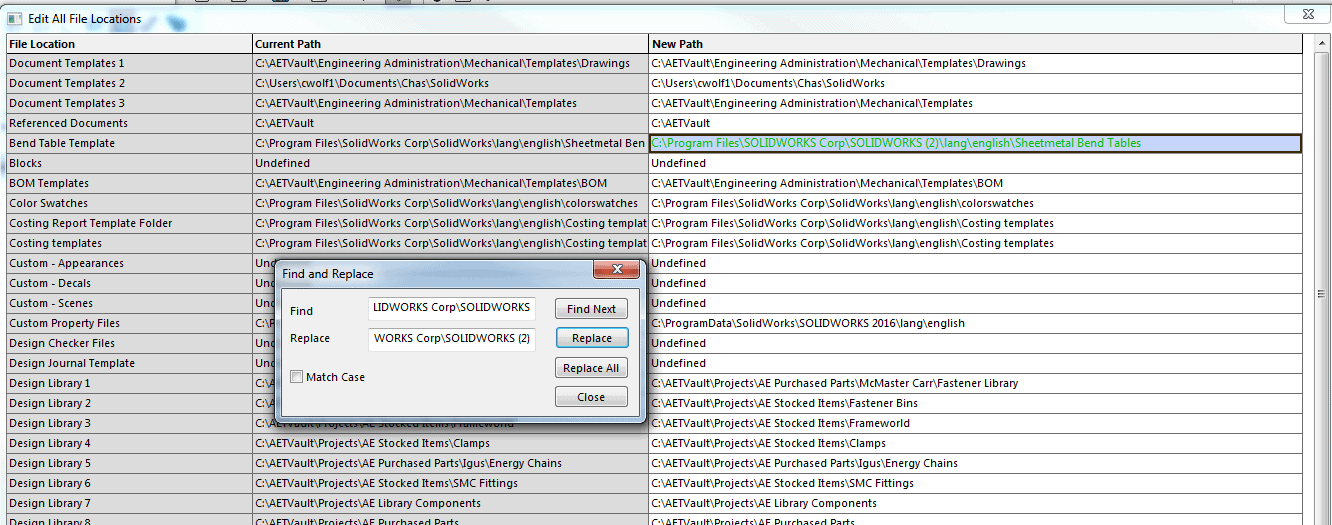
Users have the option to Replace All or scroll through each file location and Replace individually.
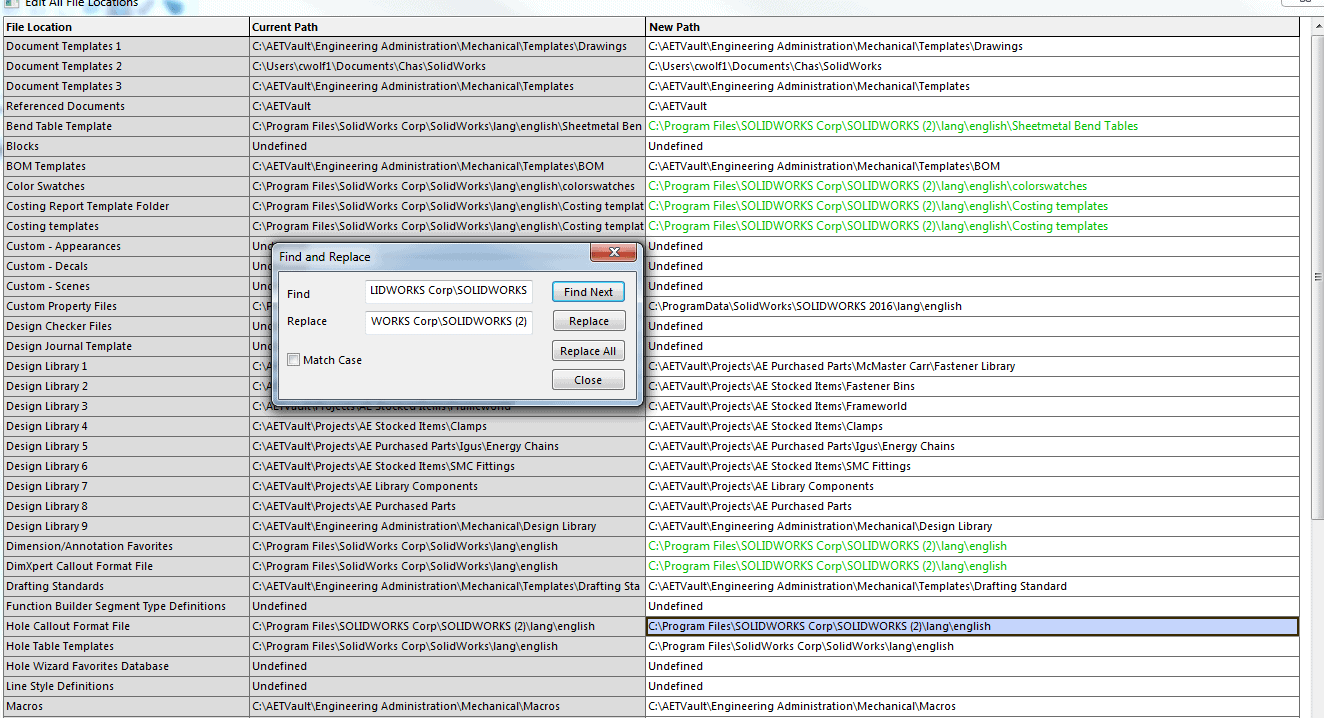
When you have completed the list of file locations that need to be changed, you will see the New Path highlight in green.
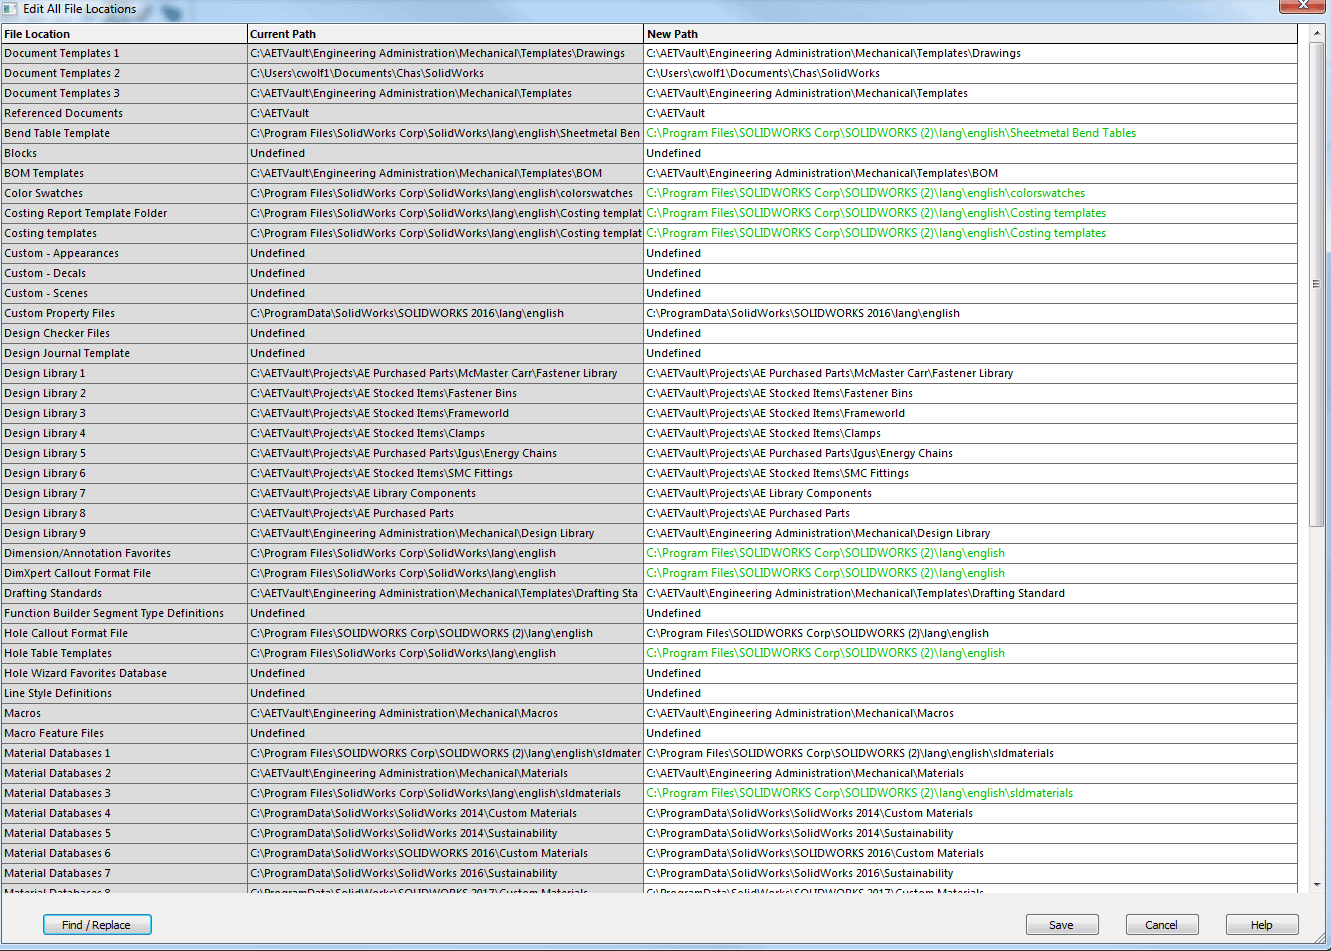
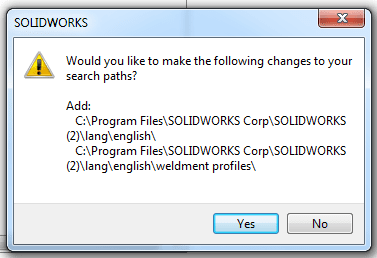
When you are done, select the Save  button. SOLIDWORKS will asks for a confirmation that you want to replace the file locations. Select Yes to complete the changes or No if you need to make additional changes.
This is sure a time saver and also a great way to have a list of all your file locations in 1 place.
I hope you found this helpful! Thanks for reading.
Judy Marlo, CSWE
Application Engineer
Computer Aided Technology, Inc

 Blog
Blog