Fluid-Structure Interaction- Fluid Cavities and SIMULIA for SOLIDWORKS
In today’s rapidly changing tech world, there is a growing demand for simulation to be performed early and often in the design process. Furthermore, simulations are becoming more complex as the programs that are used can handle coupling multiple types of physics together. One of the most common demands that I experience is the need for Fluid-Structure Interaction, or FSI for short. These types of problems usually involve coupling a fluid dynamics solver with a structural solver. With the power of SIMULIA for SOLIDWORKS, we can approximate these types of problems with a couple of different features: Fluid Cavities and SPH (smooth particle hydrodynamics) elements. I covered SPH elements in my previous blog. In this blog I’ll be covering the Fluid Cavity feature.
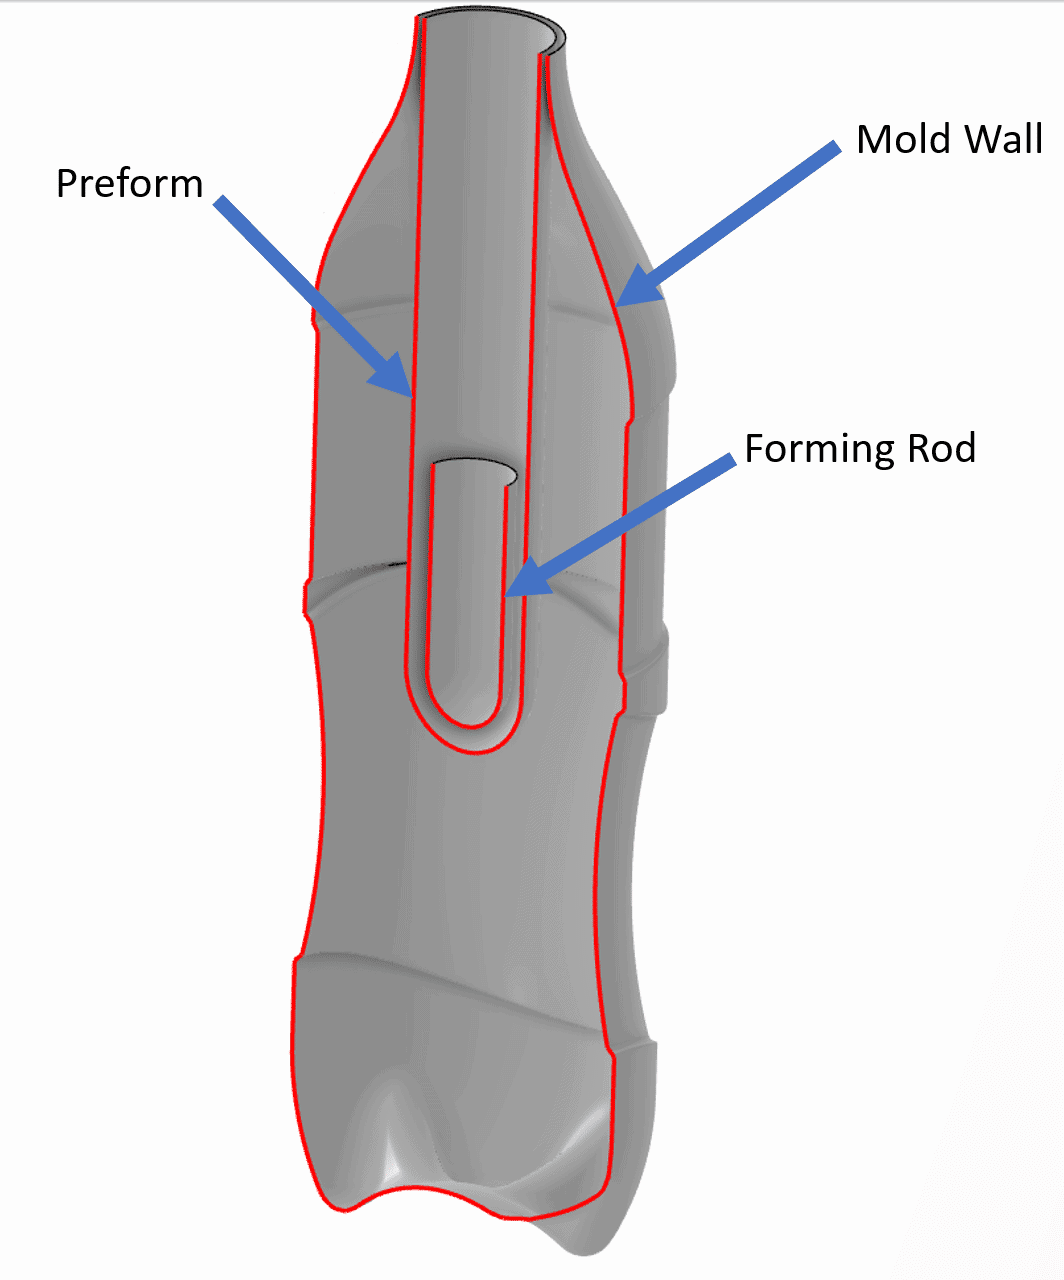
Figure 1
The Fluid Cavity feature is used to simulate the response of a structure when it is filled with a fluid under pressure. Today we will demonstrate this feature with a blow molded plastic bottle. The simulation consists of 3 parts: the preform, the forming rod, and the mold wall. The forming rod will be forced down into the mold, drawing the preform into shape. While this happens, the inside of the preform will be under pressure, expanding it to fill the inside of the mold wall.
The fluid cavity feature is located under the Abstractions tab in the Structural Model Creation app. Once clicked, select the surfaces exposed to the fluid cavity and apply the appropriate material properties. We will discuss these properties later.
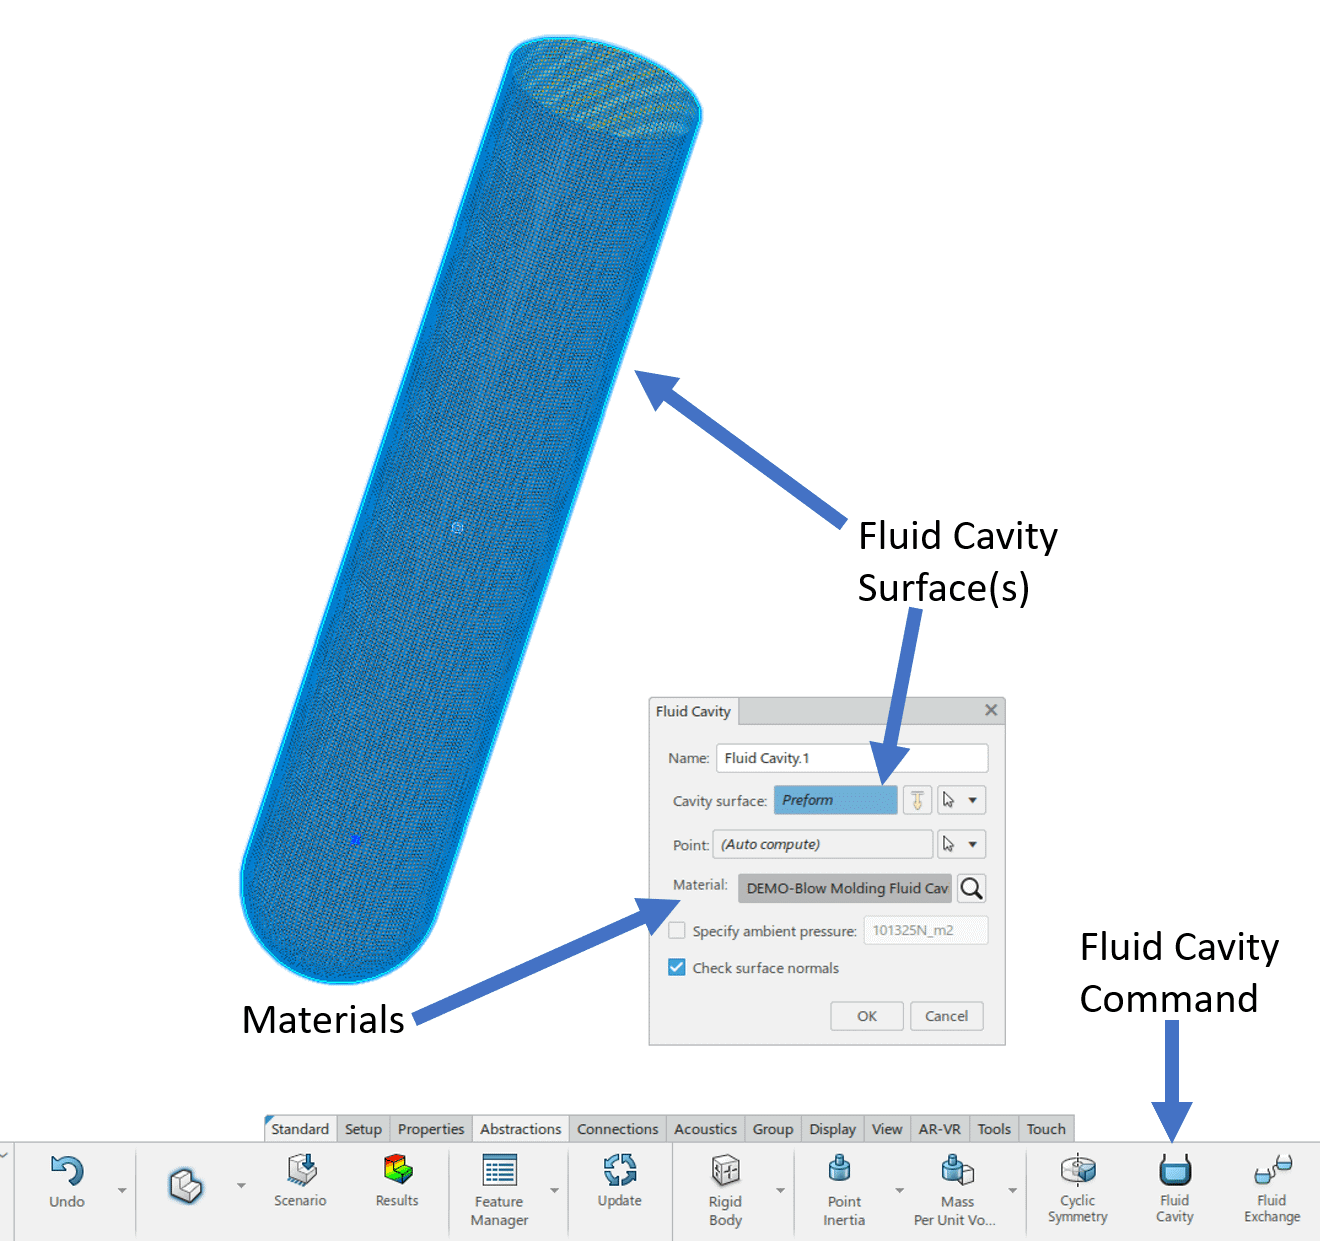
Figure 2
Notice in figure 2 that there are options to add ambient pressure and select other reference points, if desired. Now that the abstraction for the fluid cavity is defined, we must enter the pressure applied by the fluid. This is done through the Mechanical Scenario Creation app under the drop down for a Pressure load. See figure 3.
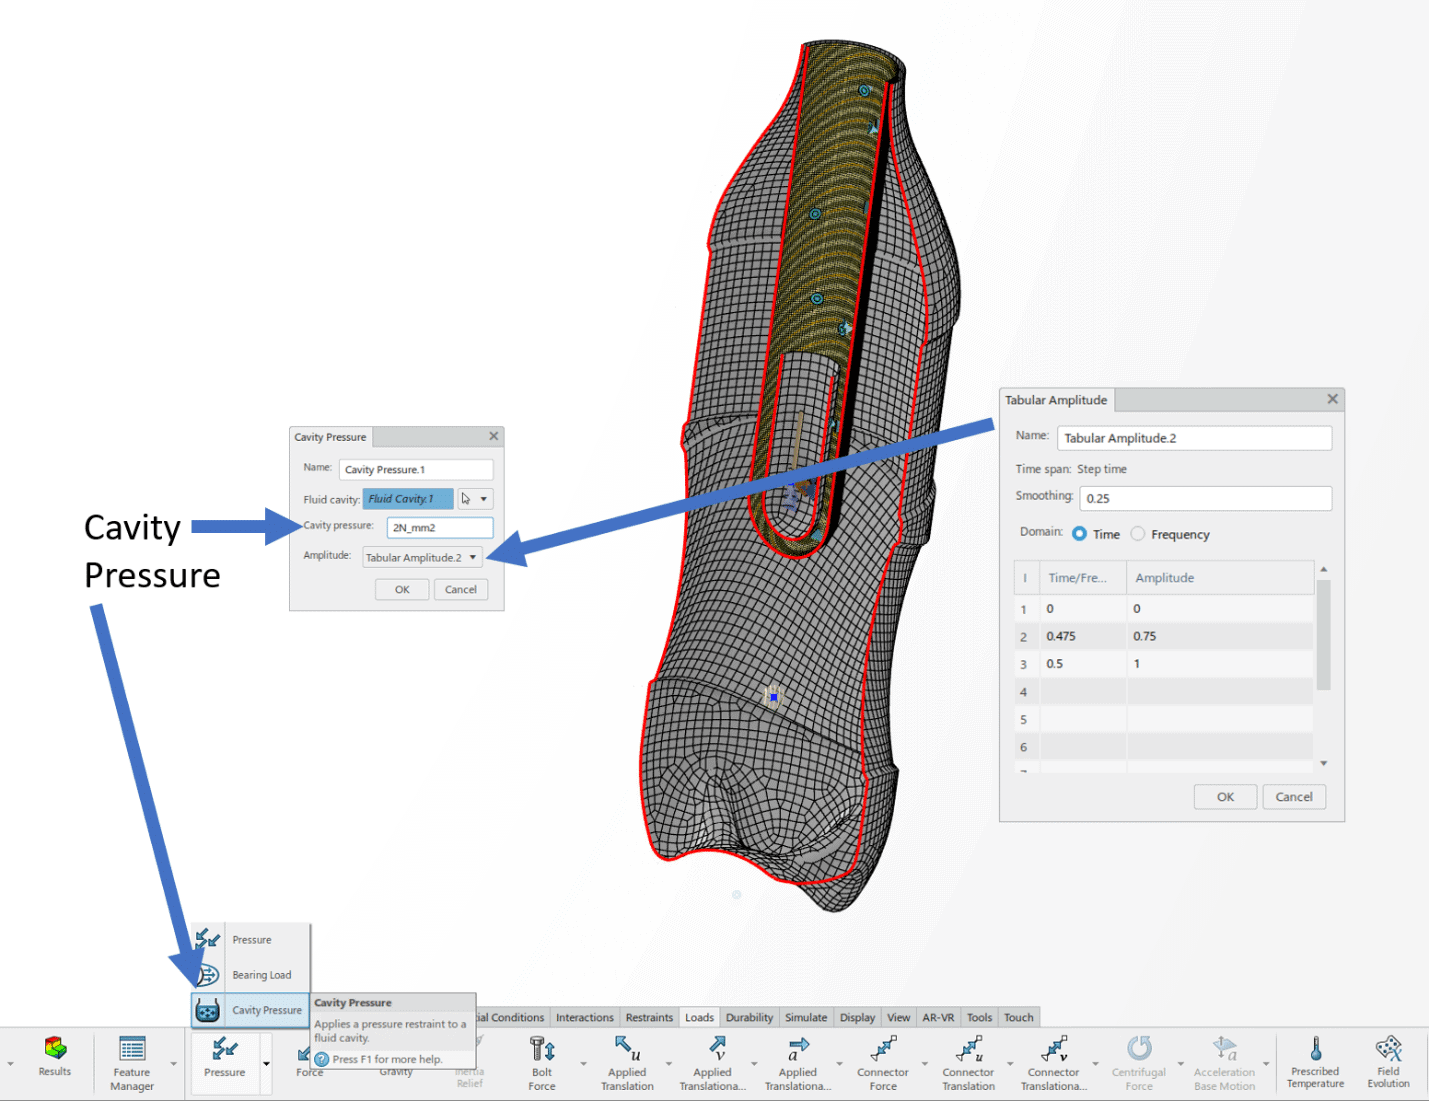
Figure 3
We will now apply a 2 MPa pressure to the cavity, but we want it to ramp up throughout the simulation. To do this, we can simply apply a tabular amplitude to control the magnitude of the load. A smoothing function is applied to this table to prevent sharp changes in the loading. This can help with convergence.
The rest of the setup is simple; we apply a few fixtures to restrain the components and setup the explicit dynamic solver. For more on the explicit solver, take a look at my blogs using the links below.
What is the Next “Step” in 3DEXPERIENCE Simulation?
Once the solution has completed, we can view the results with the Physics Results Explorer app. See figure 4, the animation shows a section view of the bottle in which you can see the forming rod guiding the expansion as it moves down into the mold cavity.
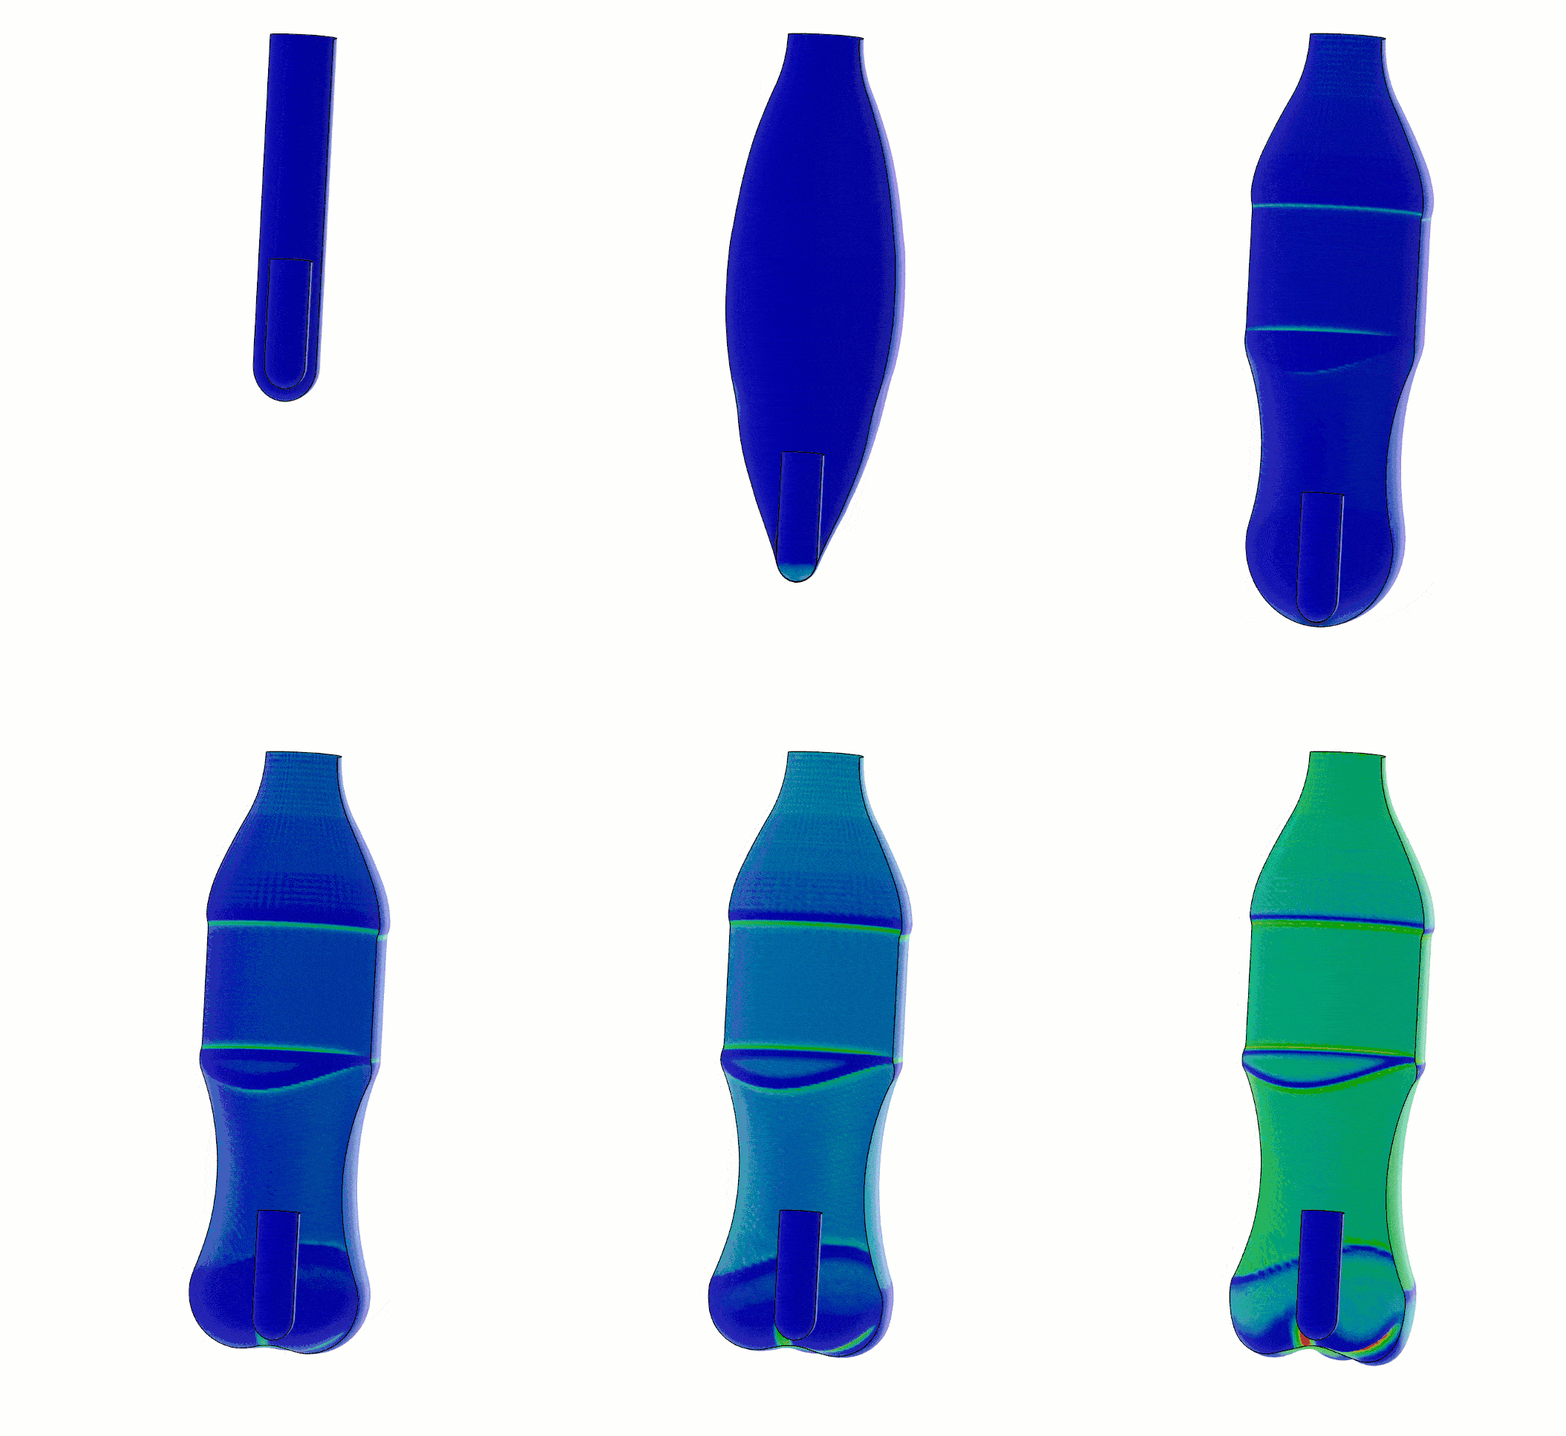
Figure 4
The Fluid Cavity allows for use of the CVOL (Fluid Cavity Volume) solver variable that allows us to plot the fluid pressure and the volume of fluid. Figure 5 plots the fluid volume vs time.
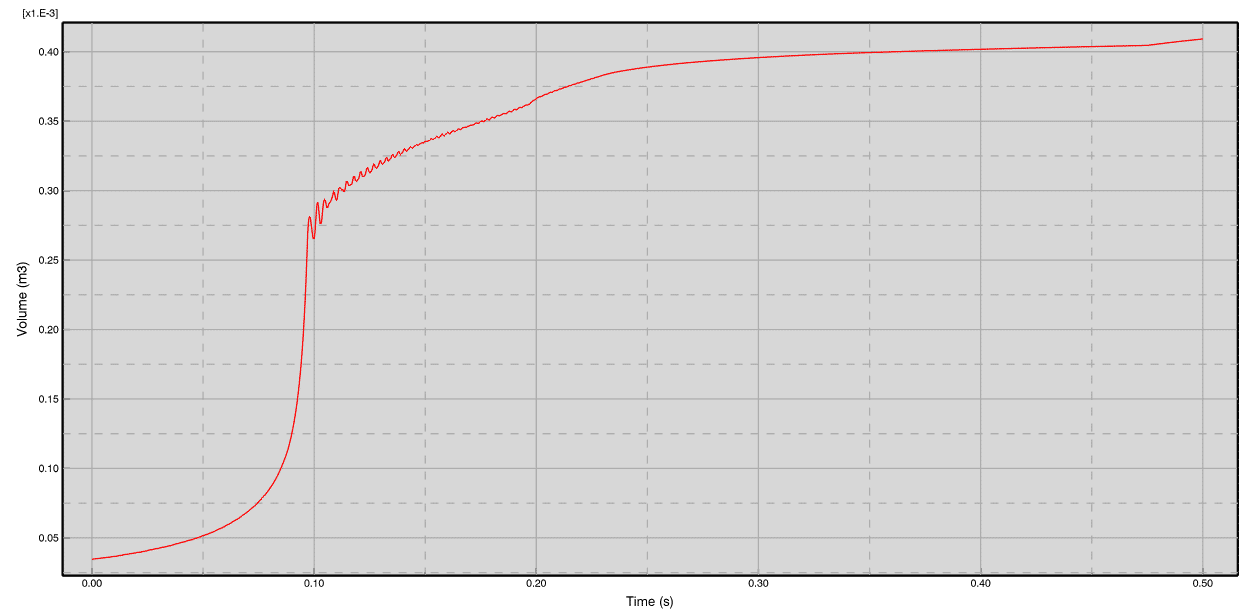
Figure 5
Fluid cavities are a great way to account for fluid pressure effects on a structure. This feature is reserved for incompressible or nearly incompressible fluids because the only properties considered are density and bulk modulus. The fluid cavity does not take other fluid properties into account (like thermal properties or equations of state).
Like SPH particles, the Fluid Cavity does not replace a full FSI problem, but it does fill a niche. It can be useful in any application that may have an internal fluid meant to deform the structure via hydraulic pressure such as bottles, balloons, and other encapsulated incompressible fluids.
I hope that this blog has enlightened you further to the capabilities of SIMULIA for SOLIDWORKS on the 3DEXPERIENCE Platform. There is a lot of power behind this product, and we would be happy to discuss any of your applications to see if one of our great simulation products is a fit.
Matt Sherak
Sr Simulation Product Specialist, Elite Applications Engineer
Computer Aided Technology

 Blog
Blog