Hybrid Modeling Now

Hello everyone! I am in the process of trying to organize my basement. One of the biggest issues has been organizing tools. This is a good opportunity to put my 3D printer to use and help get everything in order. Now, I could design something from scratch but I would guess that I am not the first person to come across this issue. I also know that my time is a valuable limited resource and those summer movies aren’t going to watch themselves.
So, I decided to go on Makerbot‘s Thingiverse and do some searching. I figured that it would be quicker to leverage the brain power of the maker community (this may be the only good part of the internet). Within 10 minutes I found a file that looked pretty good. I downloaded the file and checked the dimensions only to find that it isn’t exactly what I wanted. I want to make a few “tiny” modifications, but I know that I cannot make the changes I want in my slicing software. No worries, because working with mesh files (STL, 3MF, etc) has gotten easier inside SOLIDWORKS, especially in SOLIDWORKS 2022. Our own Jordan Puentes wrote up a great SOLIDWORKS 2022 What’s New article about the improvements to Hybrid modeling (Hybrid modeling is the term used when talking about the mixing of mesh BREP bodies and standard SOLIDWORKS BREP bodies).
Here is the TLDR for you hasty individuals (I can read your minds!): Solid model bodies no longer need to be created, converted to a mesh body followed by a boolean command (Combine command). What I want to discuss is how to properly import those mesh files so that you can take advantage of the new workflow and cover some command limitations that I found in the process.
Mesh Import Options
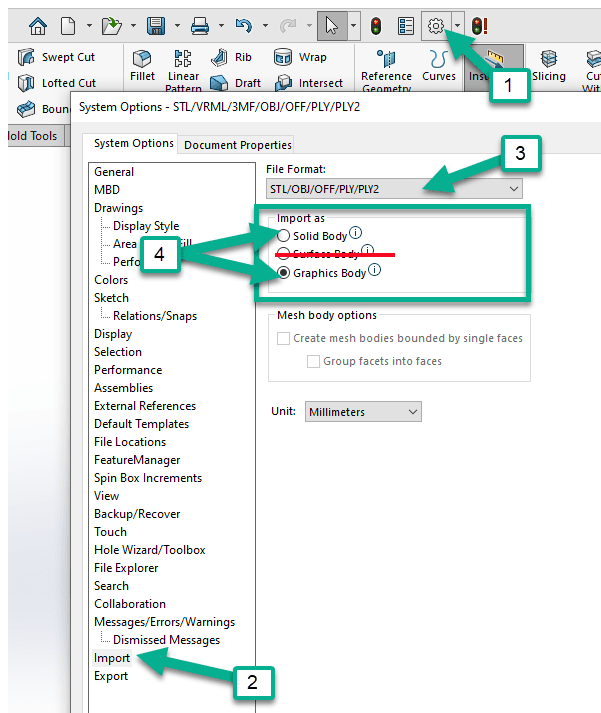
Let us look at our STL (mesh) import options. In the image below you will notice that the green arrows are pointing to the “Import as” options for Solid Body or Graphics body and there is a red line over the Surface Body option. If I import the STL as a Surface Body I will have to use the old workflow for modifying the mesh. The “Import as” for the Solid Body and Graphics Body each have a couple of things to note for Hybrid modeling.
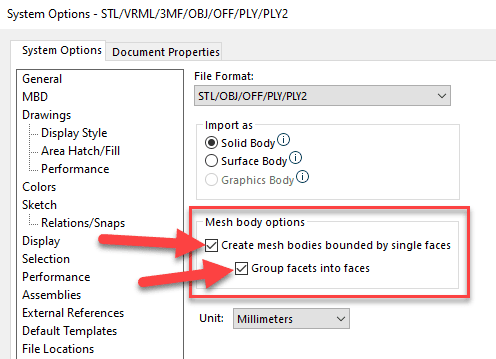
If I “Import as” a Solid Body you will see that the Mesh Body Options are available. Tip: I generally check both of the boxes because I find it easier to work with the model when the facets have been grouped into faces.
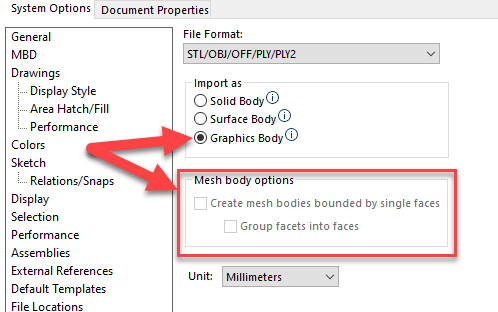
If I “Import as” a Graphics Body you will see that the Mesh Body Options are greyed out.
I will show you the import workflow for both methods.
Mesh Import Option 1 – Solid Body
The first method is “Import as” Solid Body. This is probably the easiest and most straightforward method.
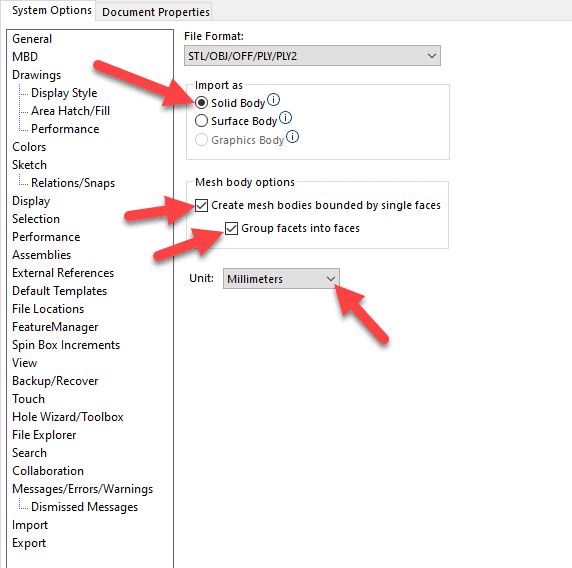
Start by selecting the file that you want to open and then click on the Options button.
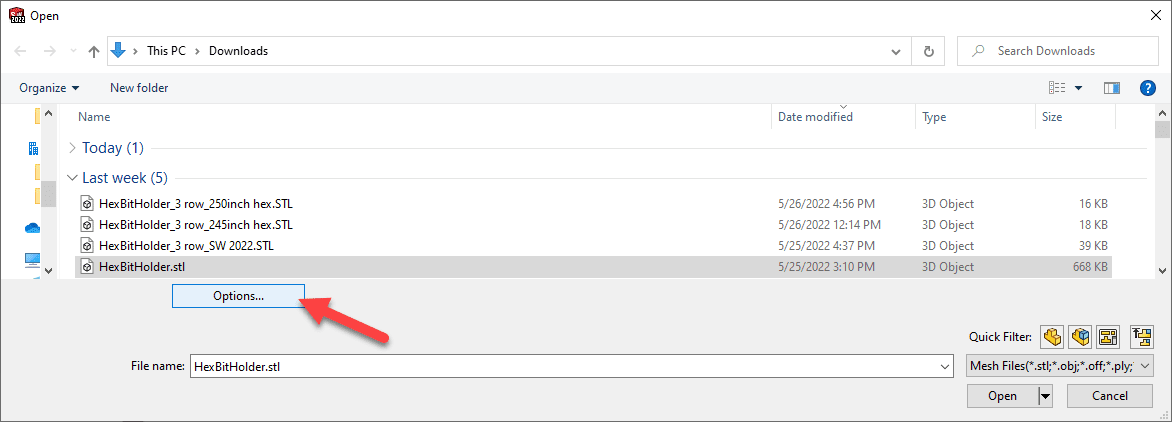
Select the Solid Body option under “Import as” and then your Mesh Body options and unit.
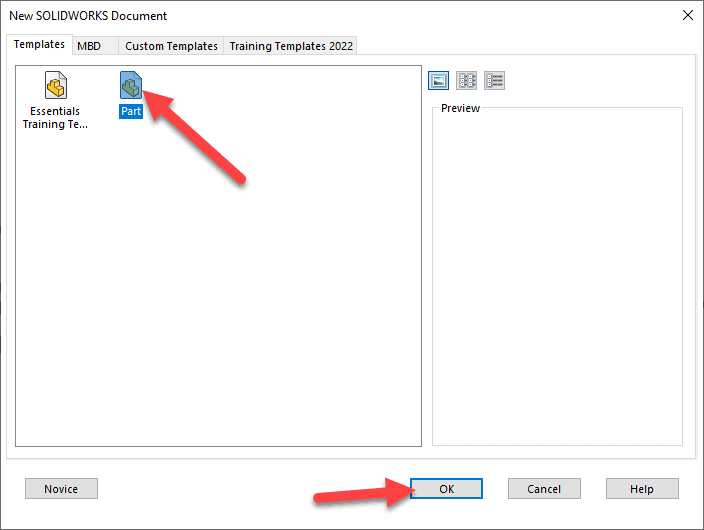
You then select the Part template that you want to use.
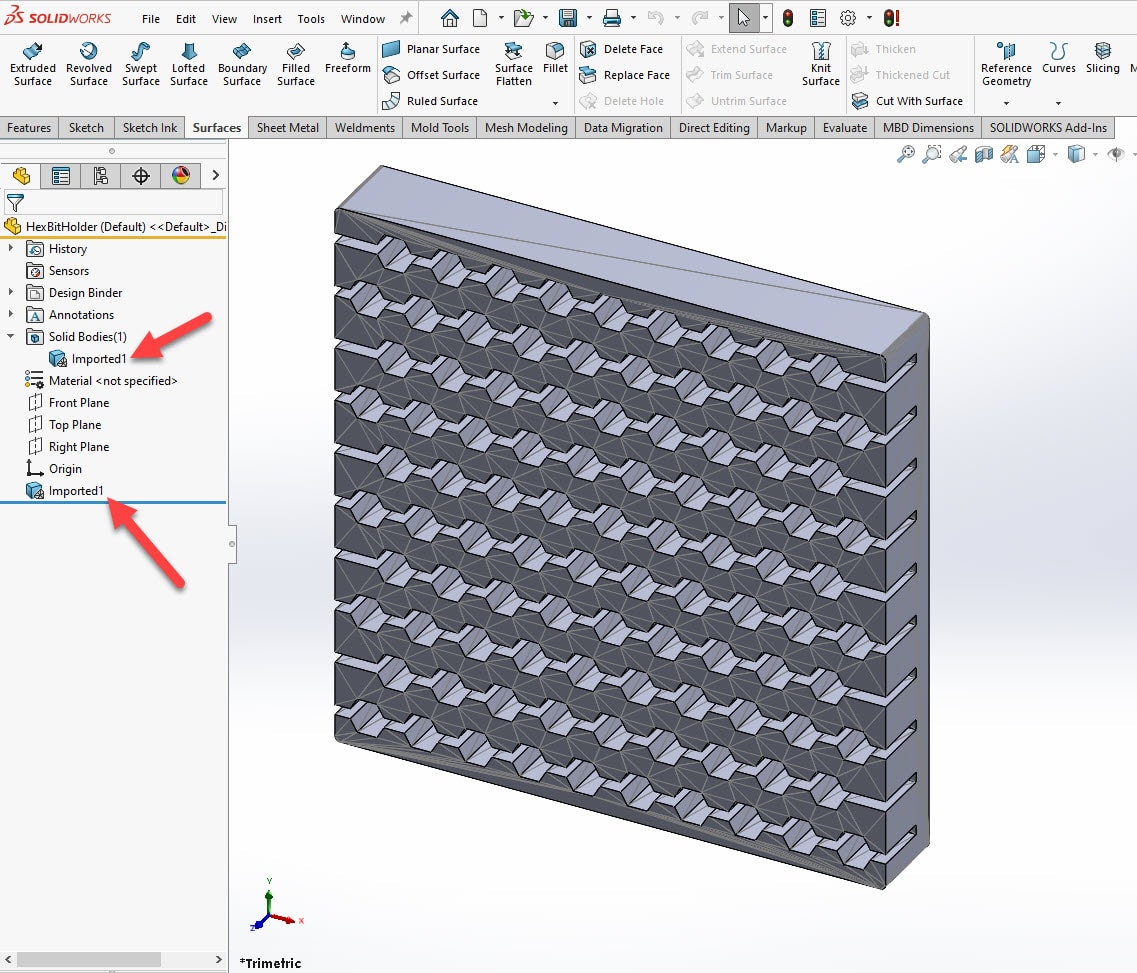
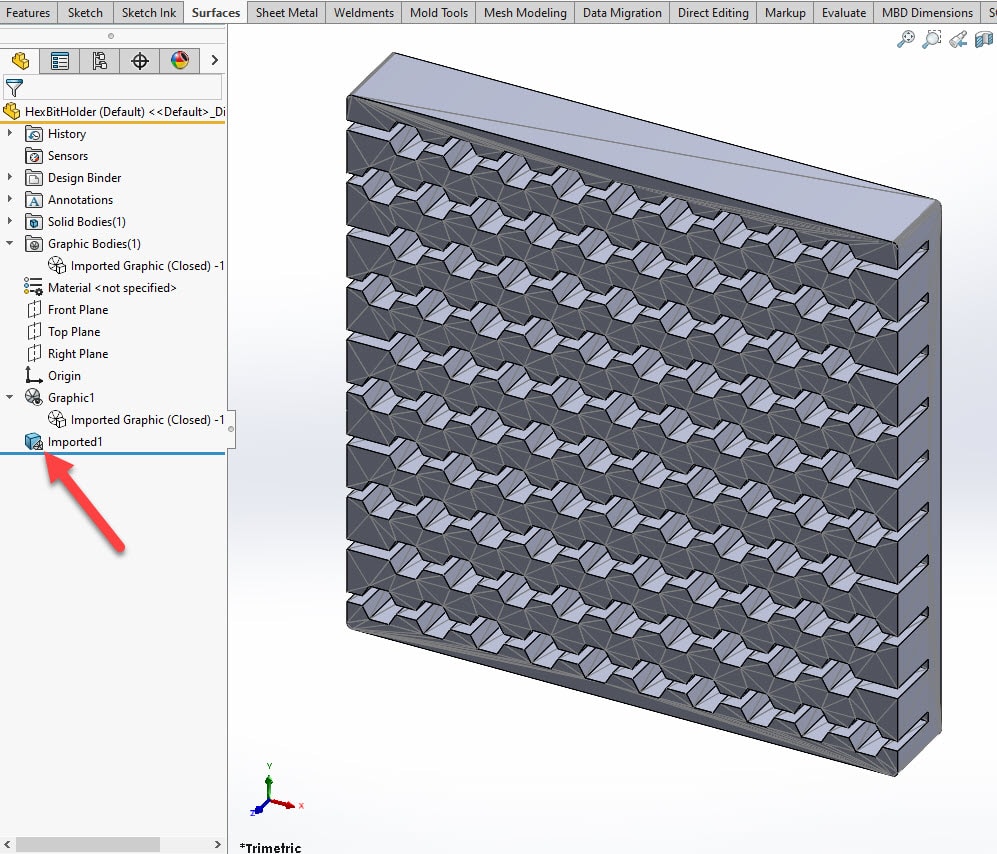
Now, look at the Icon for the body in the design tree. It shows a body with a small mesh icon in the lower right corner. I am now ready to start creating sketches and features to modify this mesh body.
Mesh Import Option 2 – Graphics Body
Now onto the other Import Option workflow. I start off the same by opening the file and clicking on the Options.

If the Graphics body option under “Import as” is grayed out then you will need to unselect the boxes under the Mesh body options.
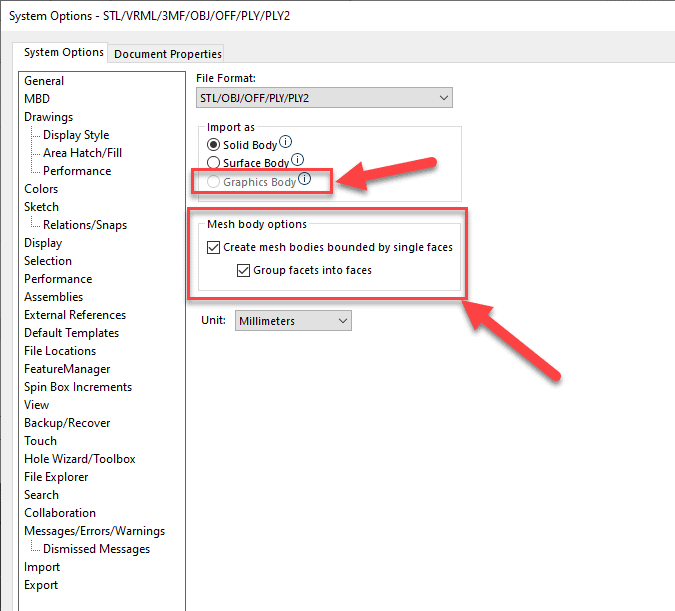
Once those have been unselected, you can then select the Graphics Body option. Don’t forget to select your units.
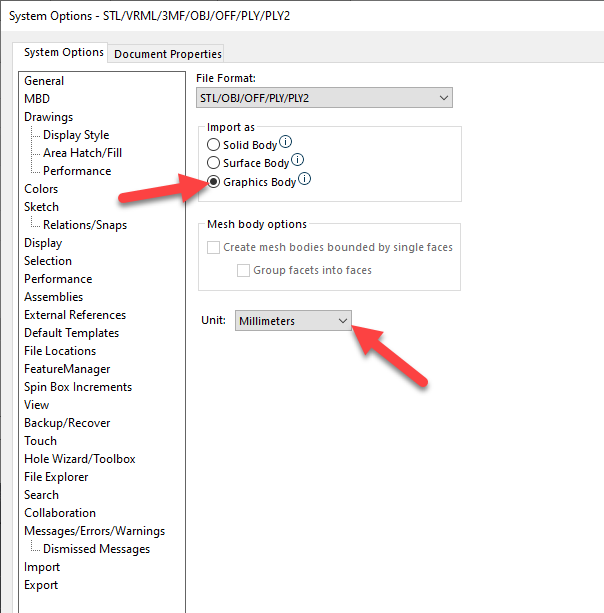
Once again you will select your Part template.

In the FeatureManager Design Tree, you will see an icon that looks like a Circle that is split into triangles with a small eyeball in the lower right corner. This is the icon for a graphic mesh body.
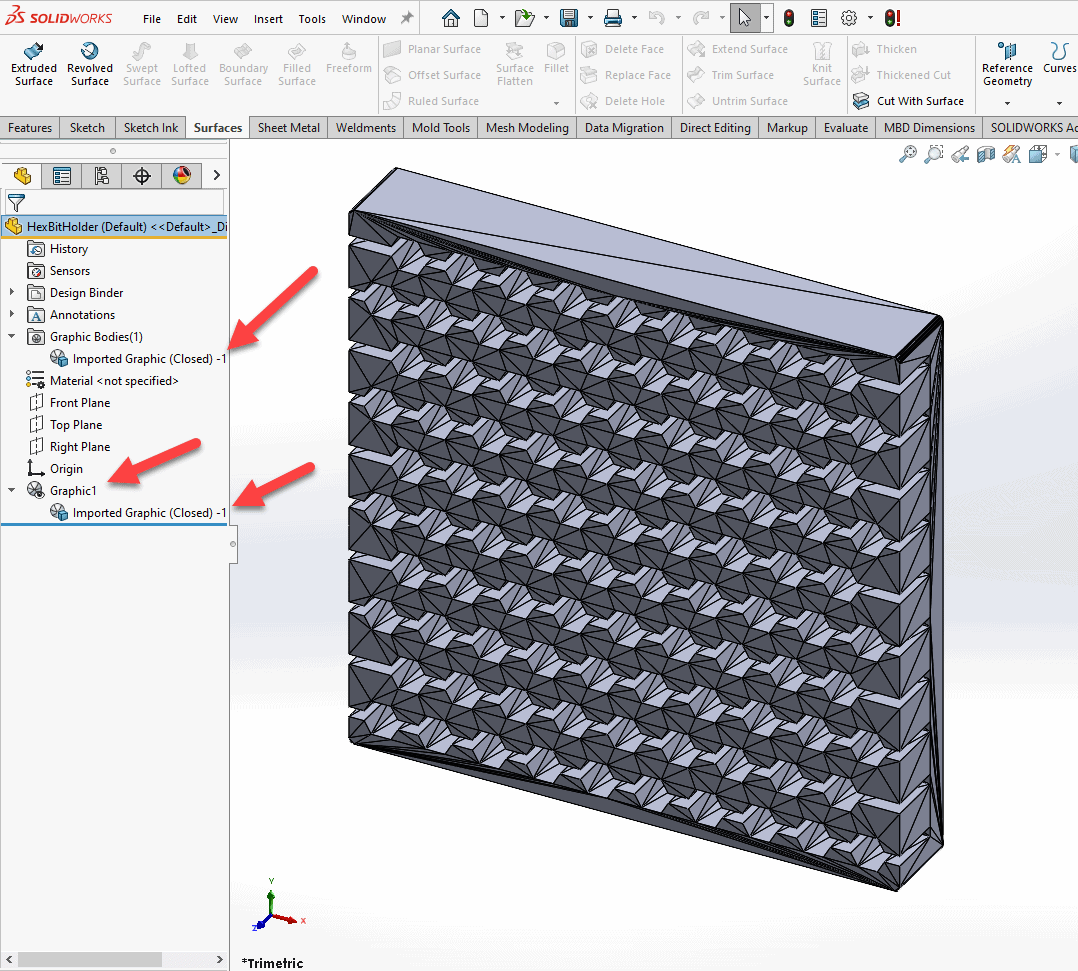
In order to take advantage of our new Hybrid Modeling workflow, we need to convert the Graphics Body mesh file into a Mesh Body. This can be accomplished by right-clicking on the Graphics Body under the graphics Body folder or by clicking the Graphics Body under the Graphic Body feature.
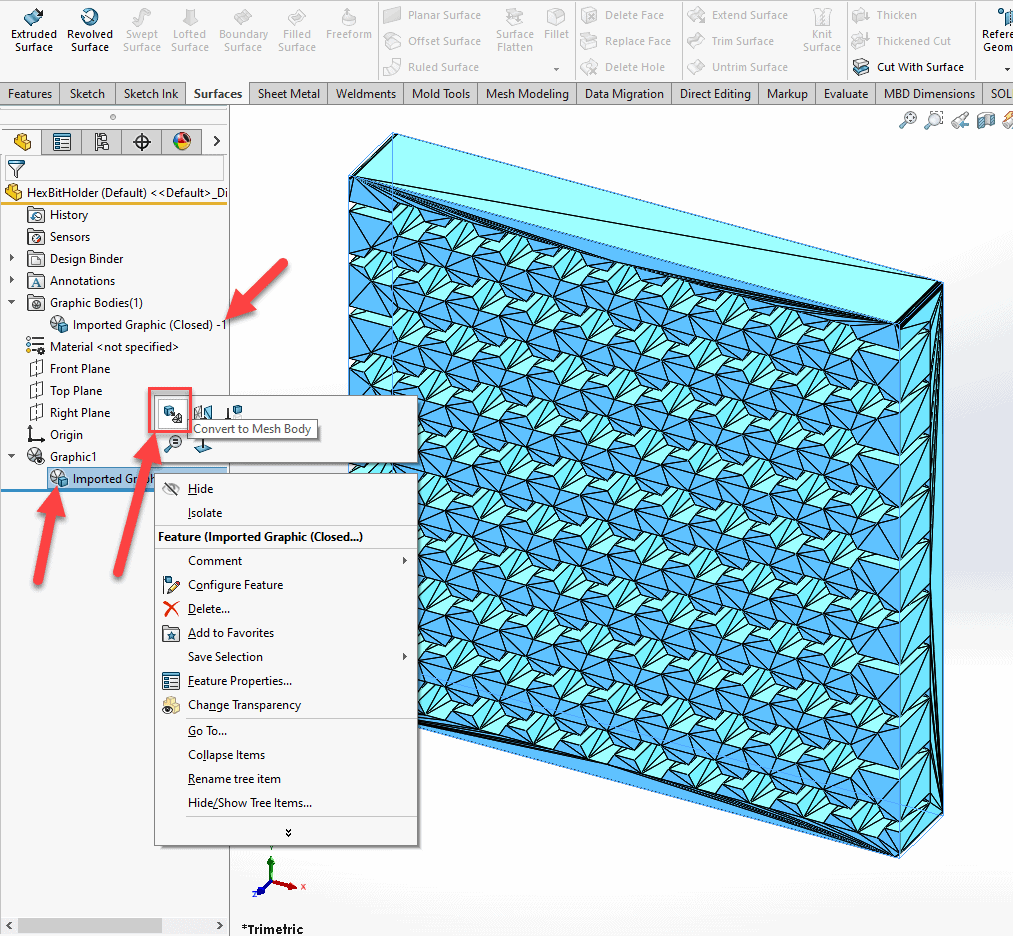
Next, I choose whether I want to Group the facets into faces or not. I check the box and hit the green check mark.
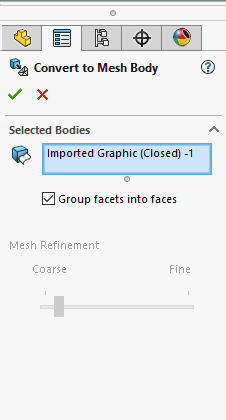
We now see a new icon the FeatureManager Design Tree. It is the body icon with a small mesh icon in the lower right corner. This means that we have now turned the Graphics Body into a solid mesh body. Now we can use the new Hybrid Modeling workflow. Now you may be asking what exactly is this file that I am looking at in these images. This STL is a bit holder for all of my ¼” hex tool bits for my drill. This particular file takes up a little more real estate on my table than I would like so I am going to make it smaller.
Modifying the mesh file (Remixing)
The next steps show how much easier it is to modify mesh files. I started by drawing a sketch on the Front Plane. It was just a couple of sketch lines and then I used a Cut-Extrude feature.
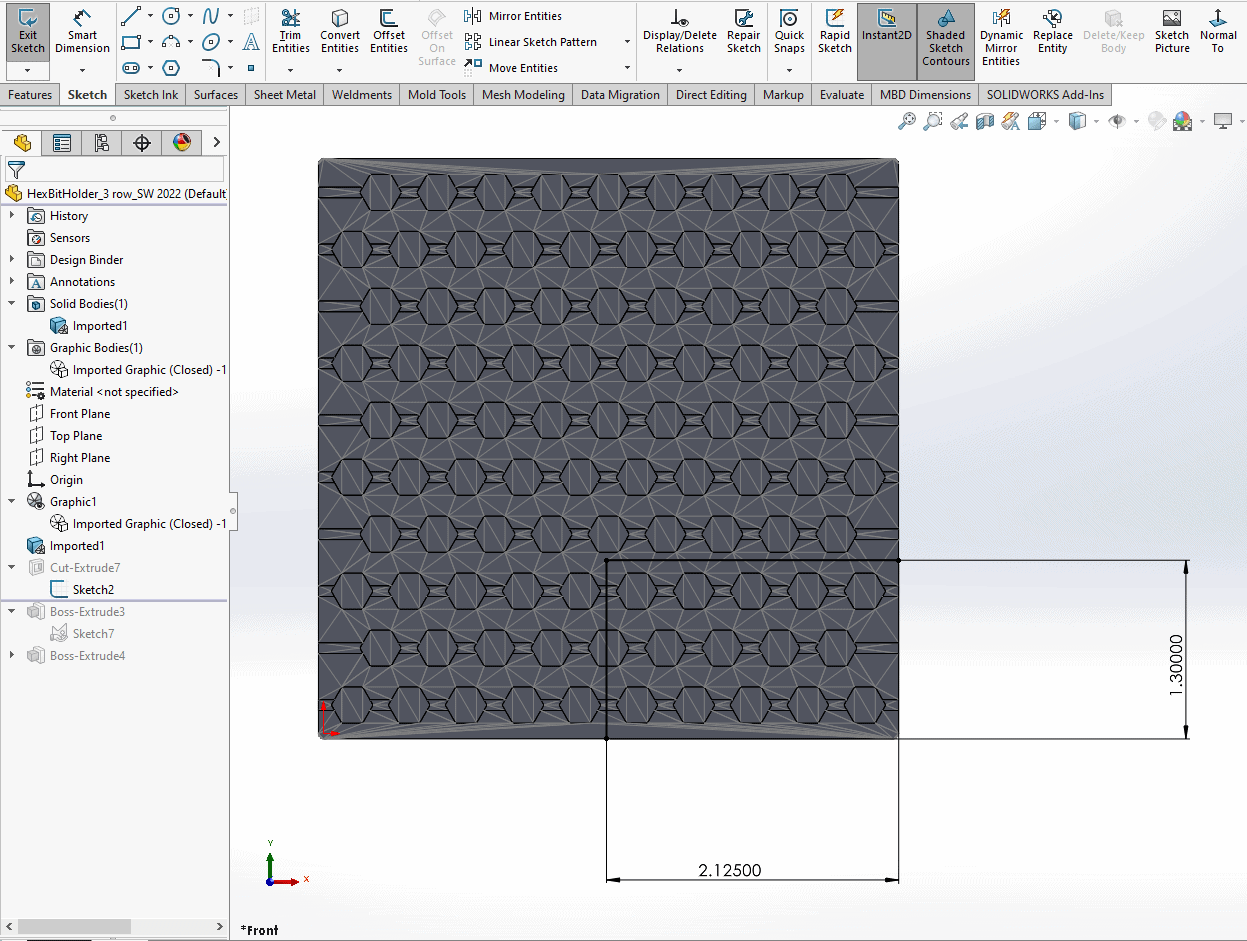
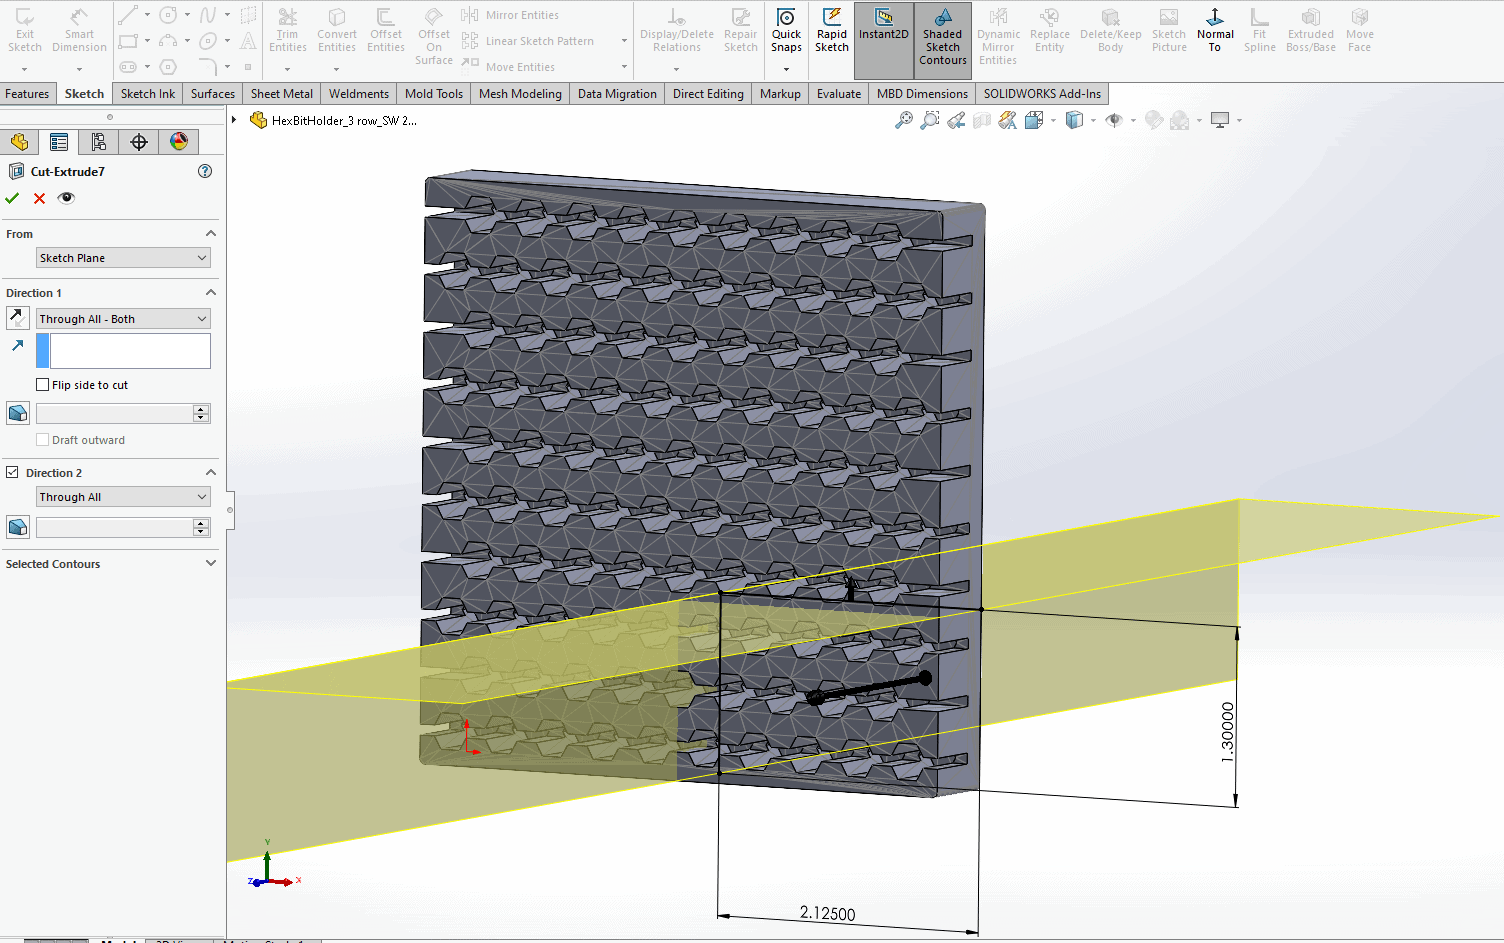
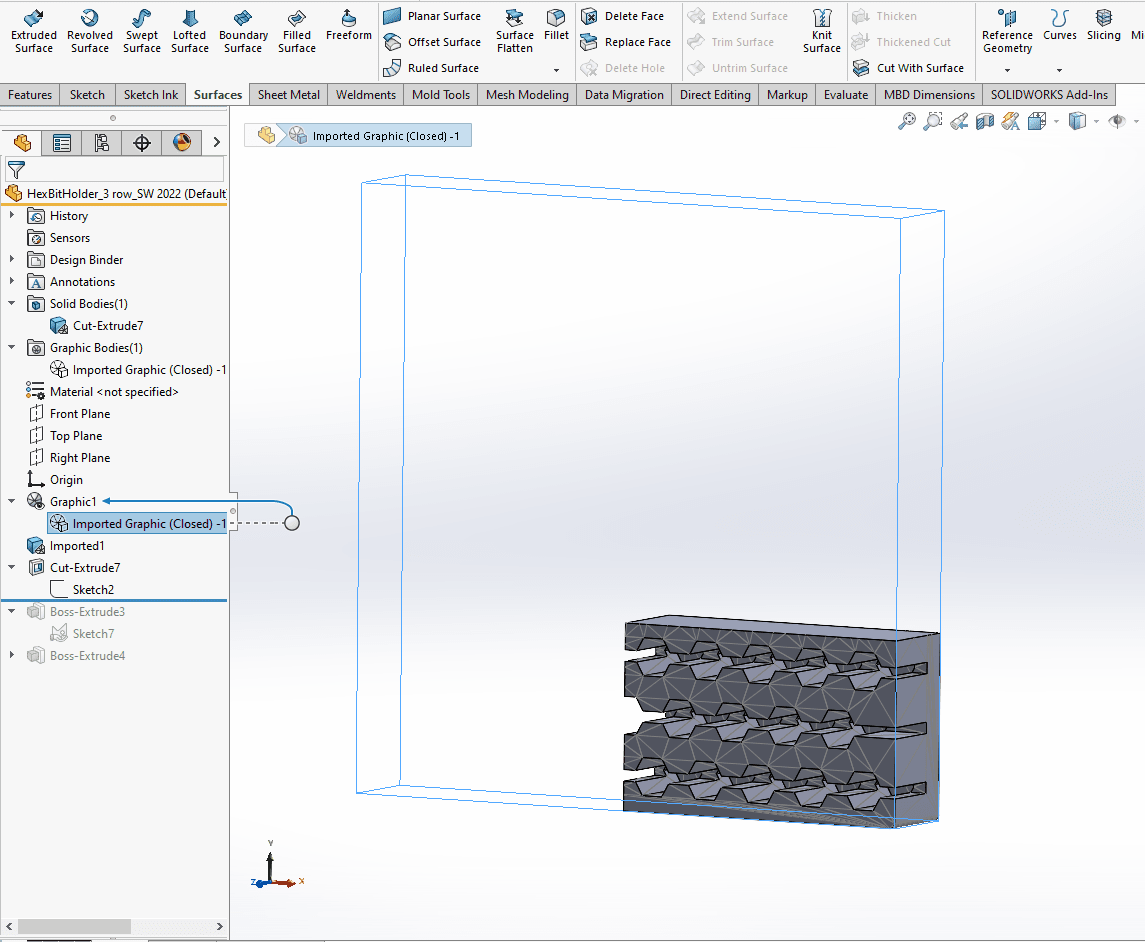
In the image above I selected the Graphic Body just so you could see all of the material that I removed.
Next, in the image shown below, I wanted the area under the red box to look the same as it does under the area in the green box.
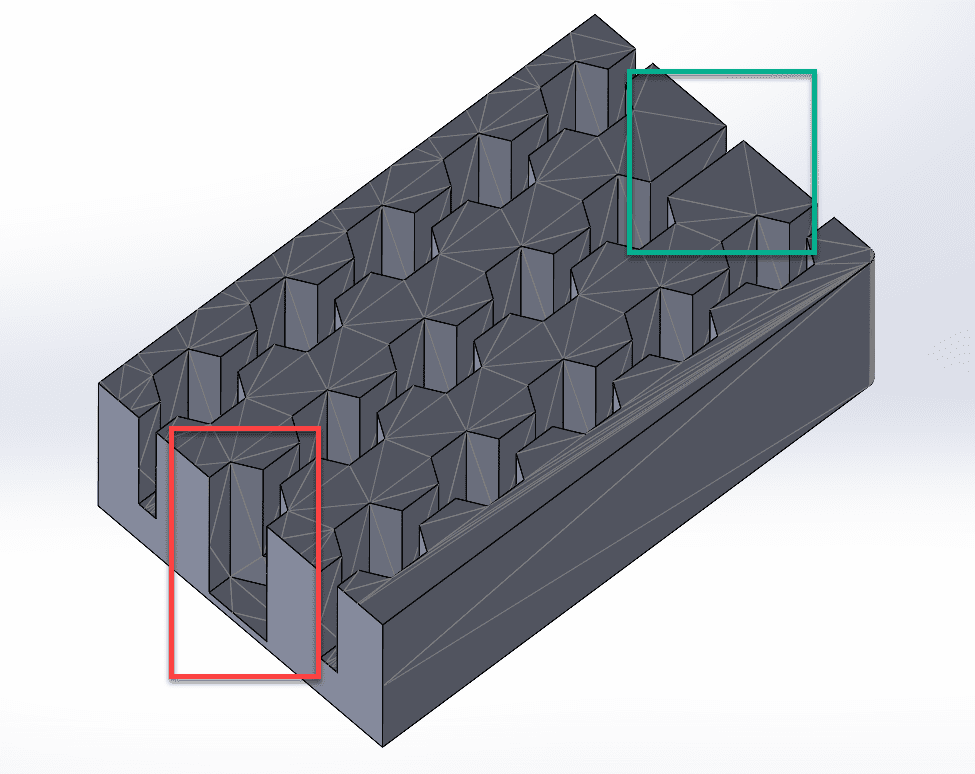
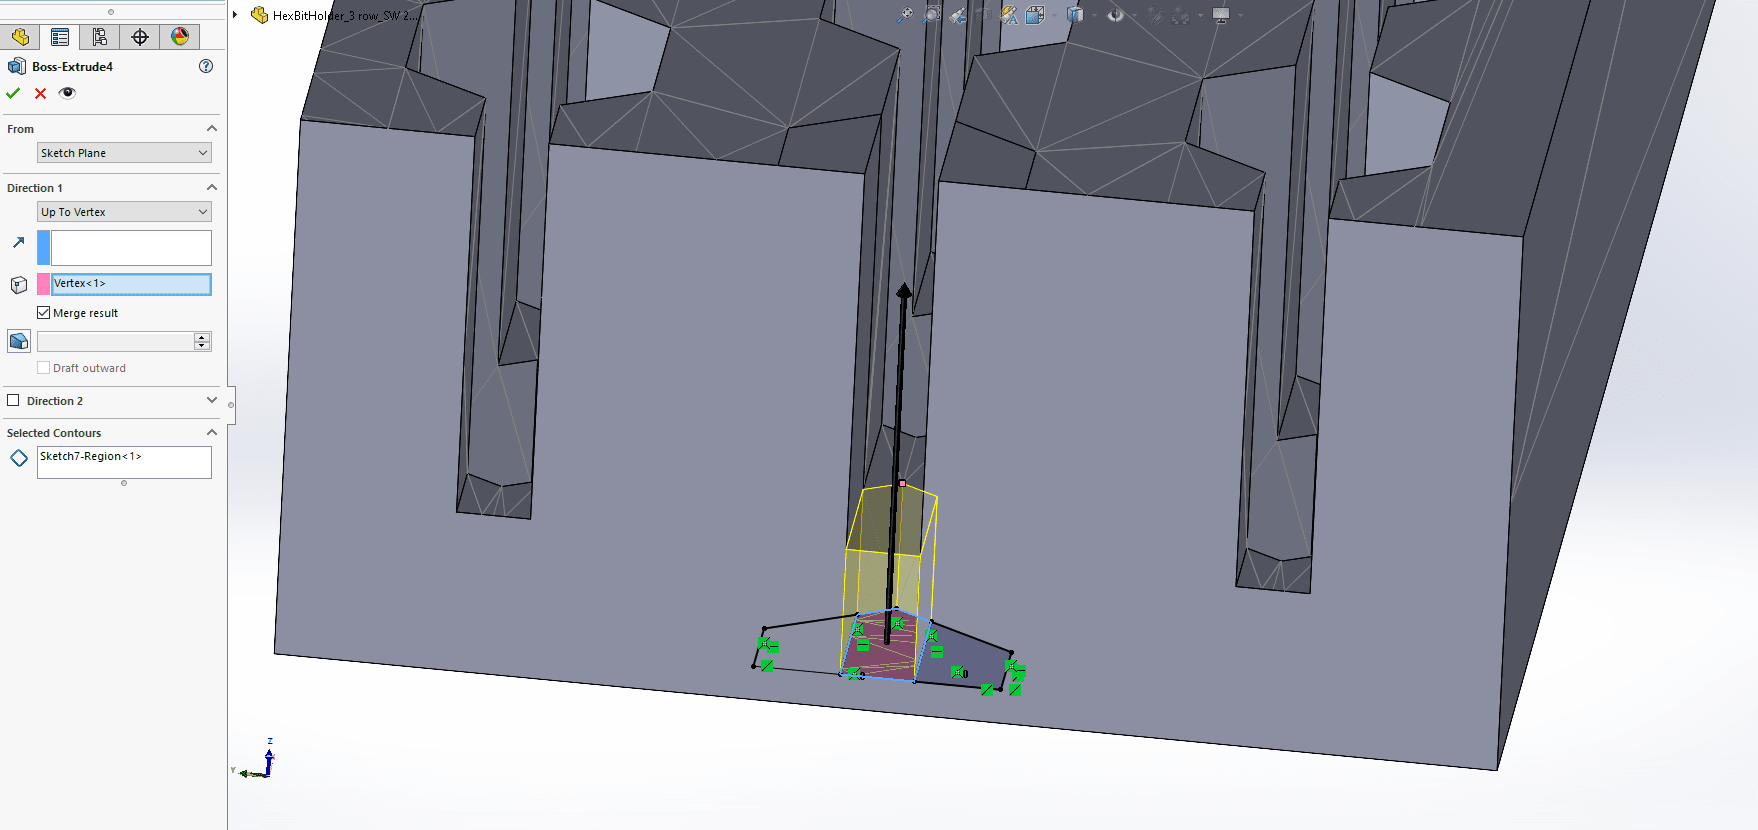
To do this, I start a sketch on the bottom surface of the channel (area in the red box). Then create an Extruded Boss-Base. You can see that I drew in the sketch entities and added relationships to the mesh body.
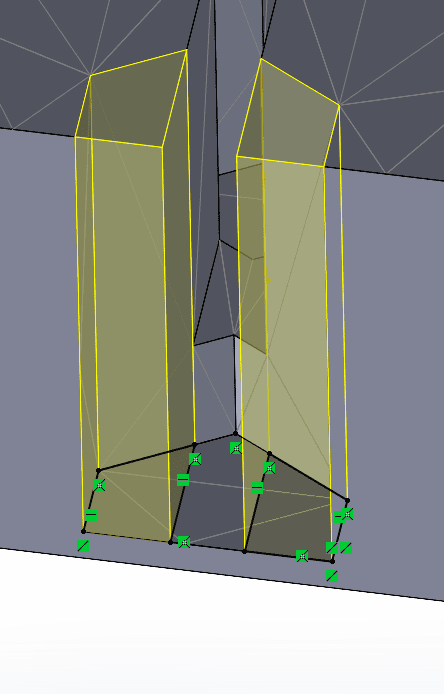
I then chose the direction and end condition. I chose Up to Vertex for the feature. Here is a little Tip! At this point in time, you cannot use the Up to Surface end condition when Hybrid Modeling. Notice that I have the Merge Result box checked. This is another bonus we get in Hybrid Modeling now, we do not need Booleans to combine bodies.
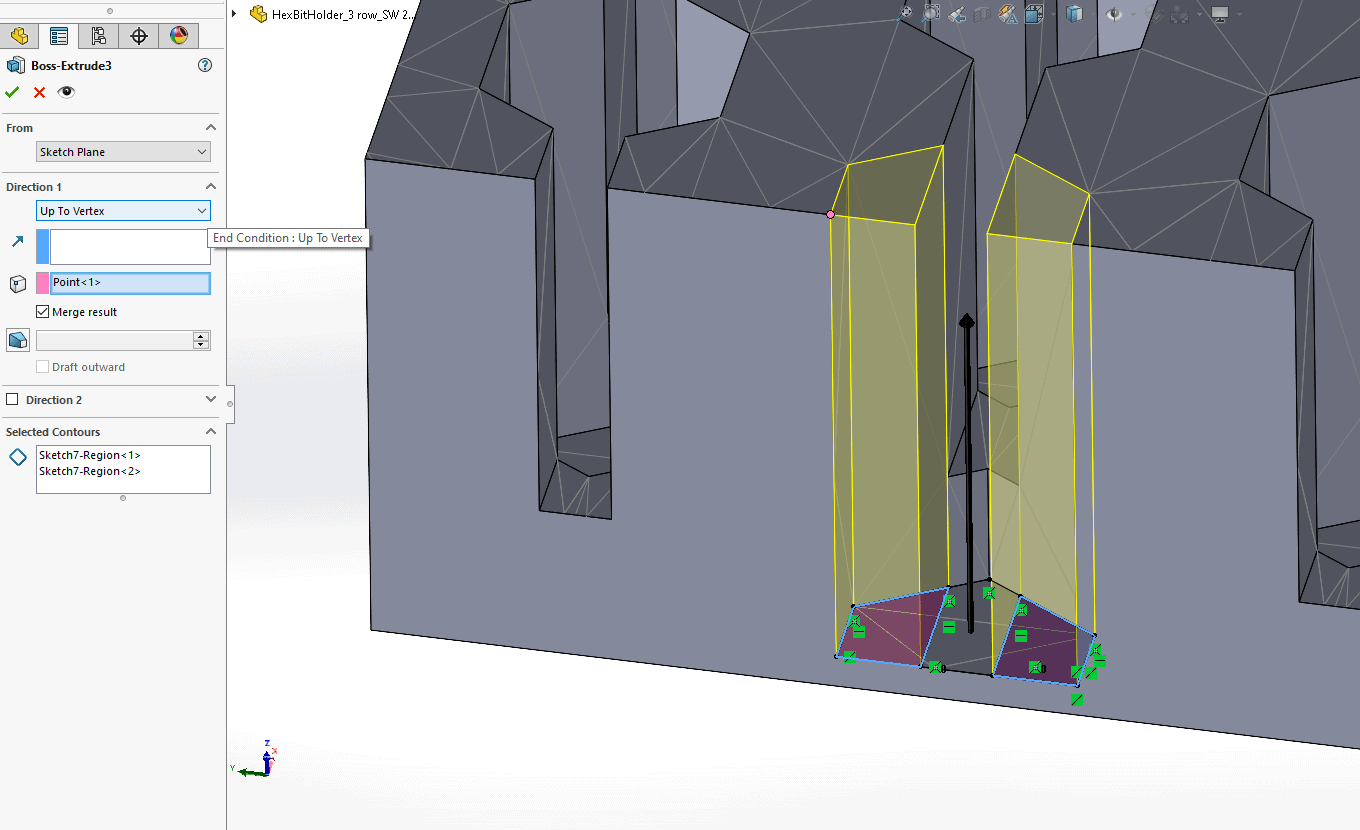
In the image below, we have a single body in the FeatureManager Design Tree. Notice that the face is smooth and without segmentation.
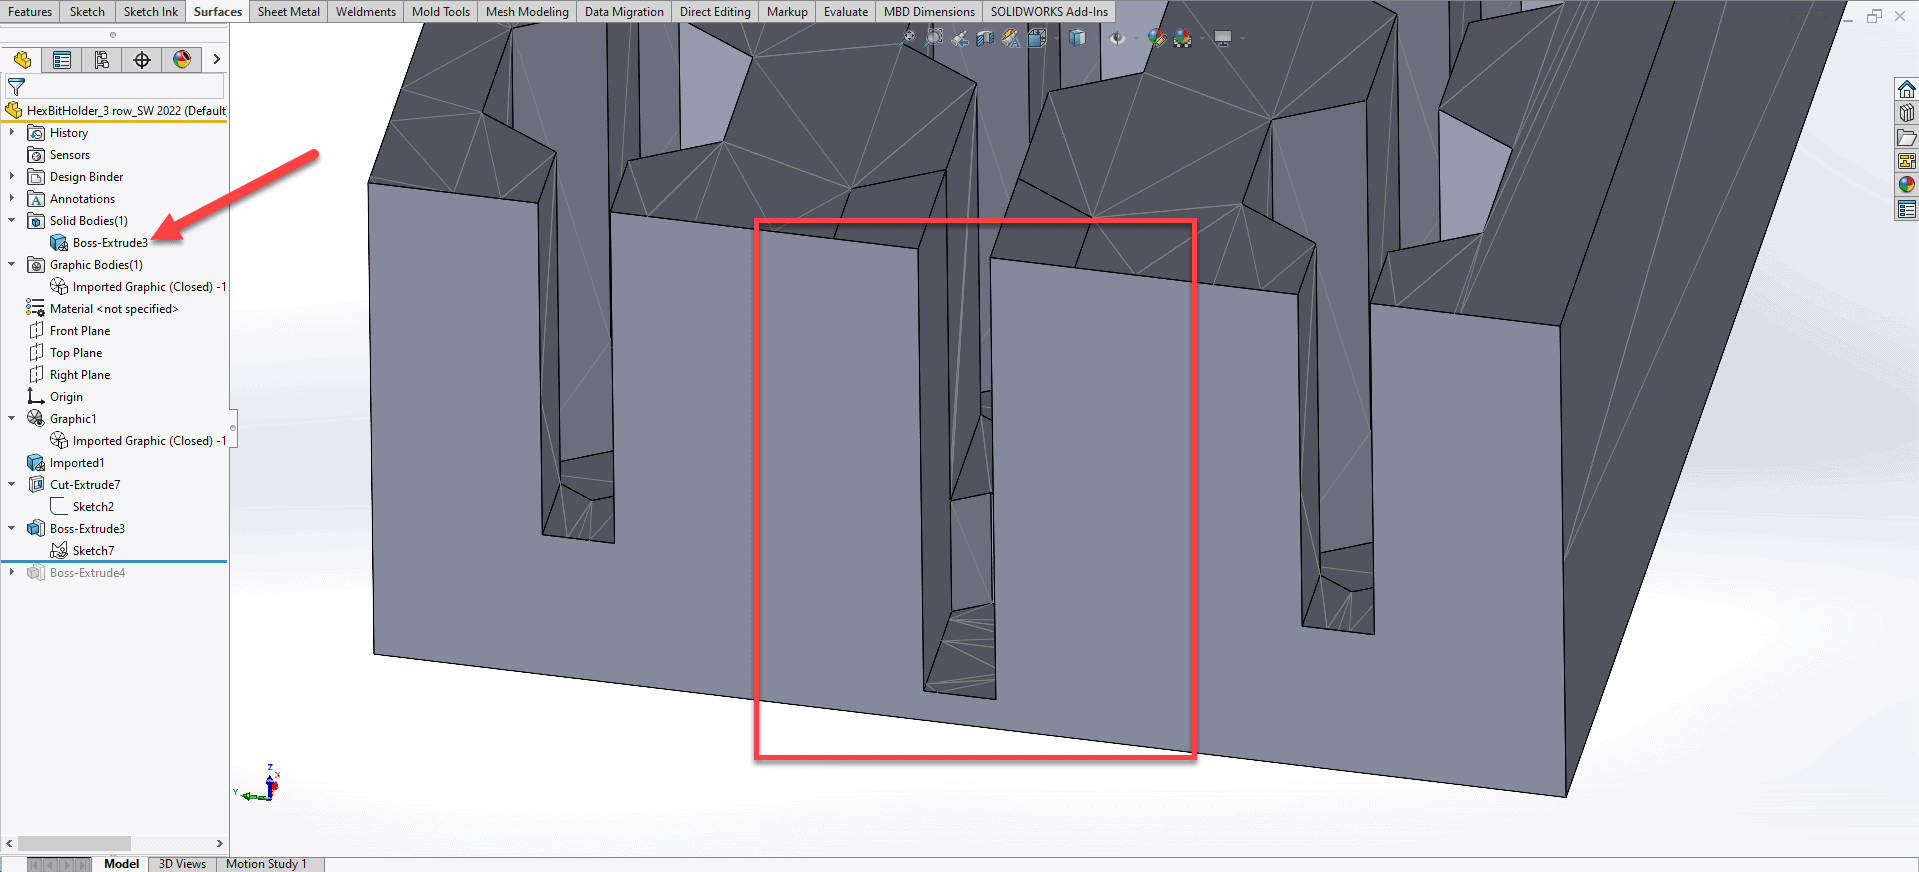
The last feature added a little material to the center channel.
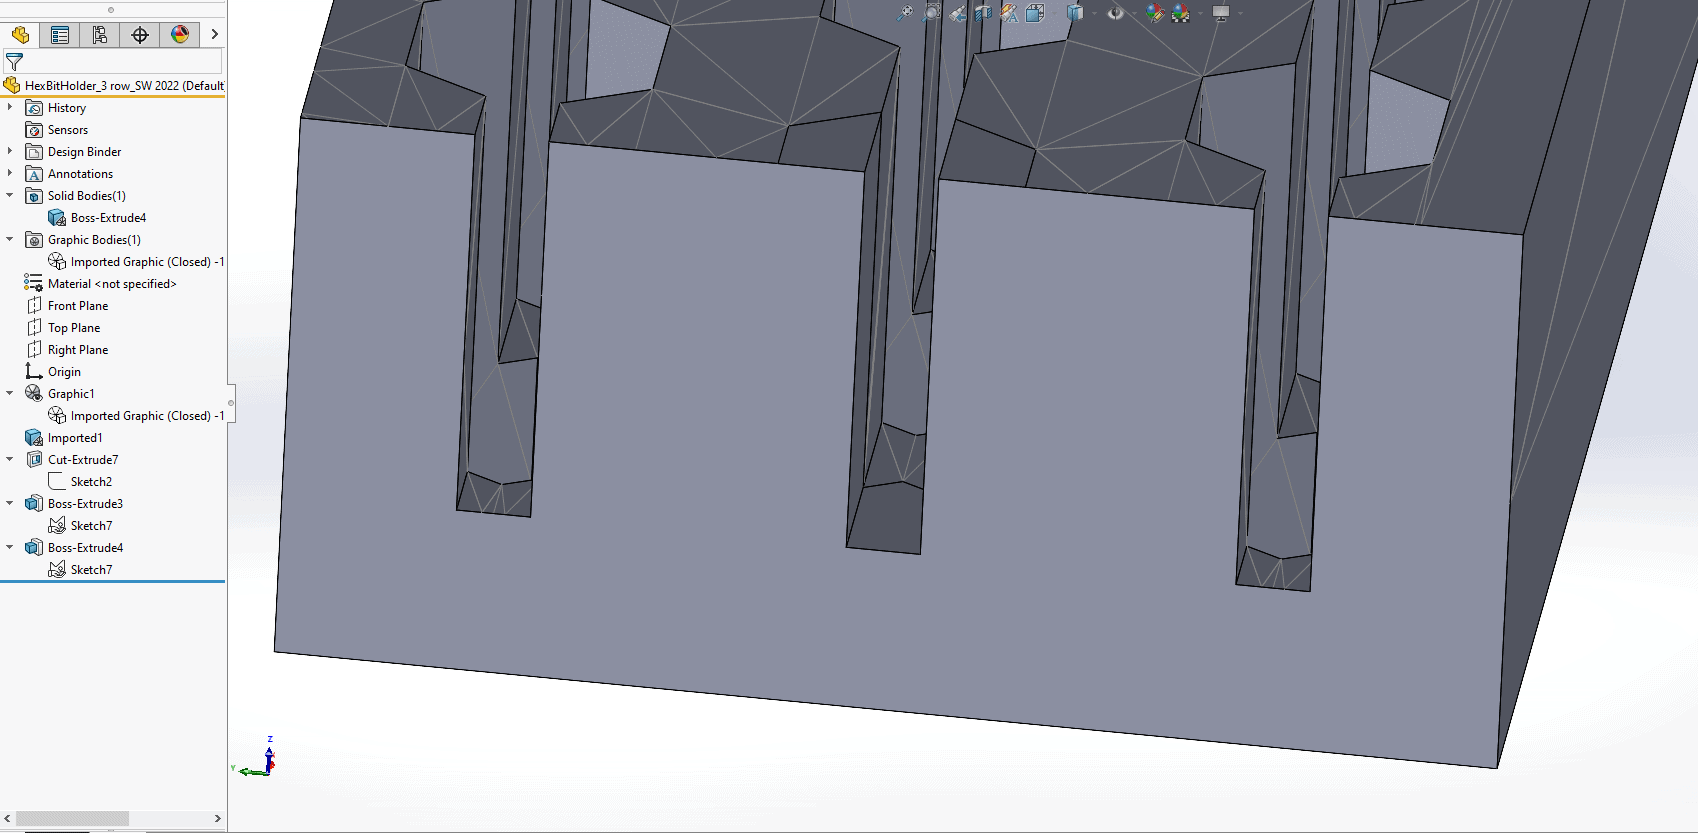
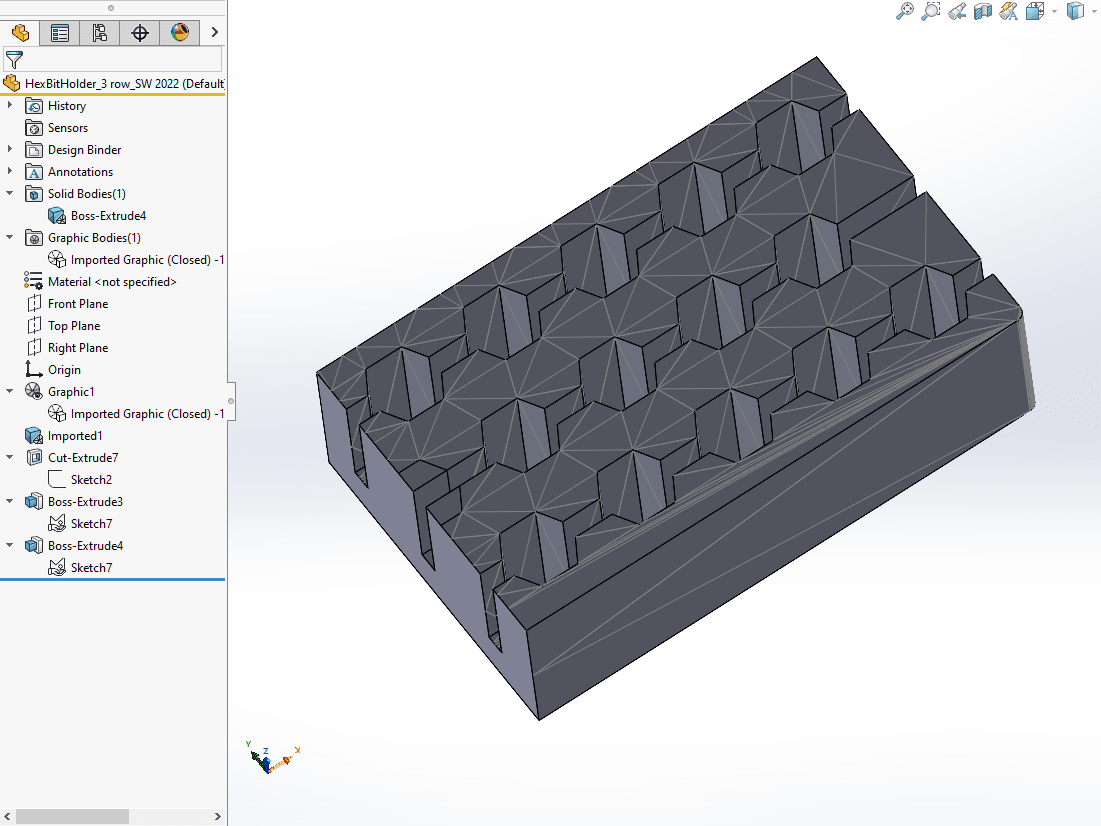
Now I have my finished model ready for export (Shown below).
Here is the finished product in use.
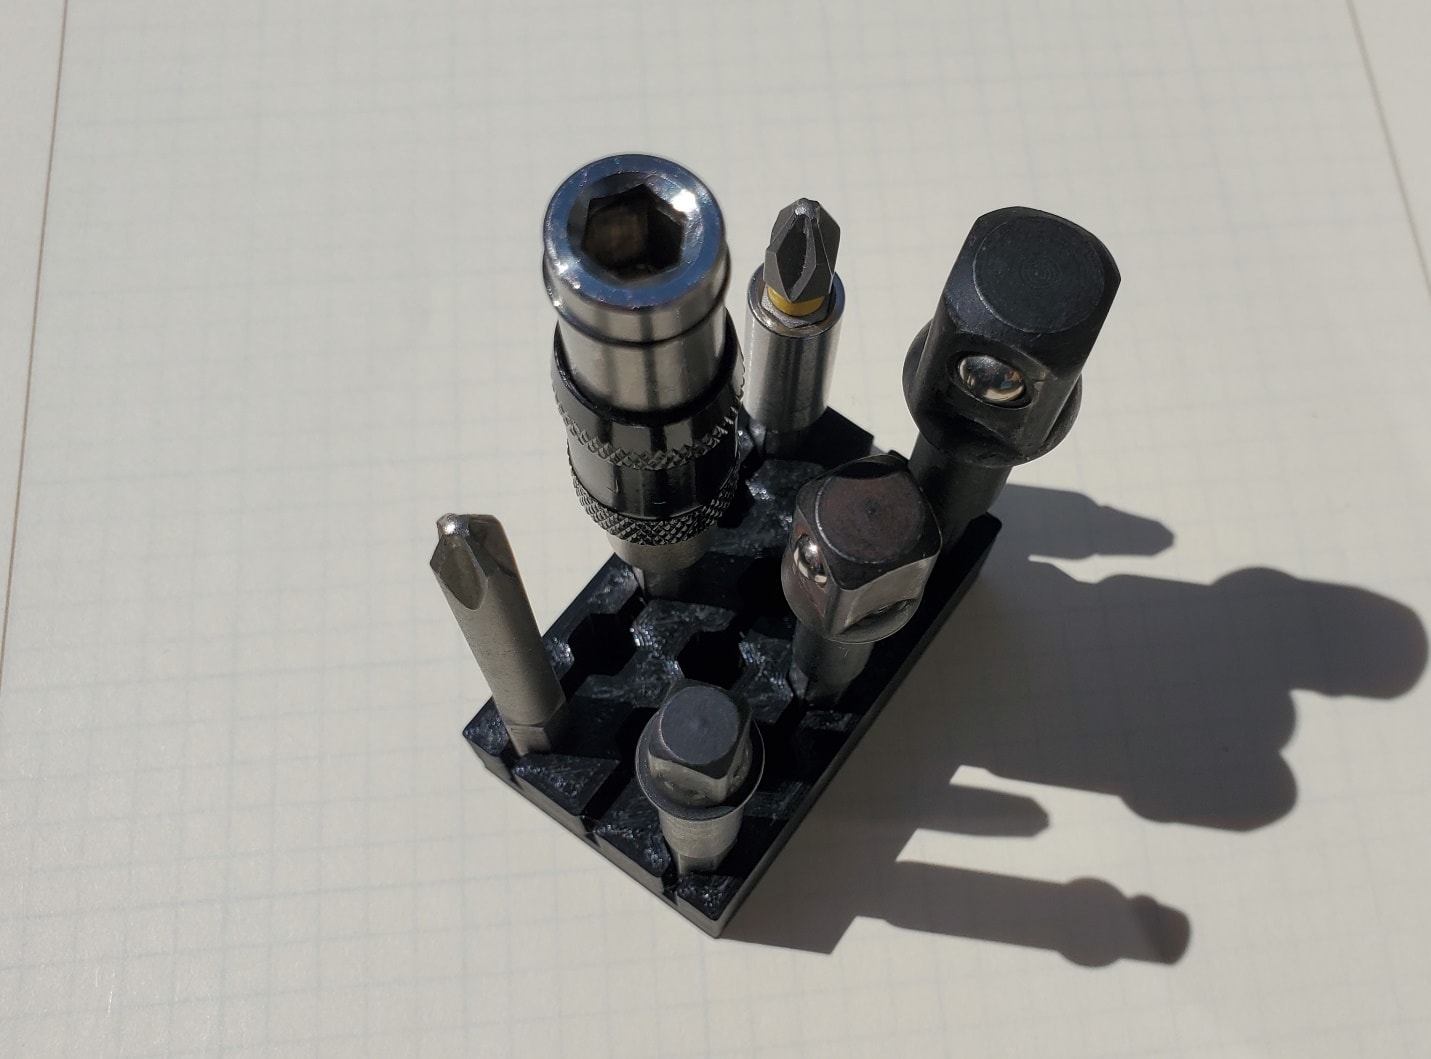
I love the smell of organized tools in the morning! Now go print your own!
Credit and Attributions to the following individuals for providing these helpful files:
Alaric Snell-Pym – Creator of the file that I used. This was a remix based on another user’s file.
MakerBot Thingiverse name: Customizable Hex Bit Holder with Staggering
https://www.thingiverse.com/alaricsp
https://www.thingiverse.com/thing:4916577
Misha Lytvynyuk – This is the original content creator whose file was remixed by Alaric Snell-Pym.
MakerBot Thingiverse name: Customizable Hex Bit Holder
https://www.thingiverse.com/xchg_dot_ca
https://www.thingiverse.com/thing:726700
James Reeher
Senior Application Engineer
Computer Aided Technology

 Blog
Blog