Add Custom Parts to Your SOLIDWORKS Toolbox
SOLIDWORKS Toolbox custom parts can be a great way to increase your productivity and efficiency when working with SOLIDWORKS. There are many different ways to go about adding custom parts to the toolbox, and the best approach will vary depending on your specific needs and workflow. Here are a few tips to get you started:
1. Determine which custom parts you need to add to the SOLIDWORKS Toolbox.
This may seem like a no-brainer, but it’s important to take the time to think about which parts you use most often, and which would be most useful to have easy access to. Adding too many parts can clutter up the interface and make it more difficult to find the right part when you need it. So, spend some time reviewing what parts really make sense to add to the Toolbox and which parts can live in your regular data management system.
2. Prep your custom SOLIDWORKS Toolbox part for mass use.
This may sound like a trivial step, but it’s important because once added to the Toolbox, parts are so easy to use they’ll end up all throughout your assemblies. Without the proper initial attention, you can easily introduce excessively complex parts into assemblies that will begin to impact your performance. Take this thumb screw downloaded from McMaster Carr. While the threading is nice, it adds excessive unnecessary detail and should be removed.
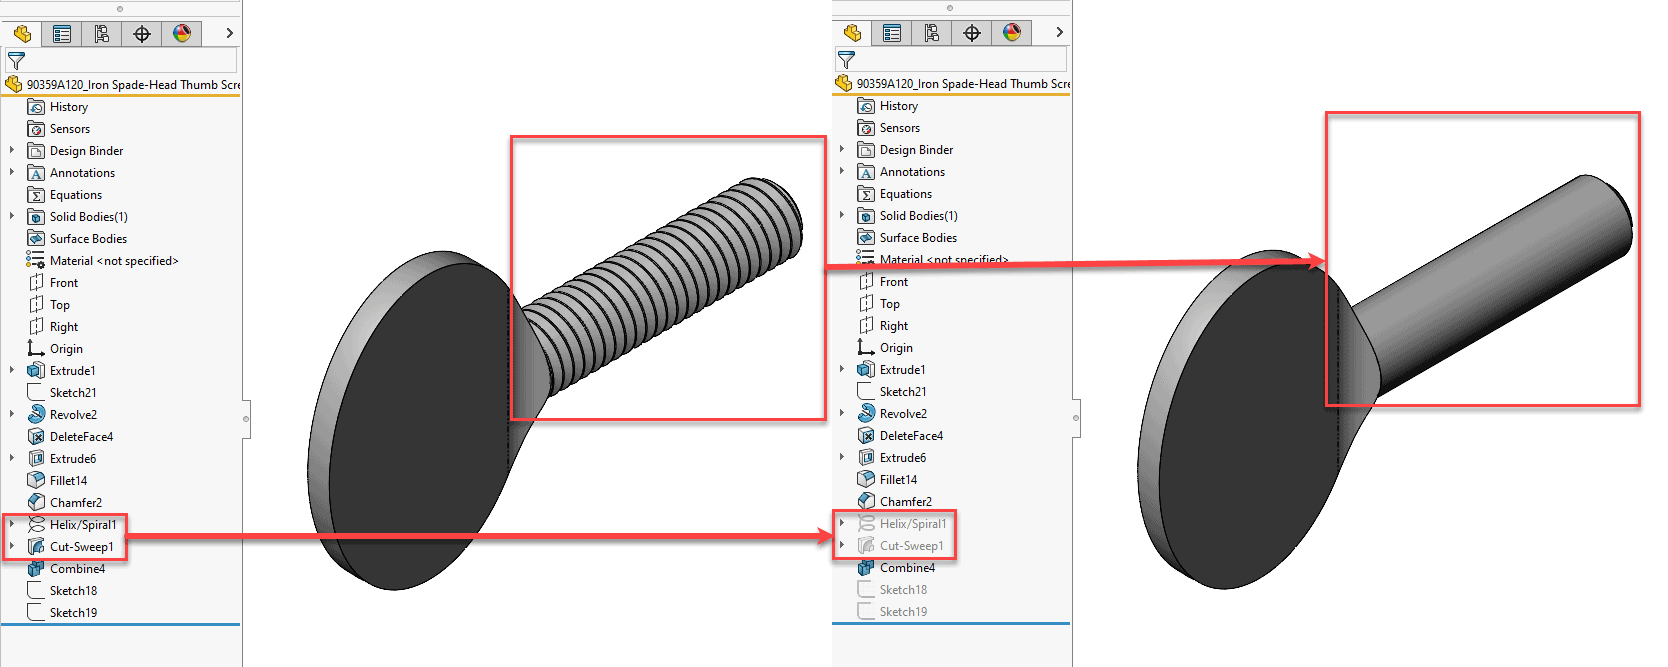
For more information on improving downloaded part efficiencies check out THIS BLOG. An additional preparation step that can be considered is creating configurations for a part for multiple sizes.
3. Create a custom folder for your custom SOLIDWORKS Toolbox parts.
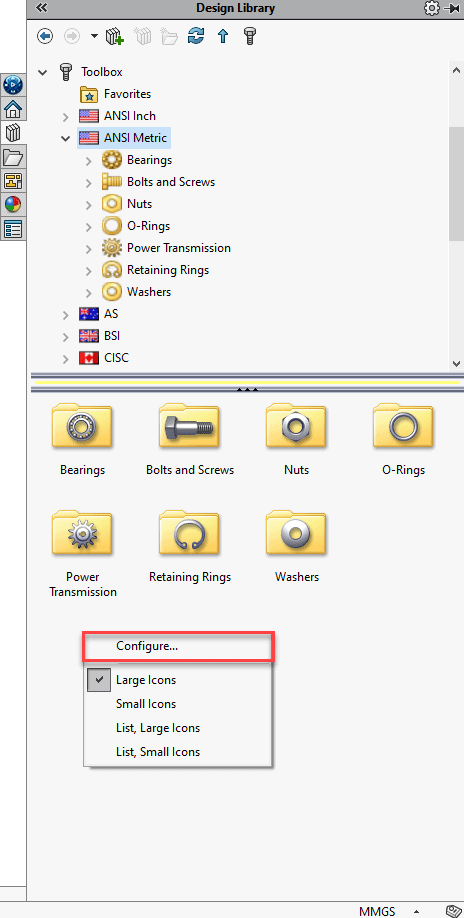
Once you’ve prepped your file, create a new folder in the SOLIDWORKS Toolbox directory for your custom parts. This will help keep your parts organized and make it easier to find them when you need them. To do this open the SOLIDWORKS Toolbox Settings by either right clicking in the folder list on the Task Pane of the Toolbox and selecting ‘Configure’
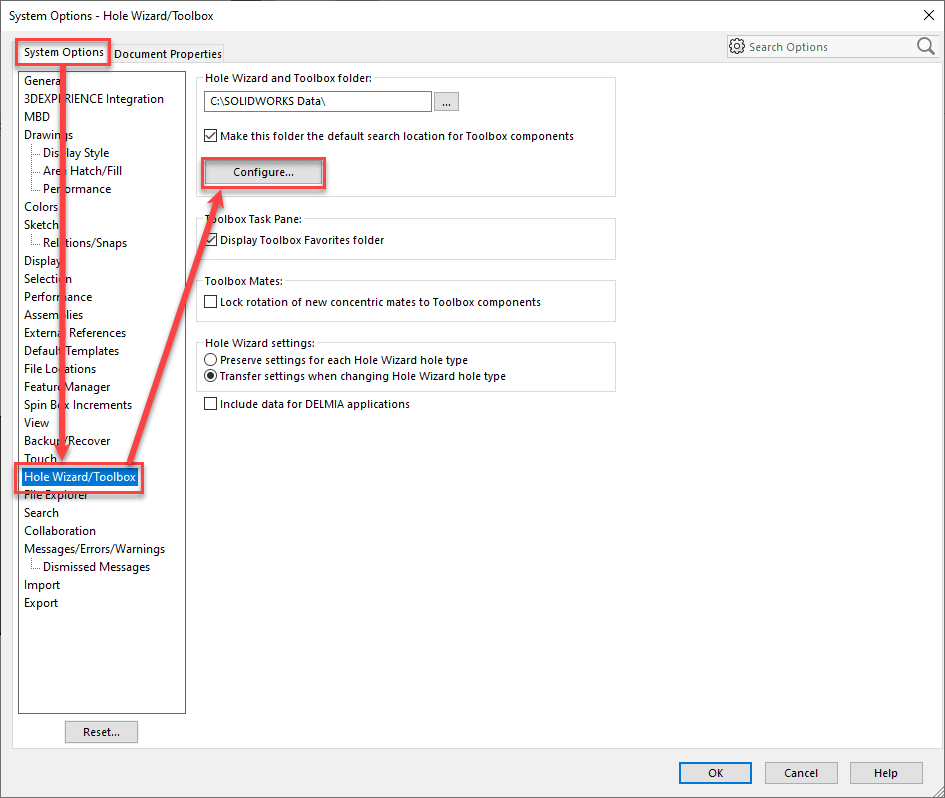
Or Selecting ‘Configure’ from System Options > HoleWizard/Toolbox
Or Launching SOLIDWORKS Toolbox Settings [YEAR] from the Windows Start menu.
Then right click on the Toolbox Standard you’d like to add to and select ‘New Folder’. From there you’ll give your folder a name.
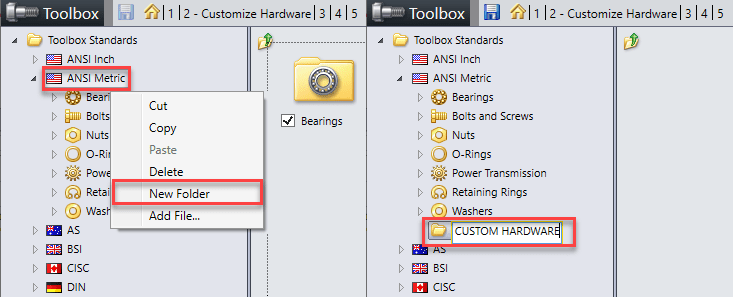
4. Add your parts to the folder.
Now it’s time to add your parts to the folder you created in step 3. Right click on the folder and select ‘Add File’.
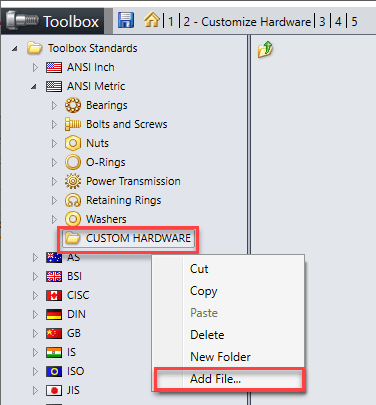
There are additional settings you can control here like color and custom properties. You’ll also want to ‘Save’ your Toolbox Settings for the changes to take effect.
5. That’s it!
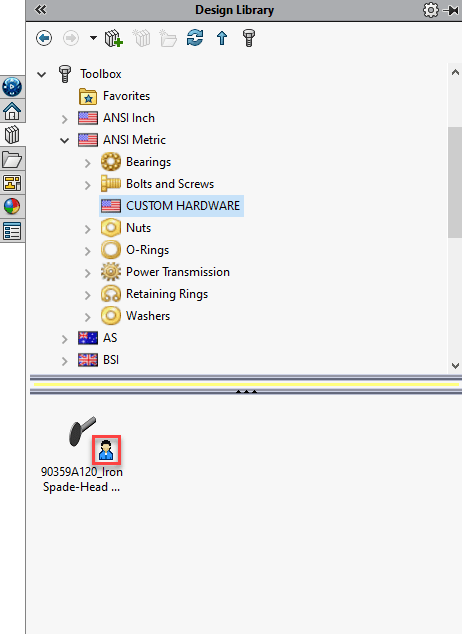
Once you’ve added your parts to the folder, they’ll be available in the SOLIDWORKS Toolbox for you to use by an easy drag and drop. Parts that have been added as a custom part will show with a person icon on the image. You can now access them anytime you need them, which will save you time and increase your productivity.
Brandon Nelms
Application Engineer Manager
Computer Aided Technology

 Blog
Blog