How to do a cable "fan out" in SOLIDWORKS Electrical Routing
Recently when teaching the SOLIDWORKS Routing: Electrical training class I was asked if it was possible to model a “Cable Fan Out” like this…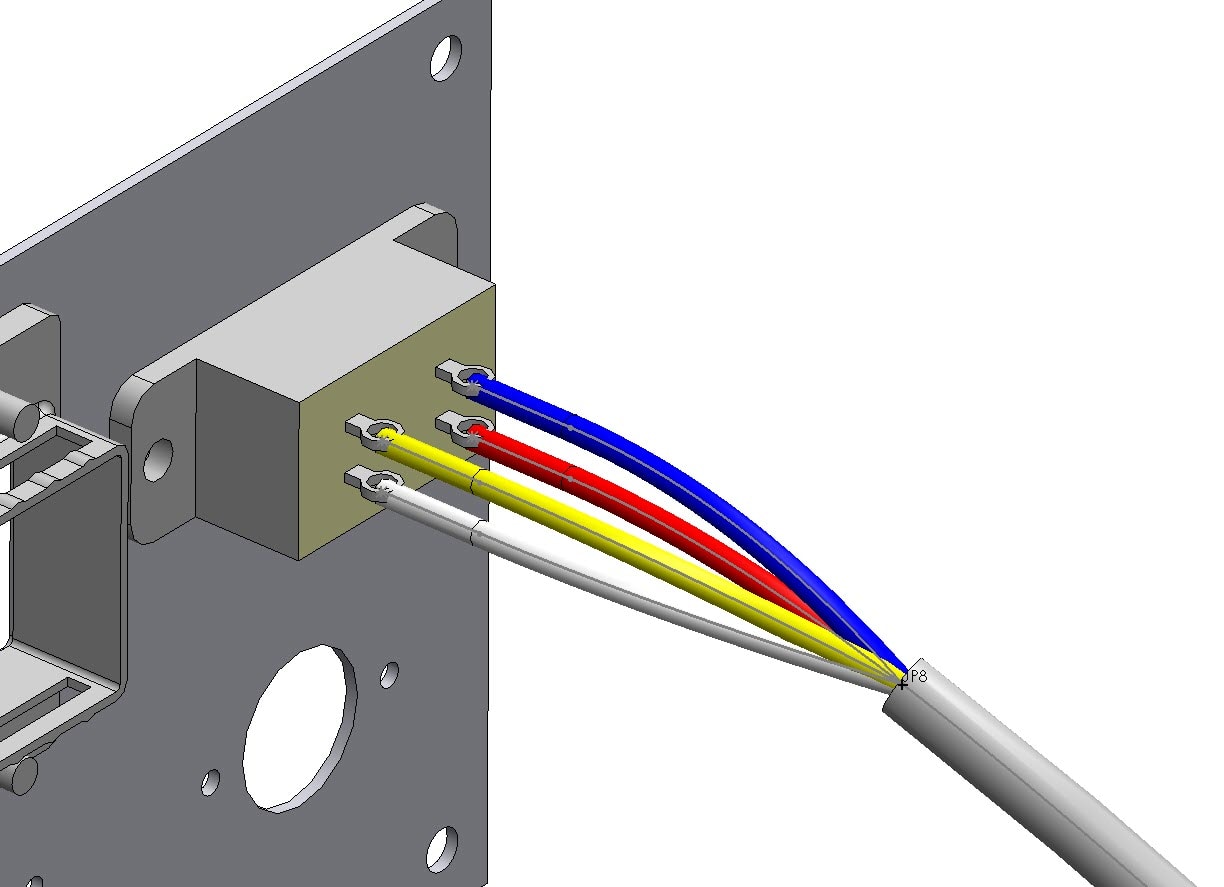
Although this is not exactly shown in the training material it uses the same technique as a SPLICE (that IS taught in the class), just without the actual “splice” part being used.
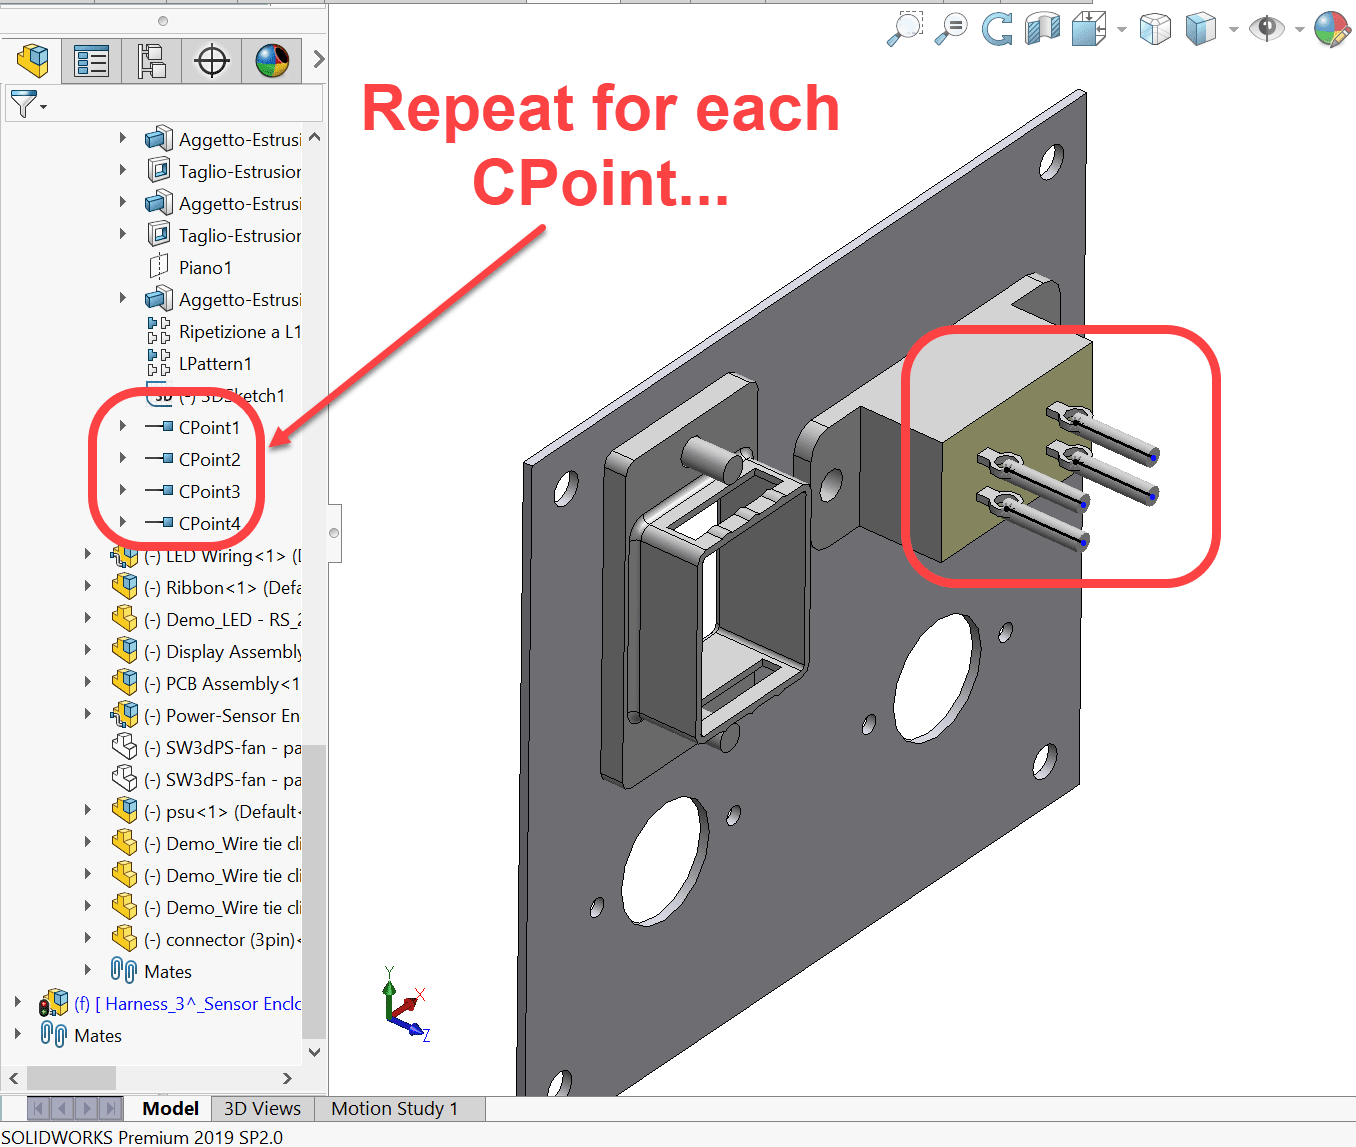
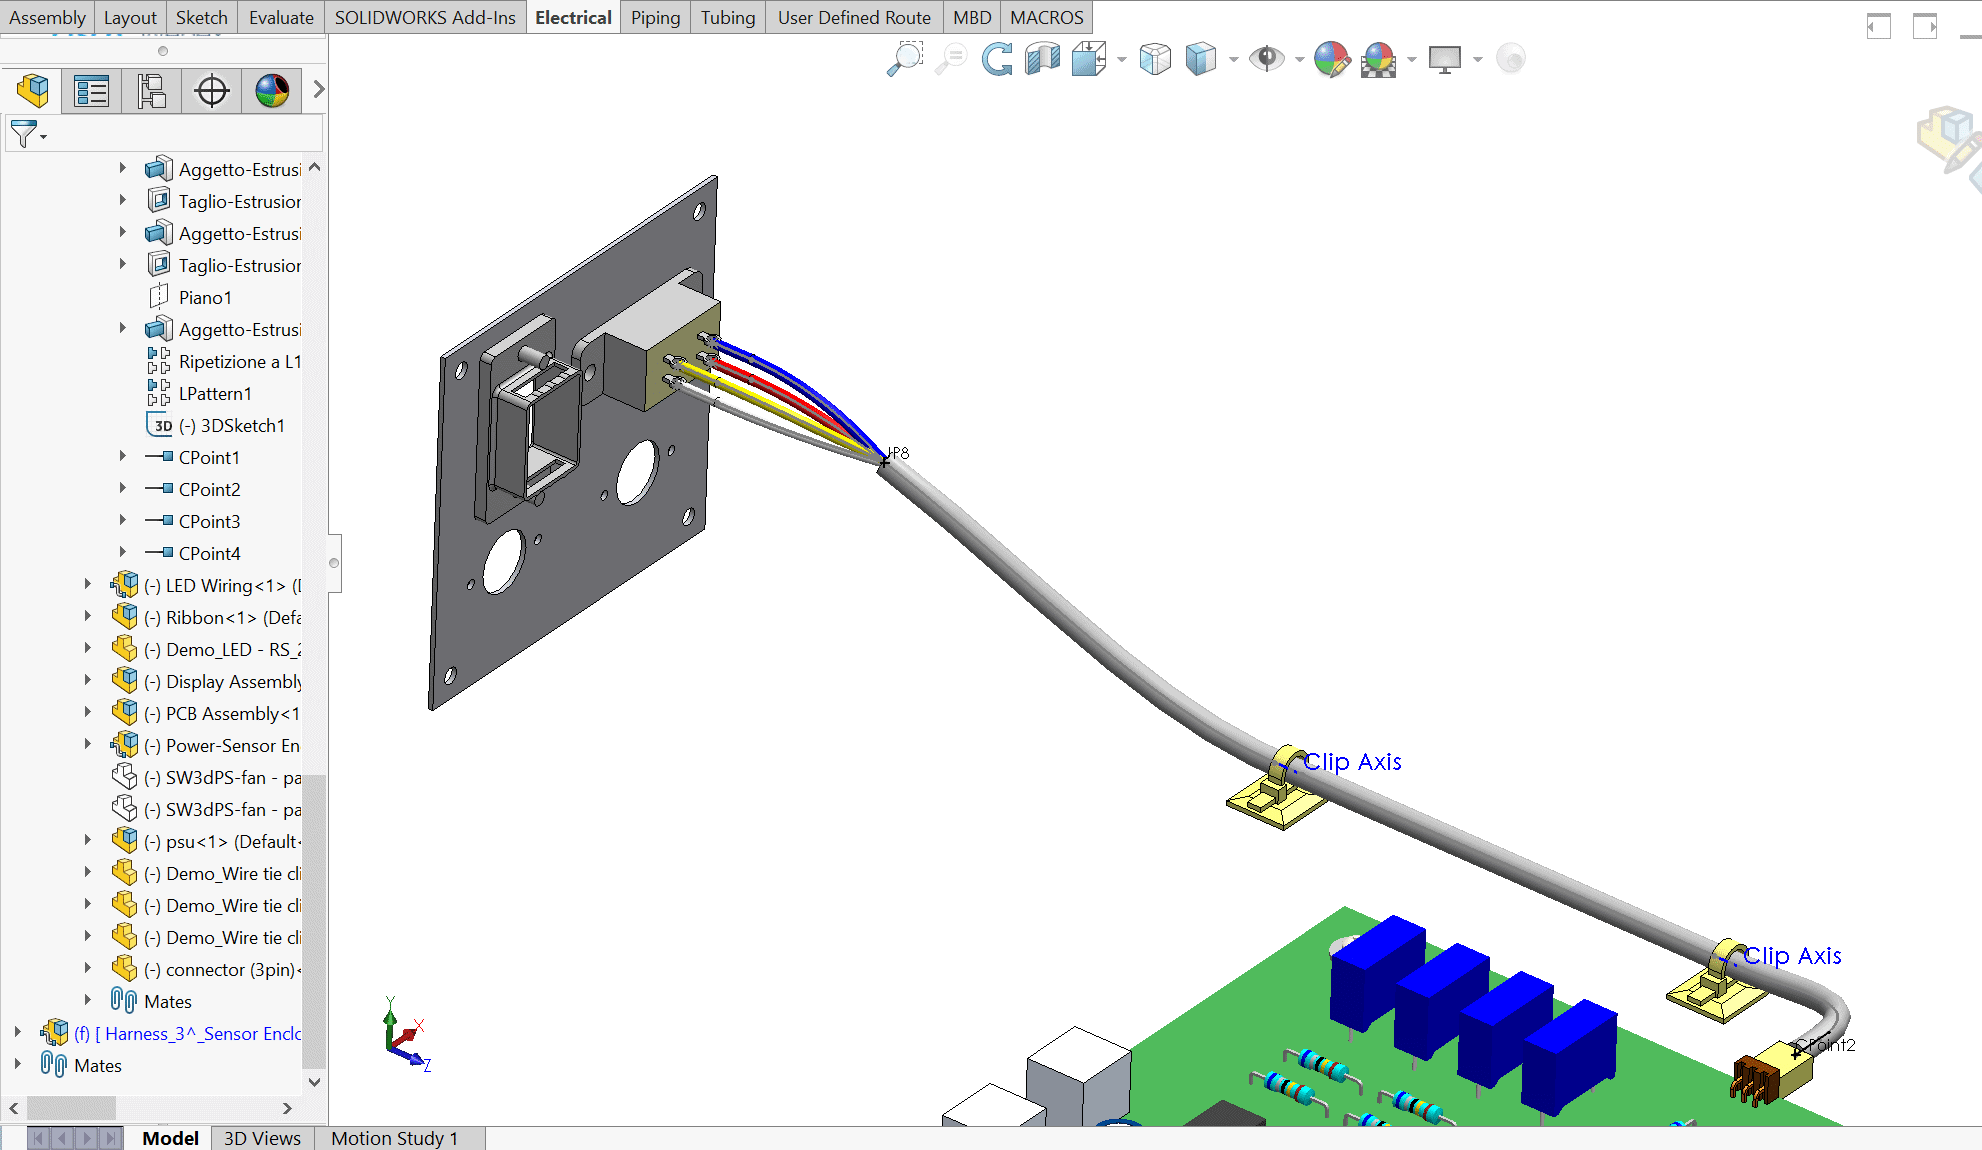
The part file you are “fanning out” to needs to have CPoints (so you can route to them) defined, like shown here:
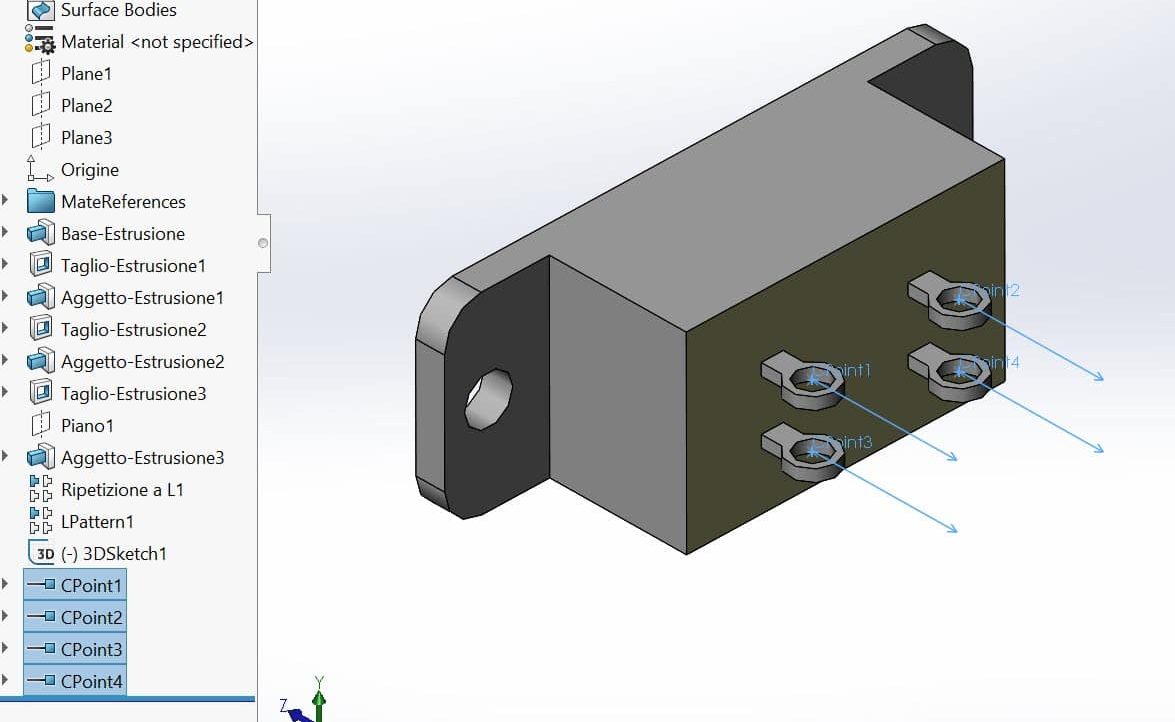 This can be done by running the part through the Routing Component Wizard or by manually assigning the CPoints.
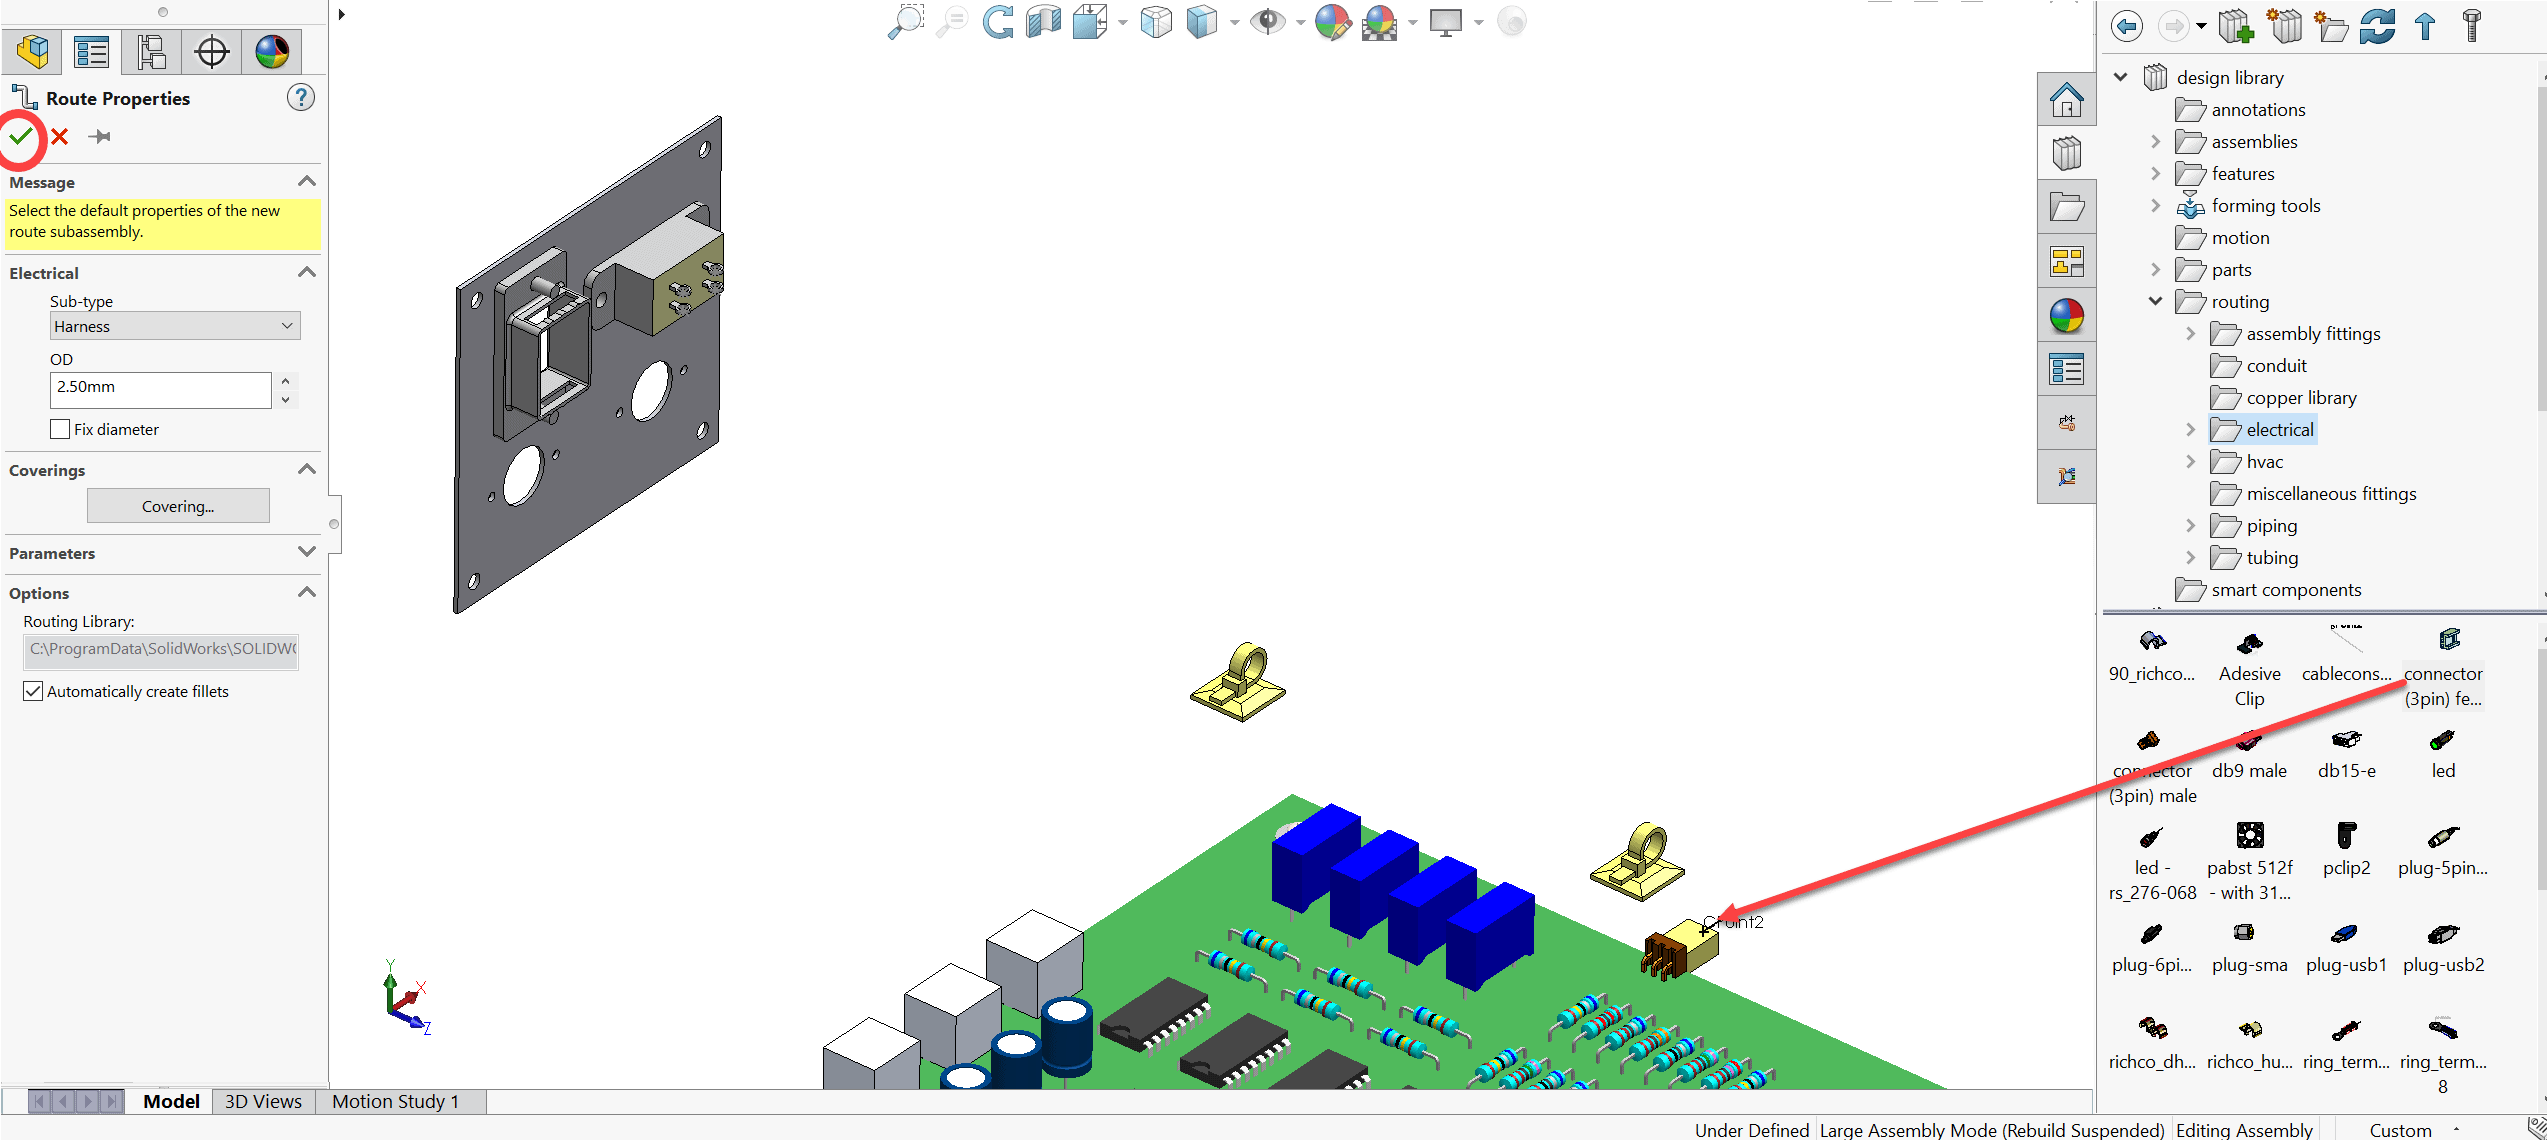
To do the route start out by dragging and dropping in a connector from the Design Library to start a route as usual and accepting the Route Properties after dropping.
Cancel / Exit the AUTO ROUTE property manager that will come up next. You aren’t ready to route yet…
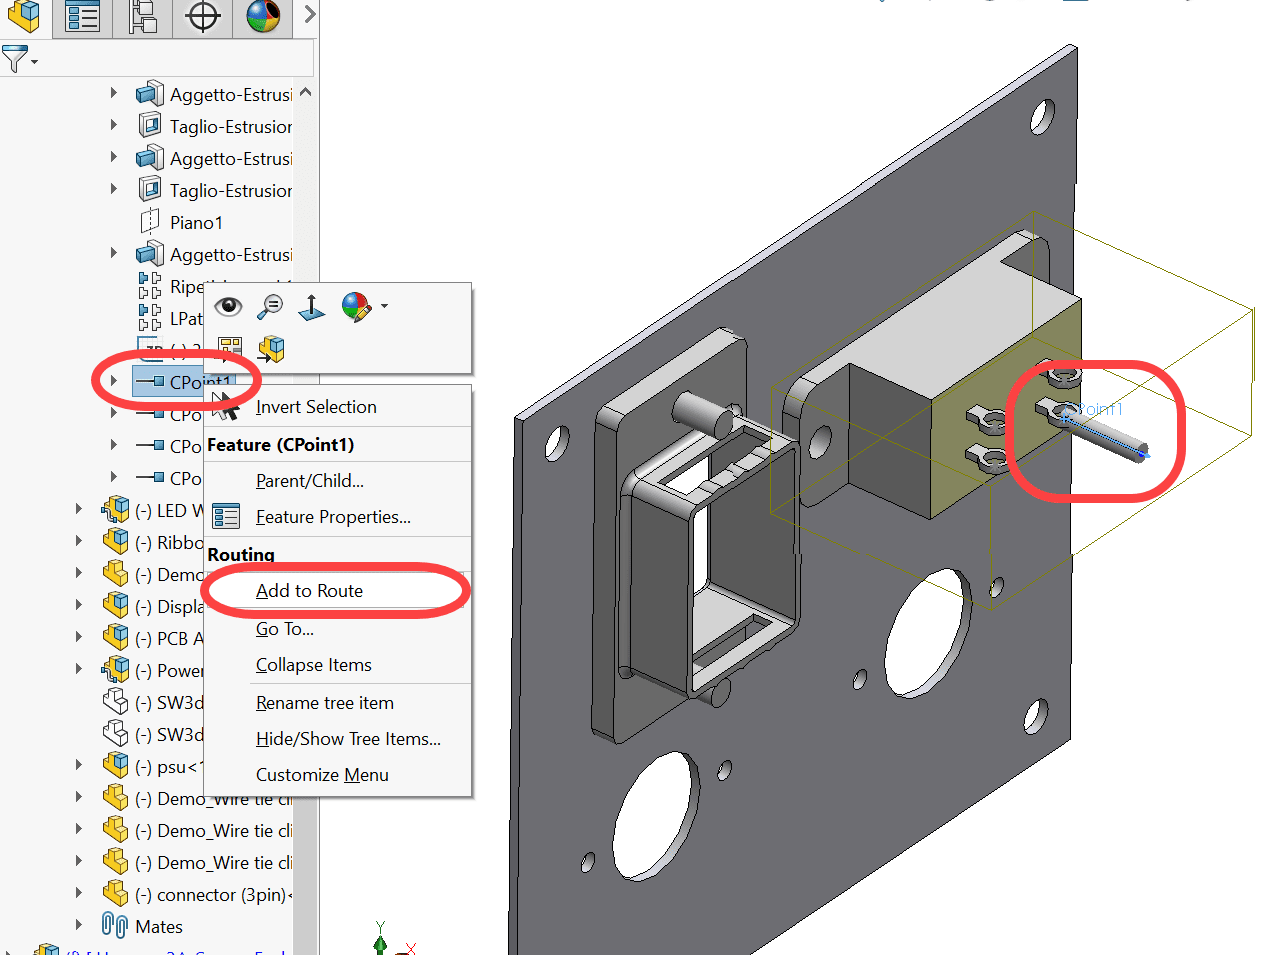
RT+CLK on one of the CPoints (from the tree or graphics screen) and choose ADD TO ROUTE. This will give you a stub from that CPoint.
Repeat this for the other CPoints…
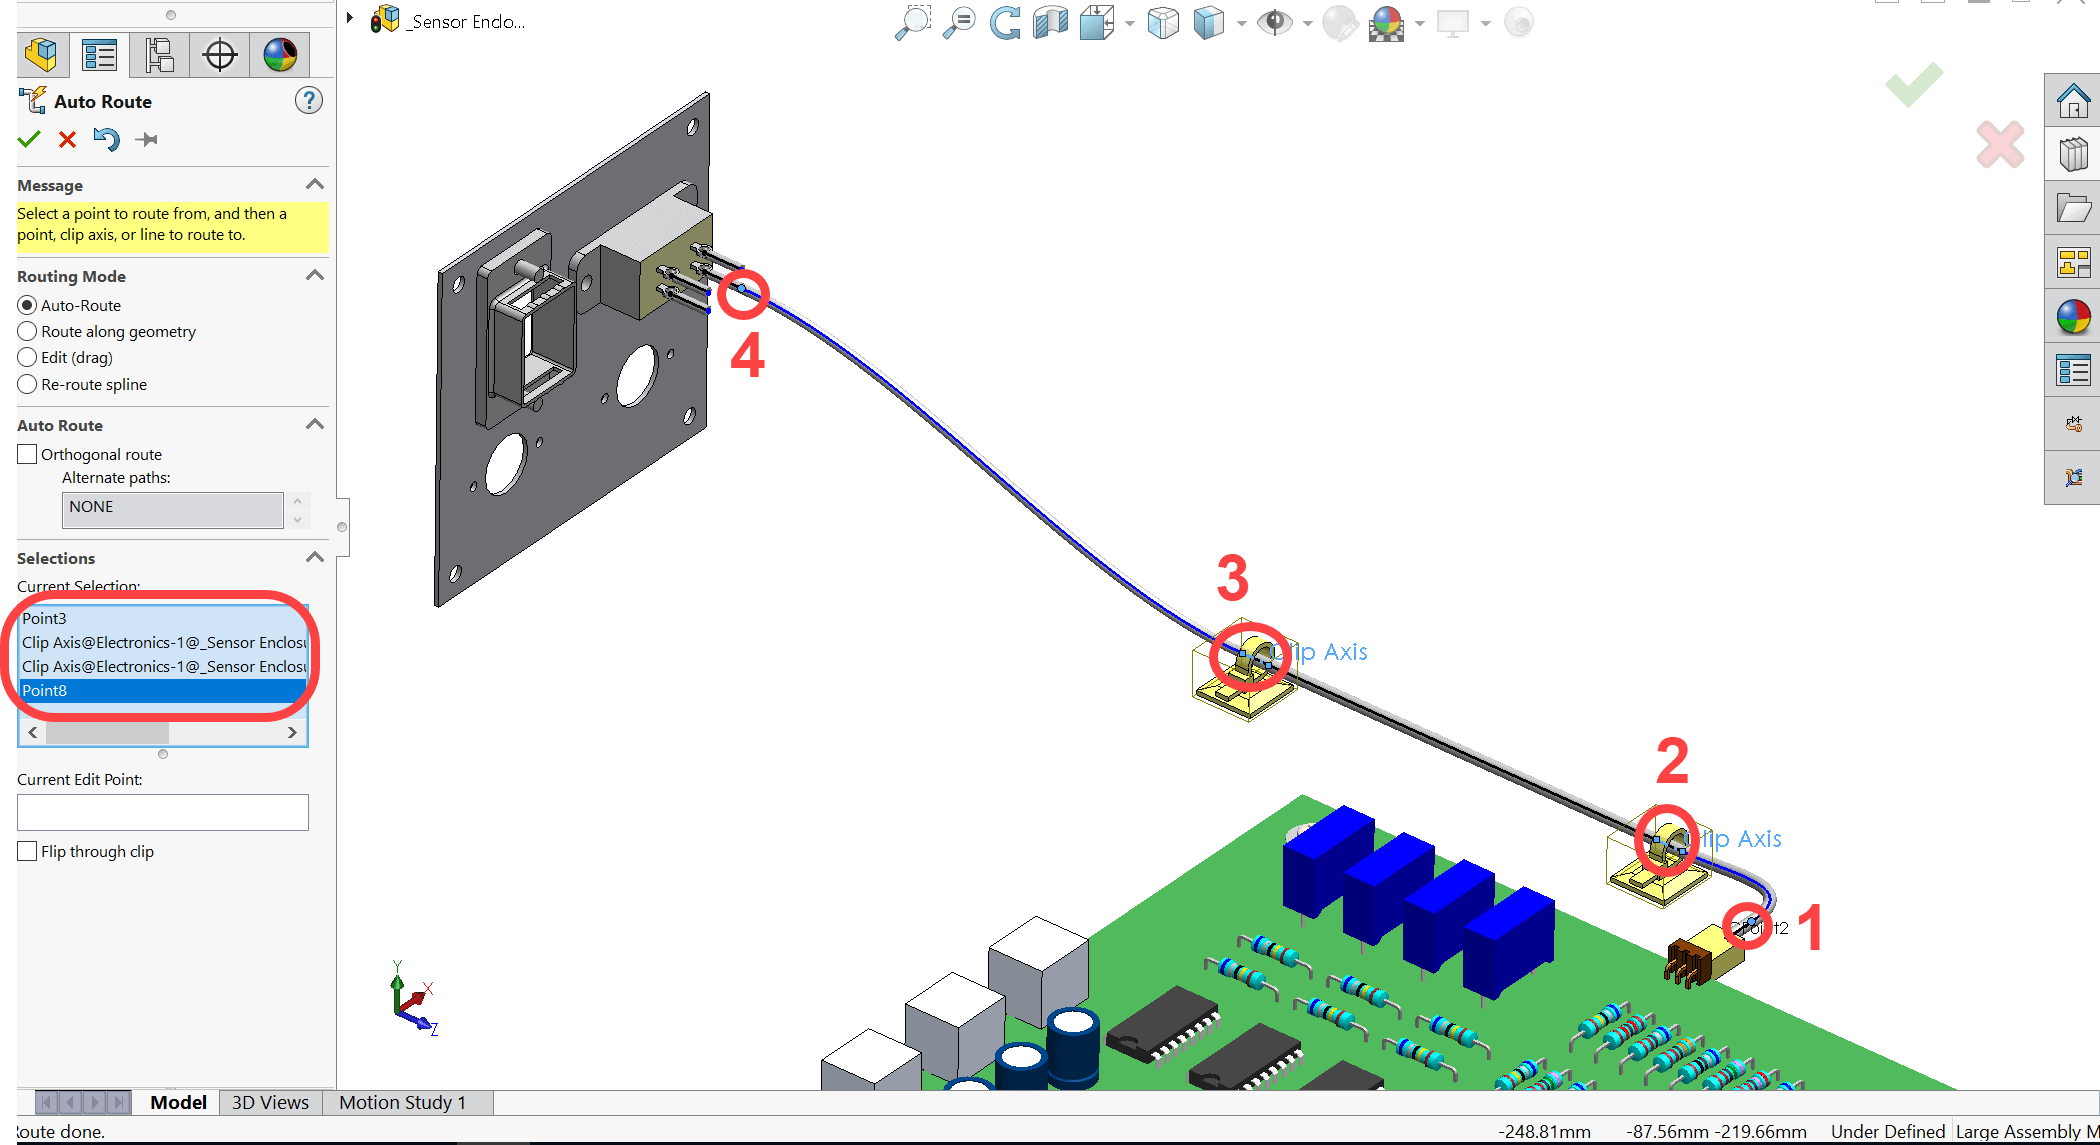
Now use AUTO ROUTE and select the end of the starting stub, any clip axis you want to route through (optional), and finally the end of ONE of the other stubs.
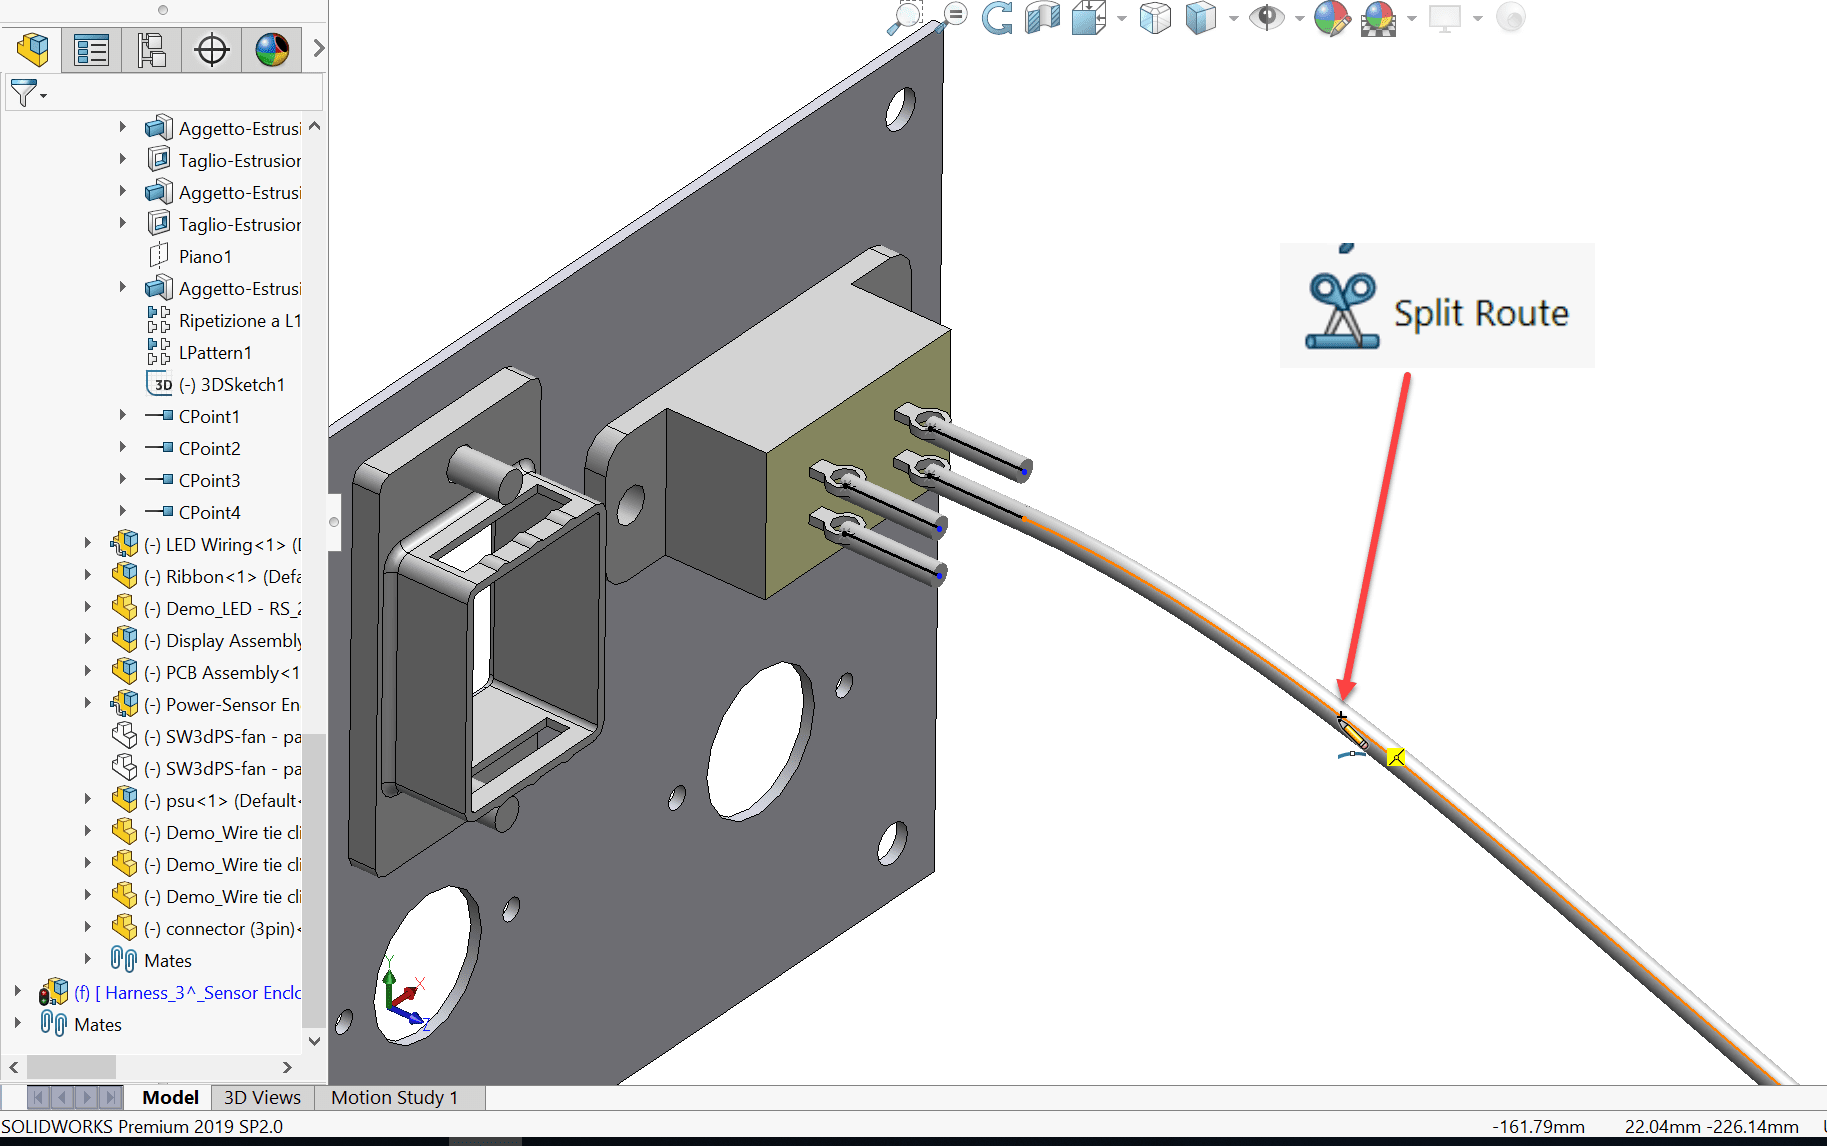
Here is the critical part! Use the SPLIT ROUTE command to add a Junction Point (JPoint) somewhere on the route.
Now AUTO ROUTE one of the other stubs to the JPoint / split point.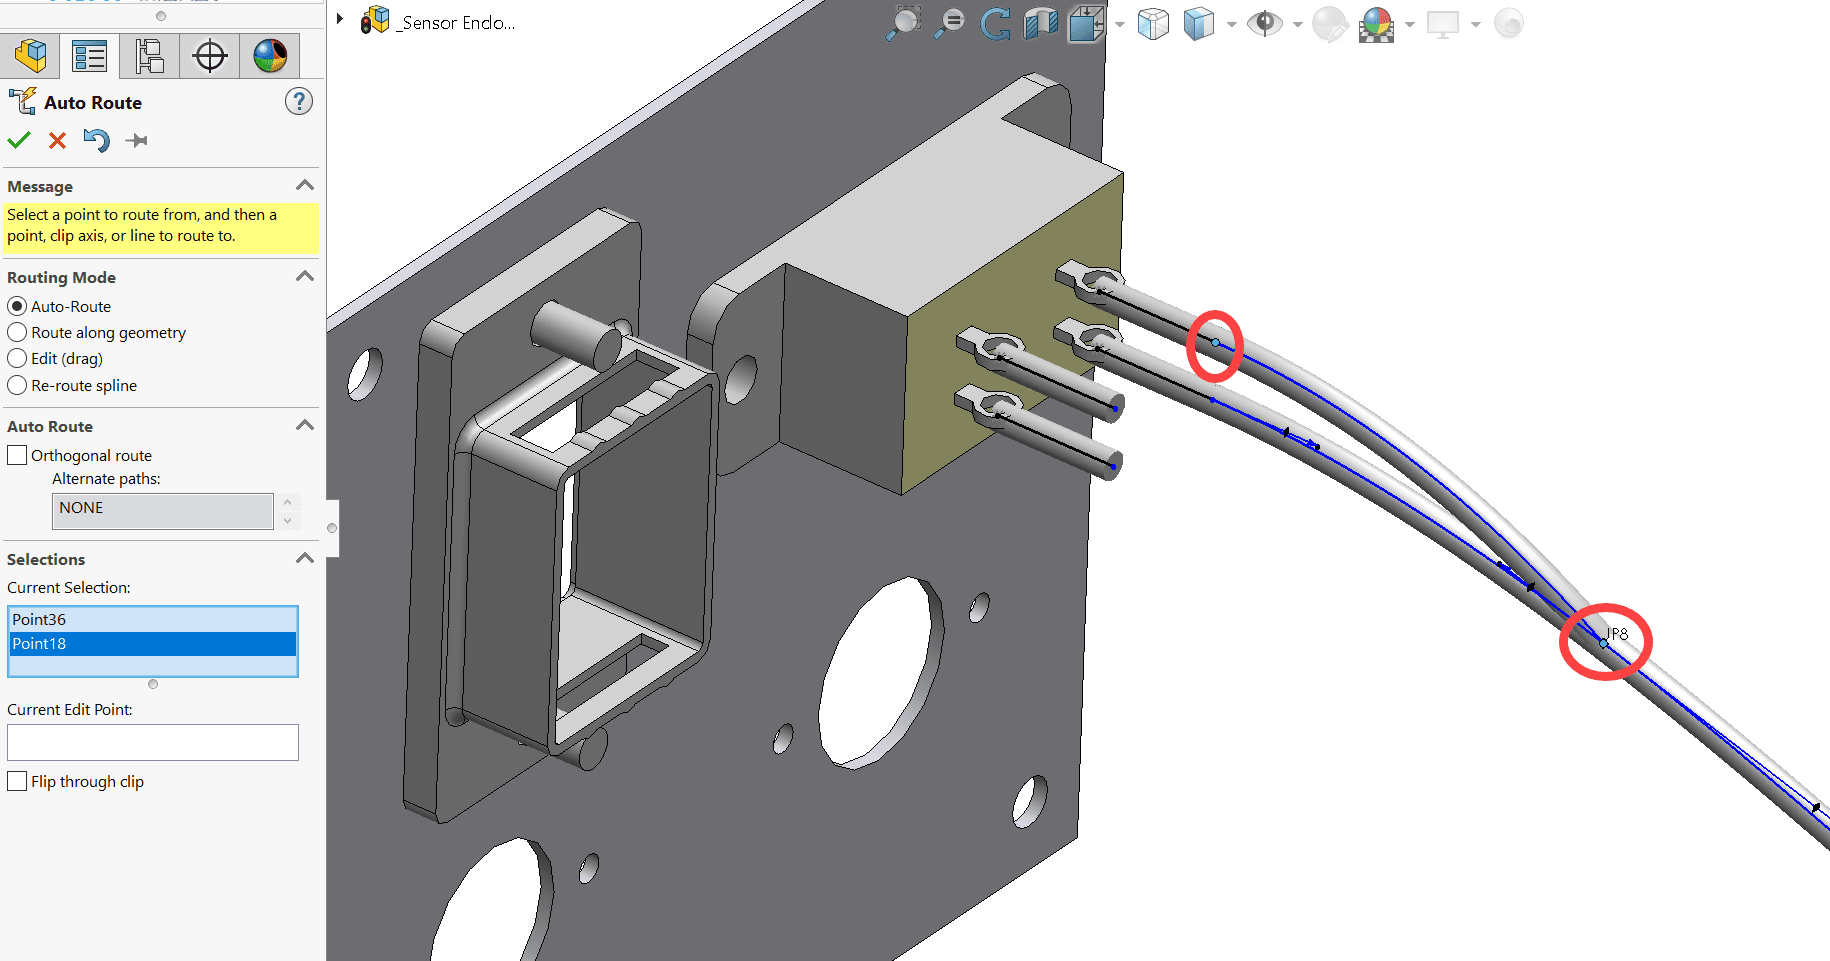
Repeat this for each remaining stub…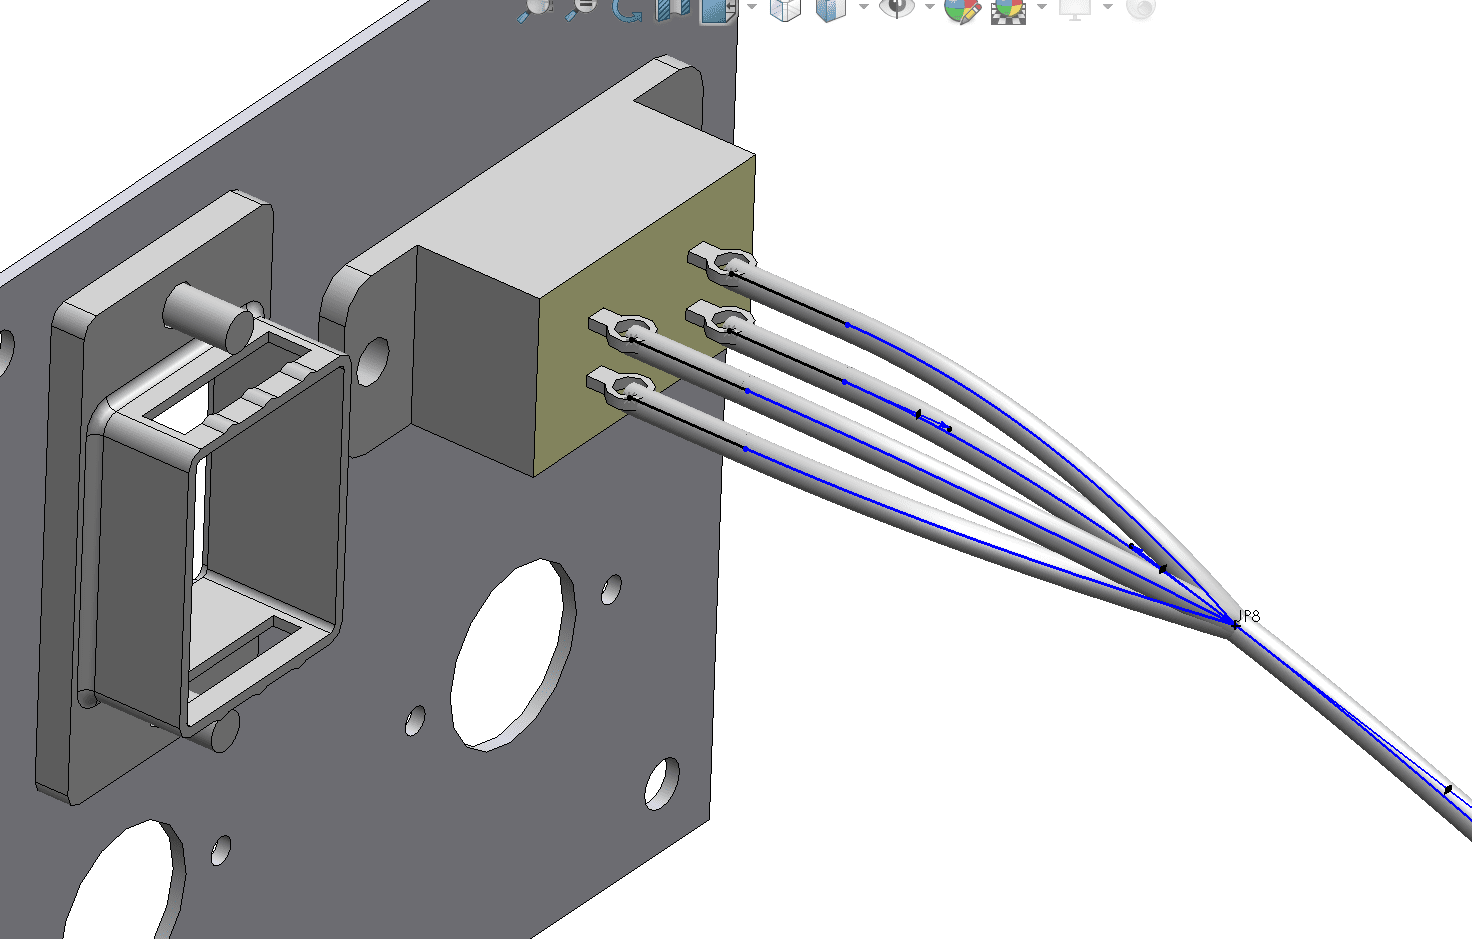
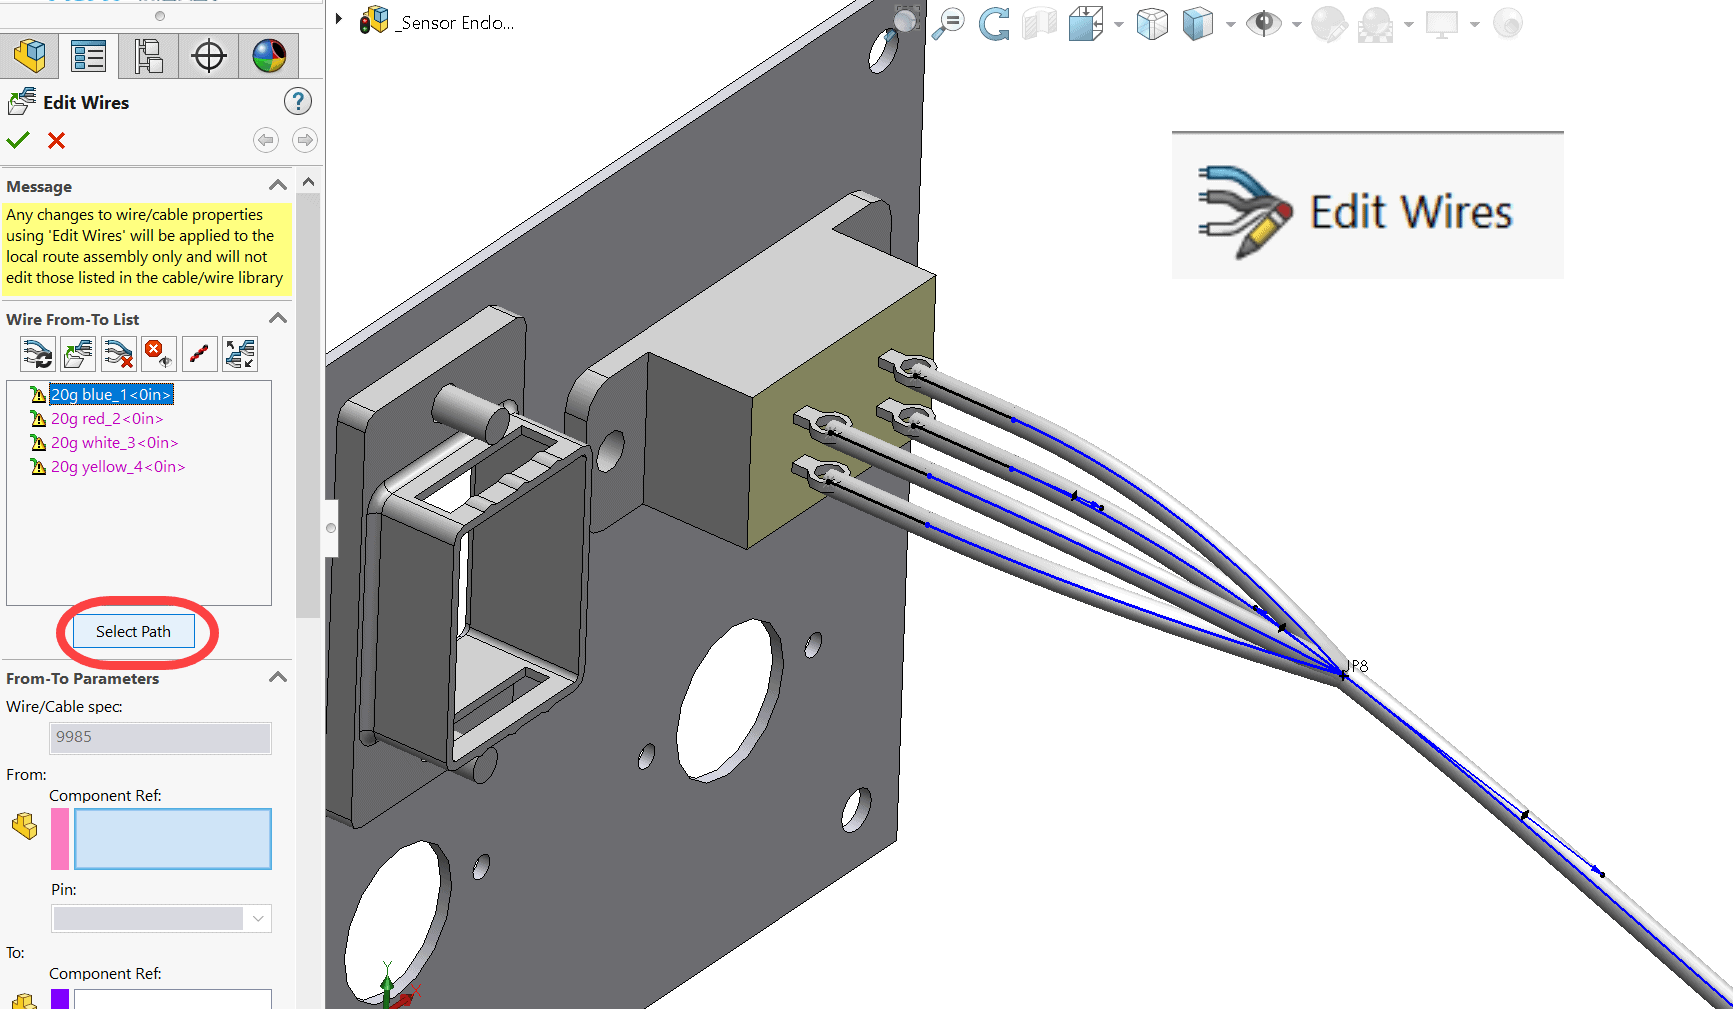
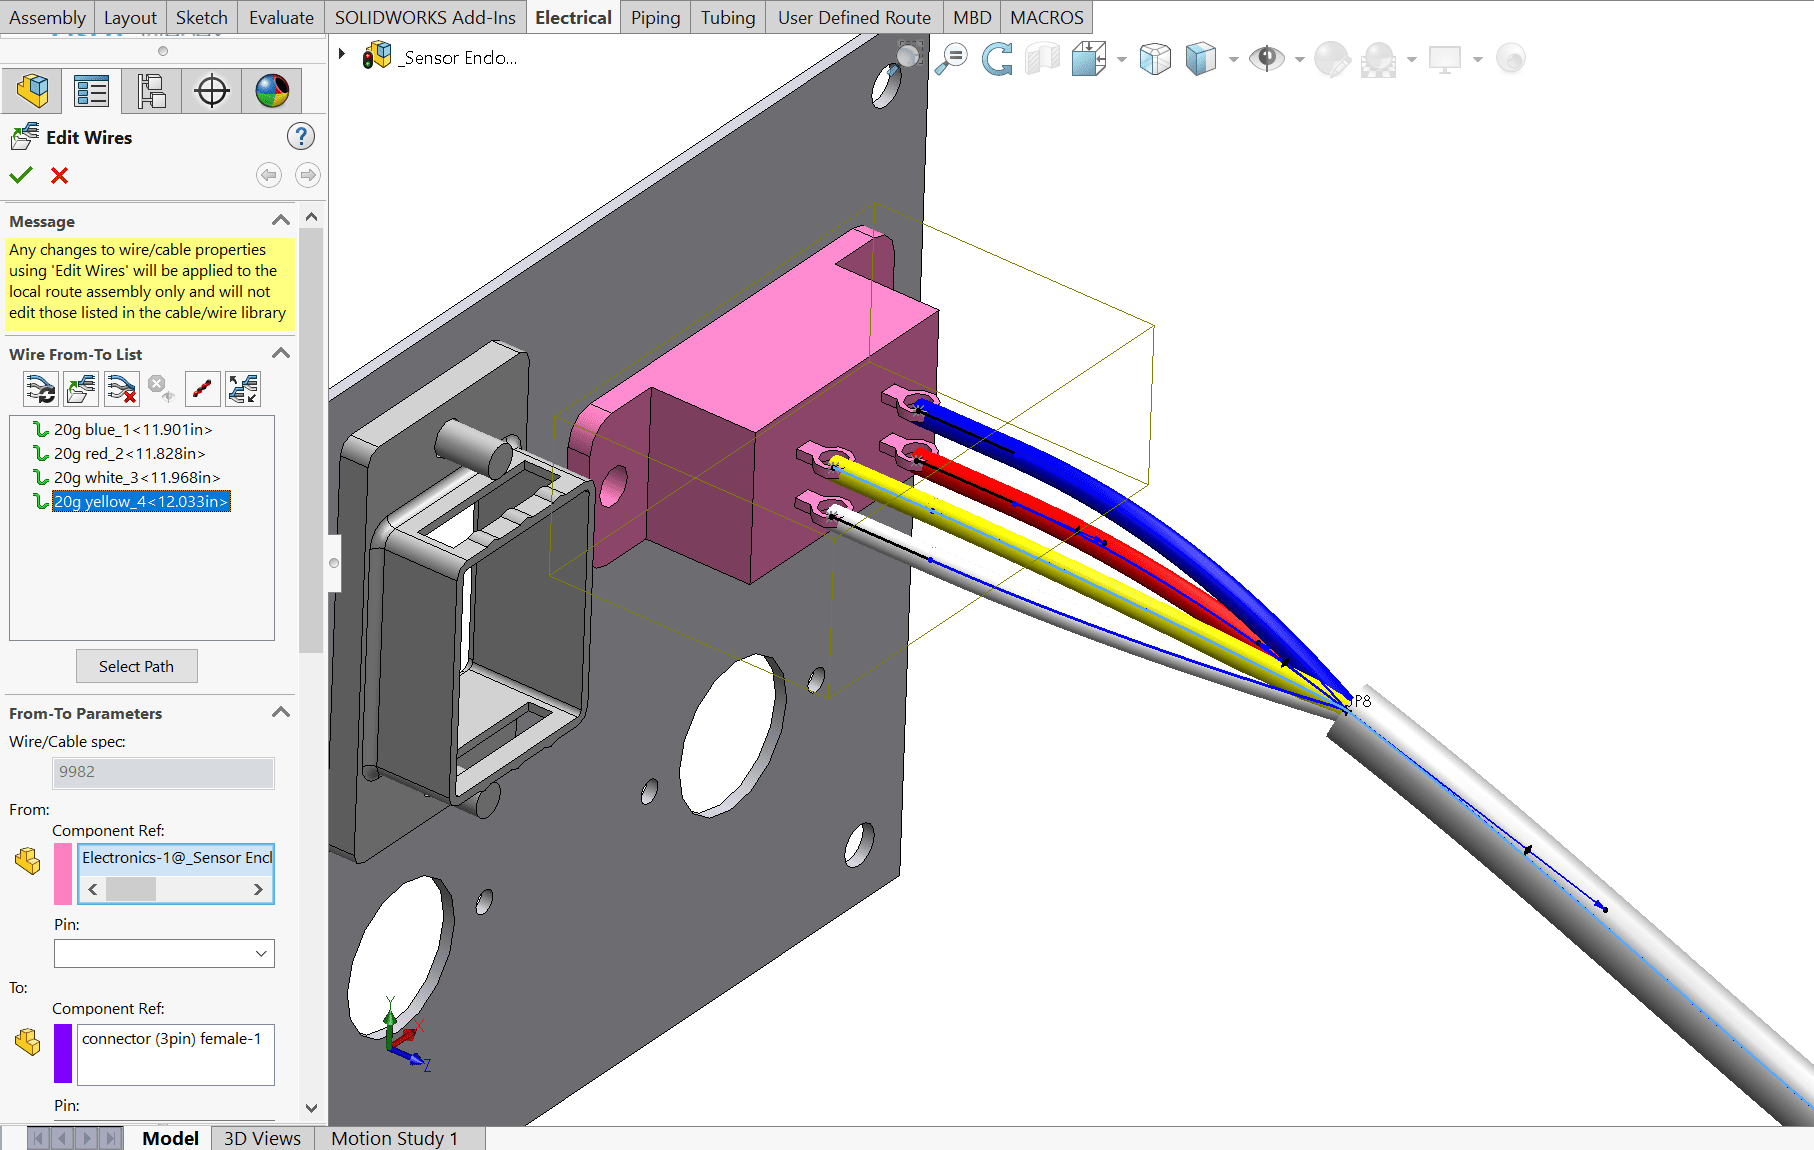
Next you can use the EDIT WIRES command to add specific wires to specific paths. Select the wire you want and hit the SELECT PATH button.
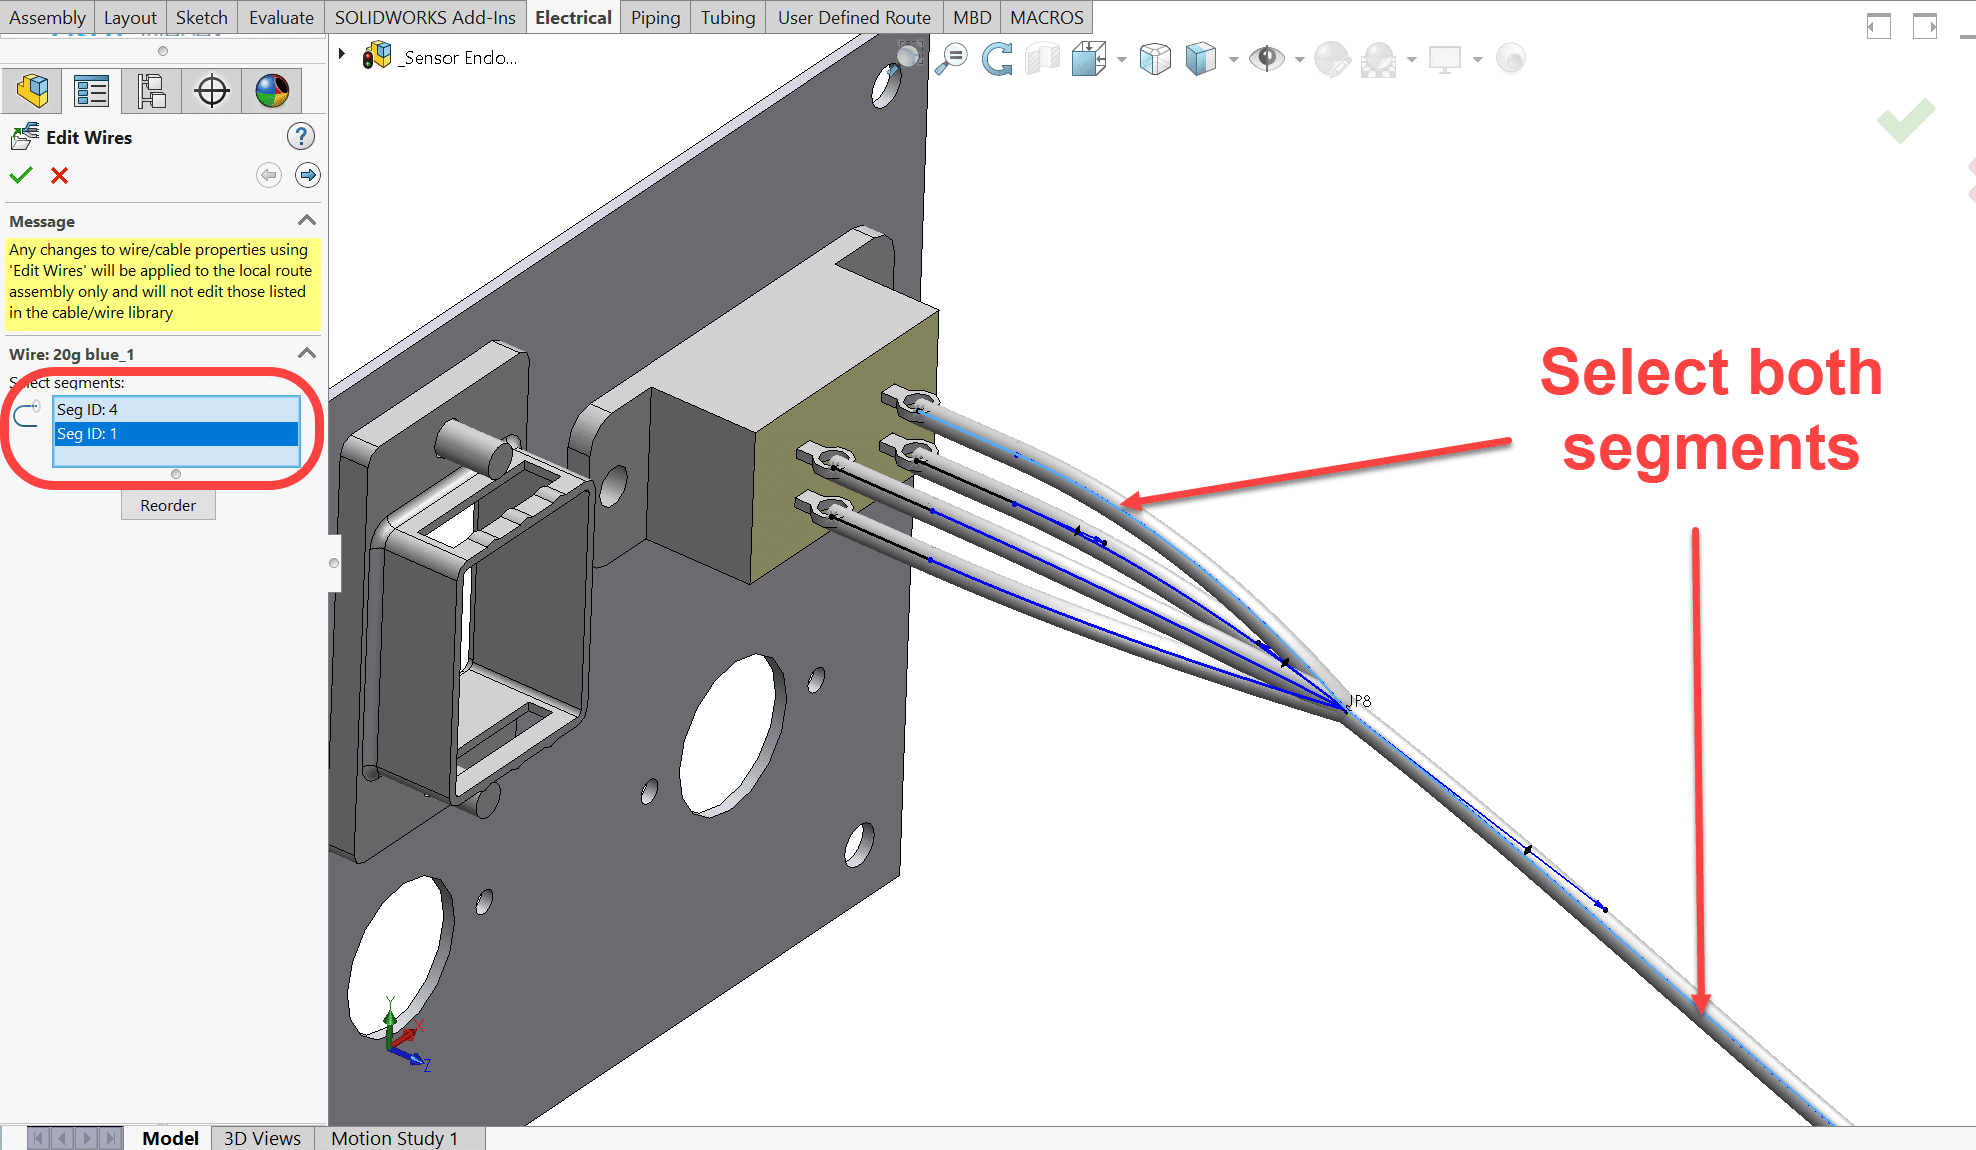
Be sure to select ALL the segments of the route you want that wire running through (2 in this case)
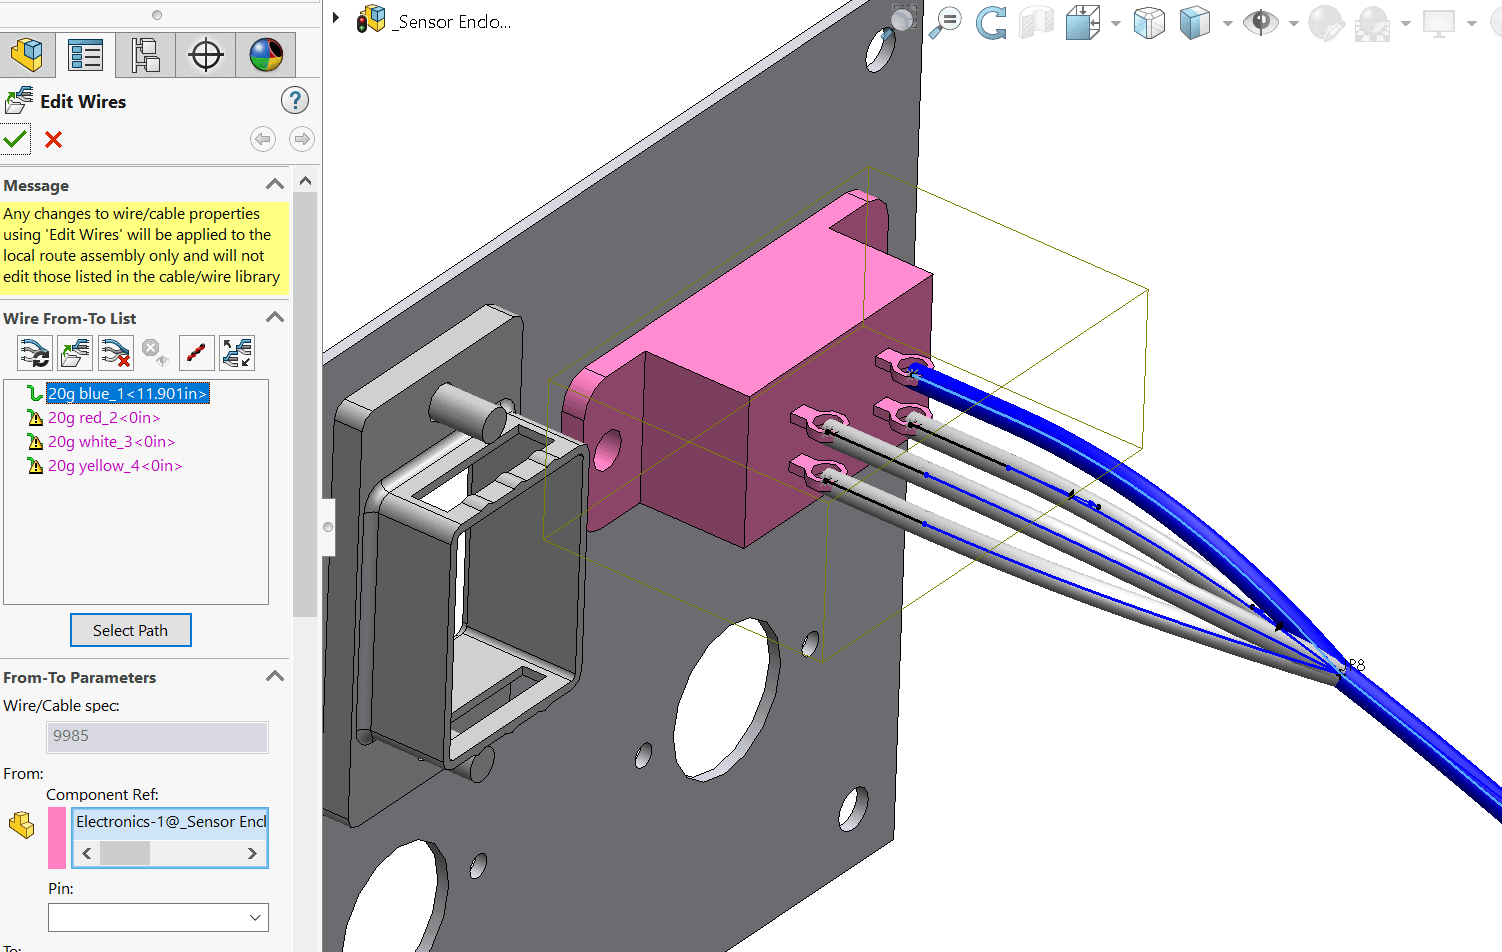
Repeat this to assign each wire to the proper segments. In this example 2 segments/splines were selected for EACH wire run. As you do this the “cable” section holding all of the bundle of wires will increase in diameter as expected.
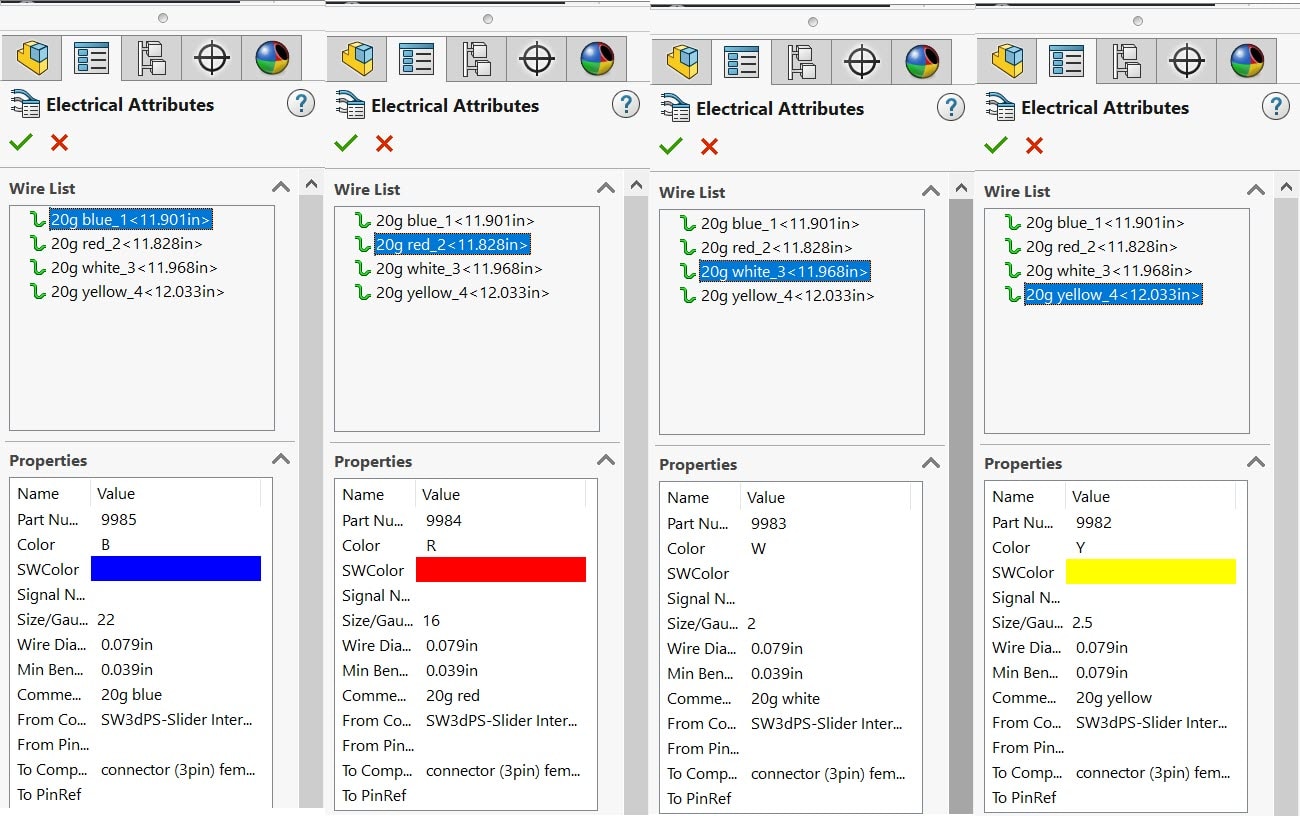
And THERE you have it!! A nice routed CABLE with individual wire “fan outs” on the end! More importantly, it has all of the Electrical Attribute information in it so each wire knows a length and what it is run TO and FROM.
You can see how easy this becomes when you have a little guidance! I hope this helps improve your efficiency in SOLIDWORKS Electrical.
Randy Simmons
Application Engineer
Computer Aided Technology, LLC

 Blog
Blog 