Using Hole Wizard on a Curved (Cylindrical) Surface
Sometimes there is the need to insert a hole on a non-planar/curved surface – so how is this accomplished? When positioning a hole with the Hole Wizard feature, you need to select to insert the hole with a 2D Sketch Plane or a 3D Sketch Plane. I’ll go through both the 2D Sketch Plane and 3D Sketch Plane methods.
Inserting a Hole Wizard on a Curved Surface using a 2D Sketch
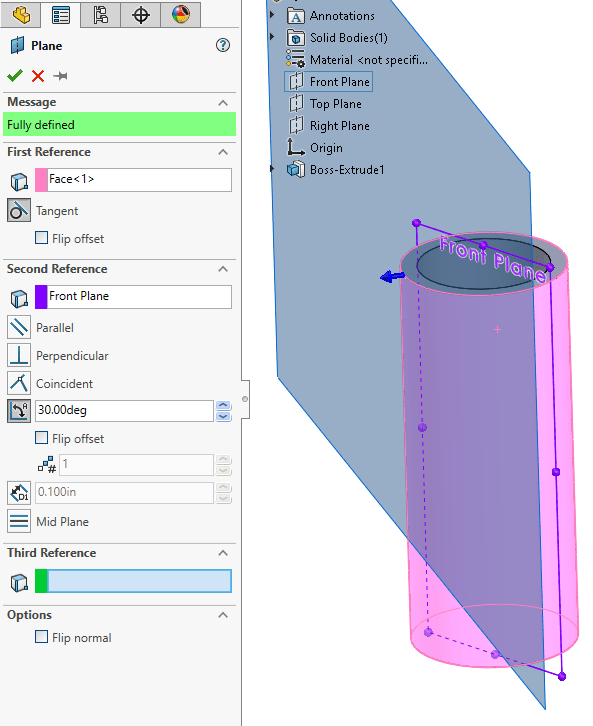
1. Create a reference plane (Insert > Reference Geometry > Plane…) positioning where the hole is to be inserted. One example of references in creating the reference plane might be: (1) Tangent to the curved face and (2) Angled off a plane (such as a Front Plane)
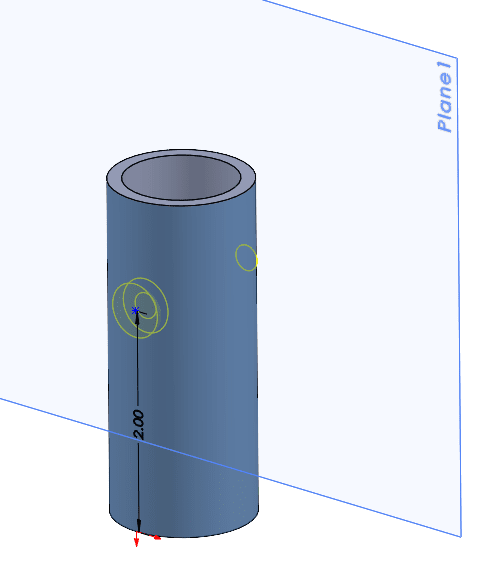
2. Once the Reference Plane has been inserted, start the Hole Wizard feature (Insert > Features > Hole Wizard), specify the Type of Hole, then click on the Positions tab and select on the newly created Reference Plane. If desired, dimensions can be added to position and fully-define the Hole Wizard positioning sketch.
Inserting a Hole Wizard on a Curved Surface using a 3D Sketch
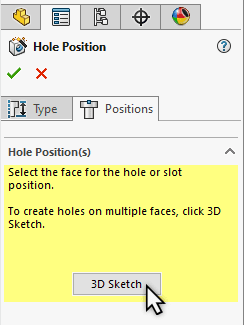
1. Start by inserting a Hole Wizard feature (Insert > Feature > Hole Wizard), specify the Type of Hole, then click on the Positions tab and select on the 3D Sketch button.
2. Hover over the curved surface and click to place the hole (Sketch Point). Placing the hole on the surface should create an On Surface sketch relation.
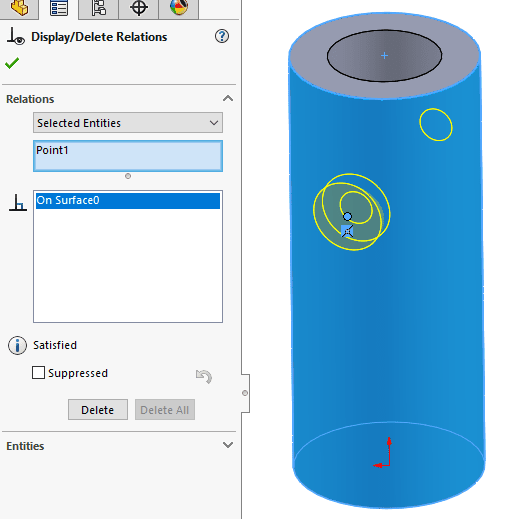
3. To position the hole at a specific height or angle, lines can be inserted (using Along X/Along Y/Along Z and Coincident sketch relations) and an angular dimension can be defined to position the hole at a certain angle.
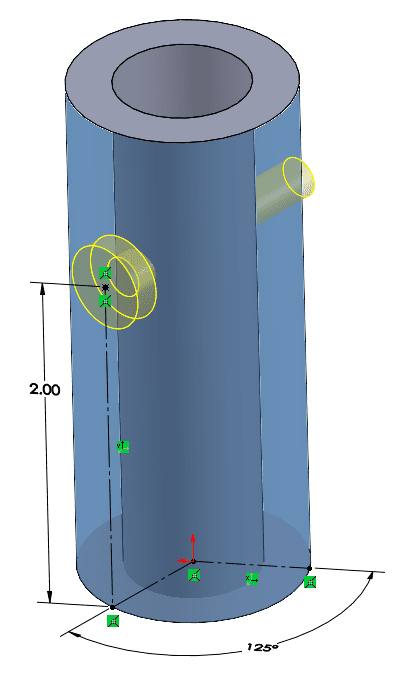
Either of these methods provide means of modifying the position of the hole, if necessary.
Nathan Marsh
Sr. Support Engineer
Computer Aided Technology, LLC

 Blog
Blog